1 - 6
3. REPAIR
3.1 Notes on Service Part Replacement (and Disassembling/Reassembling)
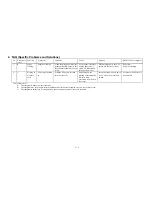
Service part
Notes on replacement
*1
Adjustment/settings
*2
Operation check
Logic board ass’y
(QM2-0483)
- Do not bend the 4 in 1
connector pin.
After replacement:
1. Initialize the EEPROM.
2. Set the destination in the
EEPROM.
3. Perform the print head
alignment in the user
mode.
4. Perform the print head
cleaning 1 time.
- Service test print
Ink absorber
(QA4-0212/0213)
After replacement:
- Reset the waste ink
counter.
- Service test print
Timing slit strip film
(QA4-0918)
- Upon contact with the film,
wipe the film with alcohol.
- Confirm no grease is on the
film. (Wipe off any grease
thoroughly with ethanol.)
- Do not bend the film.
After replacement:
- Perform the print head
alignment in the user
mode.
- Service test print
Purge unit
Remove the carriage shaft
(QC1-2196), and then the purge
unit.
Print head
(QY6-0047)
After replacement:
- Perform the print head
alignment in the user
mode.
- Service test print
*
1
: General notes:
- Make sure that the flexible cables and wires in the h arness are in the proper position and connected
correctly. See page 1-7 (1), for details.
- Do not drop the ferrite core, which may damage it.
- Protect electrical parts from damage due to static electricity.
- Do not touch the timing slit strip film. No grease or abrasion is allowed.
- Protect the units from ink contamination.
- Do not loosen red screws.
Summary of Contents for i470D Series
Page 1: ...i470D i475D SERVICE MANUAL Canon ...
Page 6: ...Part 1 MAINTENANCE ...
Page 21: ...Part 2 TECHNICAL REFERENCE ...


