MXF Clip Operations
134
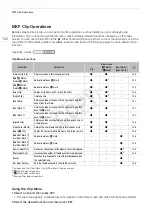
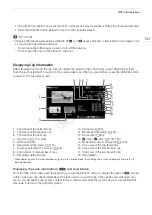
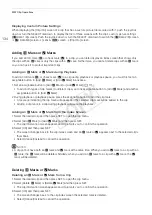
Displaying Custom Picture Settings
When displaying the [Clip Info] screen of a clip that has a custom picture file recorded with it, push the joystick
down or turn the SELECT dial down to display the first of three screens with the clip’s custom picture settings
([
/
Data 1/3] screen). Push the joystick down or turn the SELECT dial down to switch the [
/
Data 2/3] screen
J
[
/
Data 3/3] screen
J
[Lens &
Q
] screen
J
[Clip Info] screen.
Adding
$
Marks or
%
Marks
If you add an OK mark (
$
) or check mark (
%
) to a clip, you can later display an index screen that shows only
the clips with an
$
mark or only the clips with a
%
mark. Furthermore, you cannot delete clips with an
$
mark
so you can use it to protect important clips.
Adding an
$
Mark or
%
Mark during Playback
To add an OK mark (
$
) or check mark (
%
) to a clip during playback or playback pause, you must first set an
assignable button to [Add
$
Mark] or [Add
%
Mark] in advance.
1 Set an assignable button to [Add
$
Mark] or [Add
%
Mark] (
A
• To add both types of clip marks (to different clips), set one assignable button to [Add
$
Mark] and another
assignable button to [Add
%
Mark].
2 During playback or playback pause, press the assignable button to add the clip mark.
• A message indicating the clip mark will appear and the selected clip mark will be added to the clip.
• Adding a clip mark to a clip during playback will pause the playback.
Adding an
$
Mark or
%
Mark from the Index Screen
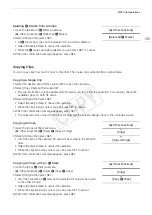
1 Select the desired clip and then press SET to open the clip menu.
2 Select [Add
$
Mark] or [Add
%
Mark] and then press SET.
• The clip information screen appears and it prompts you to confirm the operation.
3 Select [OK] and then press SET.
• The screen changes back to the clip index screen and an
$
mark or
%
appears next to the selected clip’s
thumbnail.
• Select [Cancel] instead to cancel the operation.
NOTES
• A clip cannot have both an
$
mark and
%
mark at the same time. When you add a
%
mark to a clip with an
$
mark, the
$
mark will be deleted. Similarly, when you add an
$
mark to a clip with a
%
mark, the
%
mark will be deleted.
Deleting
$
Marks or
%
Marks
Deleting an
$
Mark or
%
Mark from a Clip
1 Select the desired clip and then press SET to open the clip menu.
2 Select [Delete
$
Mark] or [Delete
%
Mark] and then press SET.
• The clip information screen appears and it prompts you to confirm the operation.
3 Select [OK] and then press SET.
• The screen changes back to the clip index screen the selected mark is deleted.
• Select [Cancel] instead to cancel the operation.
COP
Y
Summary of Contents for EOS C500
Page 1: ...Instruction Manual Digital Cinema Camera PUB DIE 0441 001 COPY ...
Page 10: ...10 Optional Accessories 198 Specifications 201 Index 207 COPY ...
Page 126: ...Saving and Loading Camera Settings 126 COPY ...
Page 140: ...MXF Clip Operations 140 COPY ...
Page 166: ...Photo Operations 166 COPY ...
Page 206: ...Specifications 206 COPY ...


