284
The screen display and setting options will differ depending on the
printer.
Some settings may not be available. For details, refer to the
printer’s instruction manual.
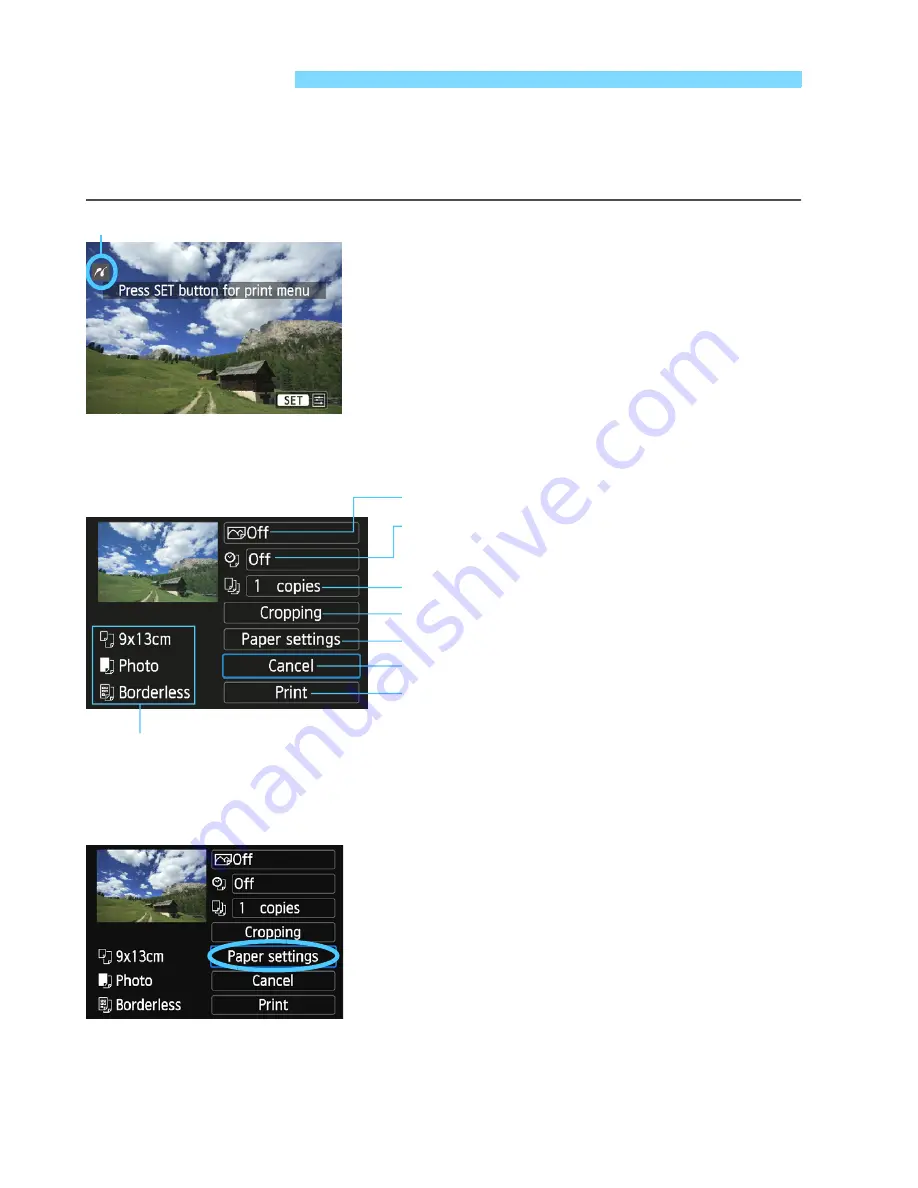
1
Select the image to be printed.
Check that the <
w
> icon is
displayed on the upper left of the LCD
monitor.
Press the <
Y
><
Z
> keys to select
the image to be printed.
2
Press <
0
>.
X
The print setting screen will appear.
3
Select [Paper settings].
Select [
Paper settings
], then press
<
0
>.
X
The paper settings screen will
appear.
w
Printing
Printer-connected icon
Print setting screen
* Depending on the printer, certain settings such as the date and file
number imprinting and cropping may not be selectable.
Sets the printing effects (p.286).
Sets the date or file number imprinting to on or
off.
Sets the quantity to be printed.
Sets the print area (p.289).
Sets the paper size, type, and layout.
Returns to the screen in step 1.
Starts the printing.
The paper size, type, and layout you have set are displayed.
Summary of Contents for EOS 100D
Page 20: ......
Page 72: ......
Page 115: ...115 MEMO ...
Page 117: ...E INSTRUCTION MANUAL The Quick Reference Guide is included at the end of this manual ...
Page 144: ......
Page 172: ......
Page 206: ......
Page 296: ......
Page 330: ......
Page 422: ......
Page 474: ...358 MEMO ...
Page 475: ...359 MEMO ...
Page 476: ...360 MEMO ...
Page 526: ......
Page 527: ... ...


