70
Chapter 3 How to Use the Printer Driver
Note
• Click [Defaults] to return the printer to the default settings on the [Detailed Settings] dialog
box.
• The print image with selected color corrections is displayed in the [Print Image After
Changing Settings] section of the window.
• [Brightness] can not be selected when [Color Correction] is set to [Disable].
• [Brightness] can not be selected when a paper type associated with Profile (the start
character is "*") is selected.
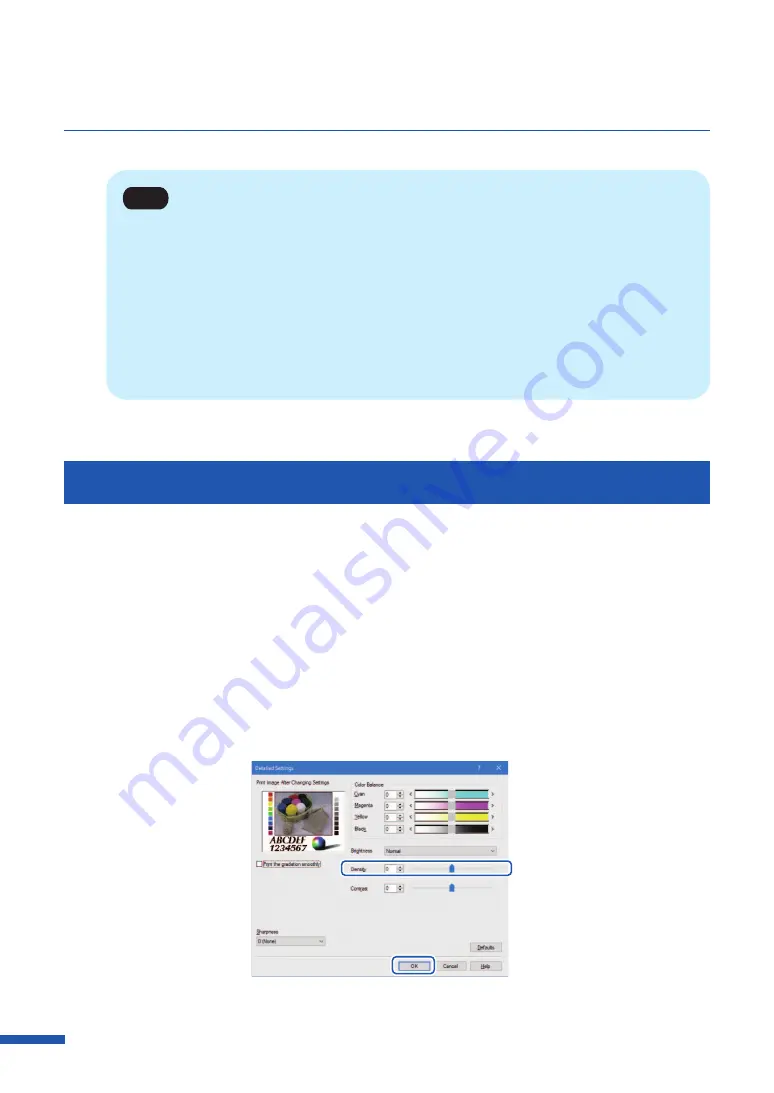
Adjusting the Density
The overall density of the printout can be adjusted if you are dissatisfied with the results.
1
Click the [Detailed Settings] in the [Color] tab.
2
Adjust the density by moving the slider, and then click [OK].
The center of the slidebar is the default position (0). The slider can be moved between -50 to +50.
Moving the slider to the left decreases the density. Moving the slider to the right increases the
density.


