Editing Still Images
177
Automatically corrects images affected by red-eye. You can save the
corrected image as a separate file.
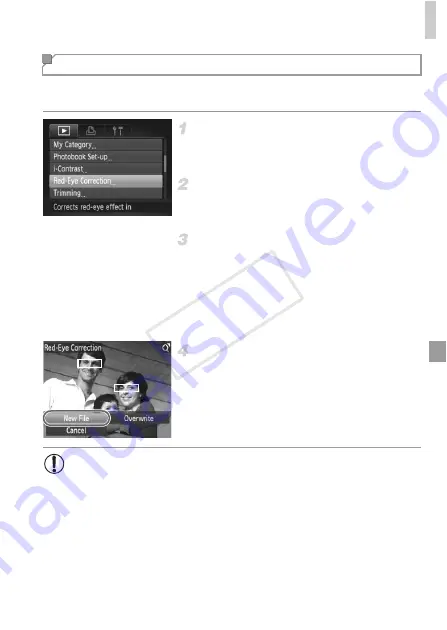
Choose [Red-Eye Correction].
z
Press the
n
button, and then choose
[Red-Eye Correction] on the
1
tab (p. 40).
Choose an image.
z
Press the
qr
buttons or turn the
5
dial to
choose an image.
Correct the image.
z
Press the
m
button.
X
Red-eye detected by the camera is now
corrected, and frames are displayed around
corrected image areas.
z
Enlarge or reduce images as needed. Follow
the steps in “Magnifying Images” (p. 156).
Save as a new image and review.
z
Press the
opqr
buttons or turn the
5
dial
to choose [New File], and then press the
m
button.
X
The image is now saved as a new file.
z
Follow step 5 on p. 172.
Correcting Red-Eye
•
Some images may not be corrected accurately.
•
To overwrite the original image with the corrected image, choose
[Overwrite] in step 4. In this case, the original image will be erased.
•
Protected images cannot be overwritten.
COP
Y
Summary of Contents for 5900B001
Page 34: ...34 COPY ...
Page 35: ...35 Camera Basics Basic camera operations and features 1 COPY ...
Page 42: ...42 COPY ...
Page 43: ...43 Using GPS Function Basic GPS operations and features 2 SX260 HS COPY ...
Page 52: ...52 COPY ...
Page 53: ...53 Smart Auto Mode Convenient mode for easy shots with greater control over shooting 3 COPY ...
Page 114: ...114 COPY ...
Page 144: ...144 COPY ...
Page 180: ...180 COPY ...
Page 181: ...181 Setting Menu Customize or adjust basic camera functions for greater convenience 8 COPY ...
Page 194: ...194 COPY ...
Page 218: ...218 COPY ...
Page 219: ...219 Appendix Helpful information when using the camera 10 COPY ...


