


Do not shake or tilt the toner cartridge. Also, make sure to avoid applying shocks to the toner cartridge, such
as by hitting it against something. Doing so may cause the toner left in the toner cartridge to leak. Remove
the toner cartridge gently at the same angle as the slot.
4
Remove the new toner cartridge from the protective package.
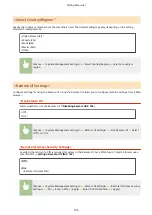
1
Pull the tab of the protective package on a flat place.
2
Pull out the toner cartridge.
5
Shake the toner cartridge 5 or 6 times as shown below to evenly distribute the toner
inside the cartridge, and then place it on a flat surface.
6
Replace the toner cartridge.
Maintenance
208
Summary of Contents for 2207C004
Page 1: ...imageCLASS LBP113w User s Guide USRMA 2442 00 2018 08 en Copyright CANON INC 2018 ...
Page 43: ...LINKS Setting IPv6 Addresses P 39 Viewing Network Settings P 42 Setting Up 38 ...
Page 58: ...Printing from a Computer P 101 Setting Up 53 ...
Page 86: ...Basic Operations 81 ...
Page 140: ...Managing the Machine 135 ...
Page 214: ...7 Close the toner cover 8 Replace the output cover LINKS Consumables P 220 Maintenance 209 ...
Page 218: ...8 Close the toner cover 9 Replace the output cover LINKS Consumables P 220 Maintenance 213 ...
Page 227: ... When replacing drum cartridges see Replacing the Drum Cartridge P 210 Maintenance 222 ...
Page 230: ...Troubleshooting 225 ...
Page 318: ... 12 JPEG this software is based in part on the work of the Independent JPEG Group ...


