Subsection 07 (LIGHTS, GAUGE AND ACCESSORIES)
Multifunction Gauge Wire
Identification
FUNCTION
PIN
COLOR
12 volt input from fuse F4
17
ORANGE/YELLOW
12 volt input from
fuse F10 (Clock)
16
RED/WHITE
Ground
20
BLACK
CAN LO
18
WHITE/BLACK
CAN HI
19
WHITE/BEIGE
Fuel level gauge supply
4
BROWN/PINK
Fuel level gauge ground
21
VIOLET/PINK
2WD/4WD switch
signal (-)
7
BLACK/BEIGE
HI beam signal (+)
5
BLUE
Vehicle speed sensor
signal (VSS)
9
PINK
Multifunction Gauge Circuit Protection
CONDITION
CIRCUIT PROTECTION
Supplied at all times
Fuse 10 of fuse block 1
(from fuse 1 of fuse
block 2)
Supplied with main relay
activated
Fuse 4 of fuse block 1
(from main relay R2)
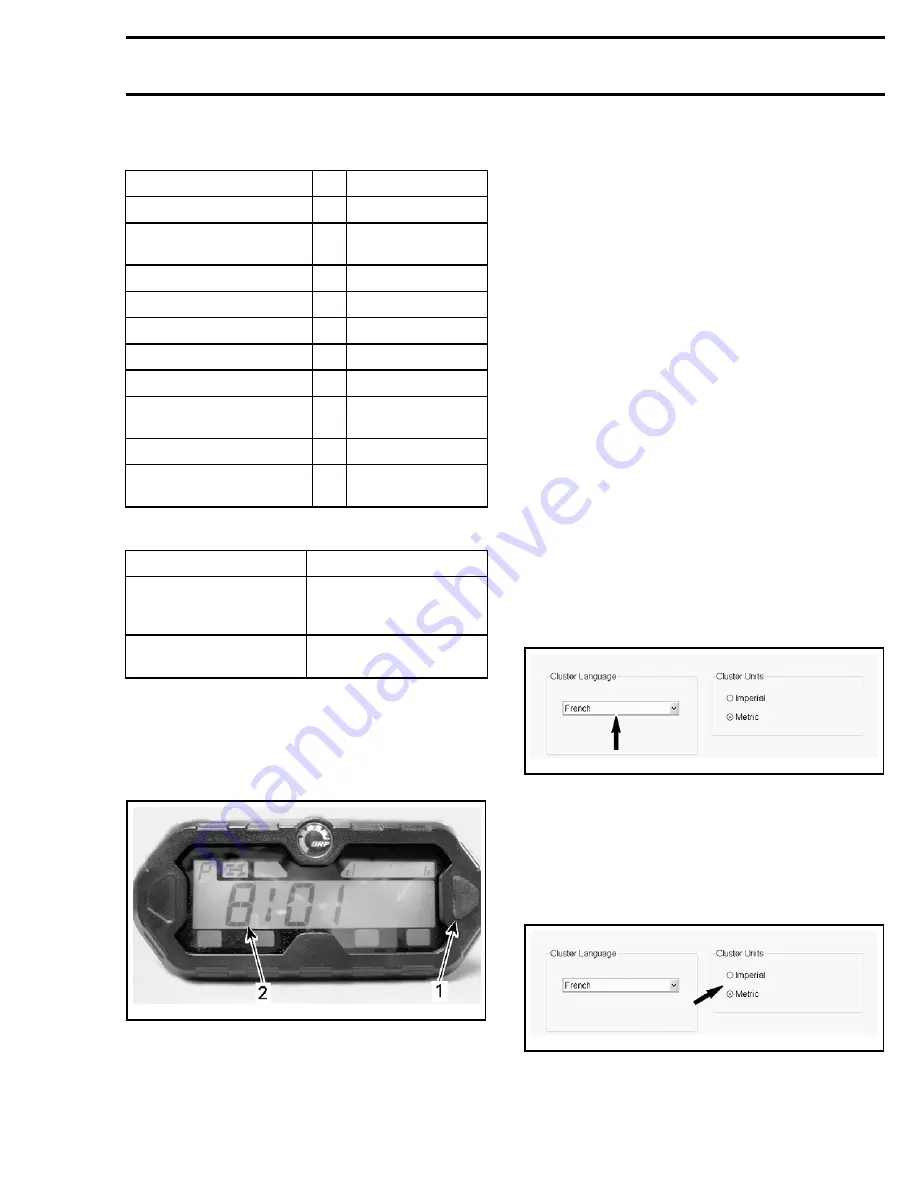
Setting the Clock with Gauge Selector
Button
To set current time, proceed as follows:
1. Select the clock display.
vmo2011-008-001_a
1. Selector button
2. Time
2. Press and HOLD selector button.
NOTE:
The display will flash.
3. Choose the 12-hour (12H) or 24-hour (24H) for-
mat by pressing button.
4. If the 12-hour format was selected, choose Am
(A) or Pm (P) by pressing button.
5. Choose hour first digit by pressing button.
6. Choose hour second digit by pressing button.
7. Choose minutes first digit by pressing button.
8. Choose minutes second digit by pressing but-
ton.
9. Press button to enter settings (CLOCK will ap-
pear on display).
NOTE:
The gauge will display the current time for
10 seconds then will return to the normal display
mode.
Setting the Multifunction Gauge with
B.U.D.S.
Connect to the applicable B.U.D.S. software. Re-
fer to
COMMUNICATION TOOLS AND B.U.D.S.
subsection.
Language Selection
In B.U.D.S., select the:
–
Setting
page tab
–
Cluster
page tab.
Scroll and select the desired display language in
the
Cluster Language
box.
vmr2016-137-001_a
Units of Display Selection
In B.U.D.S., select the:
–
Setting
page tab
–
Cluster
page tab.
Select
Imperial
or
Metric
in the
Cluster Units
box.
vmr2016-137-001_b
vmr2016-410
7


