background image

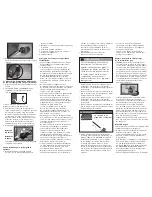
5.  If “growing” bubbles appear, there is a 

leak.  Close LP tank valve immediately and 
retighten connections.  If leaks cannot 
be stopped, do not try to repair.  Call for 
replacement parts.  Order new parts by 
giving the serial number, model number 
and name of items needed to the Service 
Center at 1-435-752-3922.

6.  Always close LP tank valve after performing 

tank leak test by turning hand wheel 
clockwise.

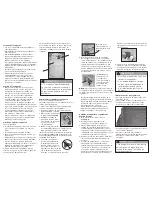
Setup instructions:

•  Place stove on a flat, level, sturdy  surface.
•  Open the lid and attach the windscreens to 

the tabs on the inside of the lid. Snap into 
place as shown.

•  Make sure the burners are in the off 

position.

• Push regulator assembly firmly into 


  stove. Tighten nut securely.
• Screw propane cylinder into the regulator.

Lighting Stove instructions:

1.  Turn burner valve on and press the red 

ignitor button until the burner lights. 

2.  If ignition does not occur in 5 seconds, turn 

the burner control(s) off, wait 5 minutes, 
and repeat lighting procedure. If built-in 
ignitor will not light follow the preceding 
steps and hold a lit long igniter or match 

next to the burner when opening the 
control valve.

3.  Adjust the flame to the desired height. 

Flame should be compact and blue in color.

4.  Avoid getting dirt in the valves, regulator, 

and burners.

5.  To shut burner off, turn the valve to off. 

(Clockwise)

If the flame is accidentally extinguished, turn 
the appliance valves OFF and WAIT 5 minutes 
before attempting to ignite.

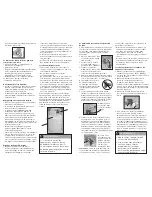
Burner Flame Check

•  Light burner; rotate knob(s) from HIGH to 

LOW.  You should see a smaller flame in 
LOW position than seen on HIGH.  Always 
check flame prior to each use. A good flame 
should be blue with minimal yellow tip. 
Some yellow tips on flames are acceptable as 
long as no carbon or soot deposits appear.

turning Lp Cooker off

•  Turn all knobs to OFF position.  Turn LP tank 

OFF by turning hand-wheel clockwise to a 
full stop.

hose Check

•  Before each use, check to 


see if hoses are cut or worn.  Replace 
damaged hose assembly before using 
appliance.  Use only valve/ hose / regulator 
specified by manufacturer. See product sheet 
for hose & regulator information.

Cleaning the Burner

NOTE: Spiders and small insects can spin 
webs and build nests inside the burner.  This 
especially occurs in late summer and fall 
before frost when spiders are most active.  
These nests can obstruct gas flow and cause 

a fire in and around the burner and orifice.  
Such a fire can cause operator injury and 
serious damage to the appliance. To help 
prevent a blockage and ensure full heat 
output, clean and inspect burner tube often 
(once or twice a month).  NOTE: Water or air 
pressure will not normally clear a spider web.

Cleaning and Maintenance

Correct care and maintenance will keep 
your appliance operating smoothly.  Clean 
regularly as determined by the amount of 
use.  NOTE:  Clean the entire appliance each 
year and tighten all hardware on a regular 
basis (1-2 times a year or more depending 
on usage).  Cleaning should be done where 
detergents won’t harm patio, lawn, or the 
like.  Keep appliance area clear and free 
from combustible materials, gasoline and 
other flammable vapors and liquids.  Keep 
the ventilation opening(s) of the cylinder 
enclosure free and clear from debris.

Suggested Cleaning Materials

• Mild dish washing liquid detergent
• Wire brush
• Nylon cleaning pad
• Hot water
• Paper clip
• Soft brass bristled brush

Component Cleaning:

•  Burner should be wiped clean. Hot soapy 

water and a soft bristle brush can be used 
to clean the burner surfaces. Clean clogged 
gas port holes with an opened paper clip.  
Replace corroded or damaged burners that 
would emit excess gas.

•  COOKING SURFACES, POTS AND PANS: Clean 

the cooking surface with soapy water and a 
nylon cleaning pad.

•  After appliance has cooled, wipe areas 

where paint and finish have burned off to 
minimize rusting.

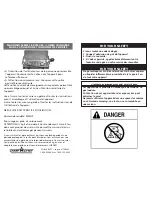
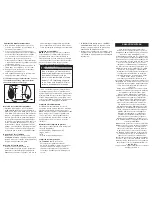
WARNING

•  Do not use appliance until leak 

checked.

•  If you cannot stop a gas leak, 

immediately close LP tank valve 

and call LP gas supplier or your 

fire department!

WARNING

•  Do not put hands or any other body 

parts over the burner during lighting 

or when in use to prevent burns.

CAUTION

All cleaning and maintenance should 

only be done when the appliance is 

cool and with the fuel supply turned 

off at the LP cylinder.  DO NOT clean 

any part in a self-cleaning oven.  The 

extreme heat will damage the finish.

To activate warranty, register on-line at: 

www.CampChef.com

The manufacturer warrants stove compo-

nents (except paint and finish) to be free 

from defect in materials and workmanship 

for 1 year from the date of purchase. All ac-

cessories (included with stove or purchased 

separately) are warranted from defect in 

materials and workmanship for 90 days 

from the original purchasing date. Within 

these periods, the manufacturer will replace 

or repair defective parts deemed unusable 

from its original intent by making available 

the parts thereof FOB Logan, UT 84321

Product paint and finish is not warranted. 

The exterior finish of the product will wear 

down over time. 

Clean the unit after each use to maintain 

the finish and prolong the life of your prod-

uct. Wipe away all grease and ashes. Keep 

metal products free of moisture, salts, acids 

and harsh fluctuations in temperatures.

Warranty does not cover normal wear of 

parts or damage caused by misuse, abuse, 

overheating and alteration. Repairs or 

alterations made by anyone other than 

Camp Chef are not covered in this War-

ranty. Manufacturer will not be held liable 

for any losses due to neglectful operation. 

Furthermore, this Warranty does not cover 

damaged caused by natural disasters such 

as earthquakes, hurricanes, tornadoes, 

floods, lightning, fires, etc. 

Upon the expiration of this warranty all 

such  liability will terminate. No other 

warranties are expressed or implied.

Keep all original sales receipts. Proof of 

purchase is required to obtain Warranty 

services. Prior written approval and a 

Return Authorization Number must be 

obtained and accepted for repair or 

replacement only. Returns must be shipped 

prepaid. Collect shipment or shipments 

without a Return Authorization Number 

will not be accepted.

To obtain Warranty services call 

1.800.650.2433.

*Warranty applies to the contiguous  US 

states only.

LiMited WarrantY

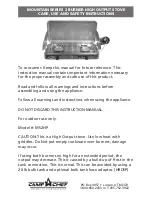
Summary of Contents for Mountain MS2HP

Page 1: ...uctions before assembling and using the appliance Follow all warnings and instructions when using the appliance DO NOT DISCARD THIS INSTRUCTION MANUAL For outdoor use only Model MS2HP CAUTION This is a High Output stove Use low heat with griddles Do Not put empty cookware over burners damage may occur If using both burners on high for an extended period the output may decrease This is caused by a ...

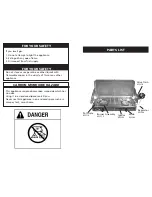
Page 2: ...other liquids with flammable vapors in the vicinity of this or any other appliance CARBON MONOXIDE HAZARD This appliance can produce carbon monoxide which has no odor Using it in an enclosed space can kill you Never use this appliance in an enclosed space such as a camper tent car or home Ignitor MS 102 Burner Assembly MS 115 Valve Train MS 116 Pot Grate MS 114 Knob MS 103 Regulator MS 104 ...

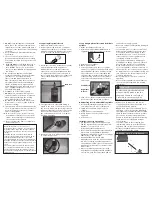
Page 3: ...ith propane cylinder in an inverted position Setup Using Optional Hose And Refillable Cylinder 1 Make sure burner valves are off 2 Attach Camp Chef Model HRDSP hose to regulator regulator to stove as shown 3 Attach hose to cylinder 4 Open cylinder valve 5 Perform leak check on hose to regulator and hose to cylinder connections with soapy water Bubbles indicate a leak Check that the connection is n...

Page 4: ...pty LP tanks through an exchange service Use only those reputable exchange companies that inspect precision fill test and certify their cylinders Exchange your tank only for an OPD safety feature equipped tank as described in the LP Tank section of this manual Always keep new and exchanged LP tanks in upright position during use transit or storage Leak test new and exchanged LP tanks BEFORE connec...

Page 5: ...ep appliance area clear and free from combustible materials gasoline and other flammable vapors and liquids Keep the ventilation opening s of the cylinder enclosure free and clear from debris Suggested Cleaning Materials Mild dish washing liquid detergent Wire brush Nylon cleaning pad Hot water Paper clip Soft brass bristled brush Component Cleaning Burner should be wiped clean Hot soapy water and...

Page 6: ...u doux avec plaques de cuisson Ne pas mettre cuisson vides sur les brûleurs des dommages peuvent survenir Si vous utilisez les deux brûleurs à puissance élevée pendant une période prolongée la sortie peut diminuer Ceci est causé par une accumulation de givre dans le raccord de réservoir Ceci est normal Ceci peut être évité en utilisant un réservoir de 9 kg en vrac et adaptateur en option vrac tuya...

Page 7: ...ile ou de graisse au moyen d eau NOTE Le présent appareil est conçu pour utiliser des bouteilles de propane jetables de 465 g 16 4 oz Utiliser uniquement des bouteilles portant la mention propane Les bouteilles de propane jetables doivent être débranchées du four pendant l entreposage Des réservoirs en vrac de GPL rechargeables d une capacité maximale de 9 kg 20 livres peuvent également être utili...

Page 8: ...liser l appareil Se reporter à la fiche technique au sujet des informations relatives au tuyau et au détendeur Ne pas bloquer les trous situés sur le bas ou les côtés de l appareil Ne jamais faire fonctionner l appareil si la bouteille de gaz n est pas correctement positionnée conformément aux instructions de montage Fermer toujours le robinet de la bouteille de gaz et retirer l écrou de raccordem...

Page 9: ...fournis avec cet appareil Voir les instructions de montage ou la plaque signalétique de l appareil pour le numéro de modèle du détendeur 1 Placer la bouteille de GPL sur une surface de niveau sûre et stable 2 S assurer que le bouton de commande est à la position OFF ARRÊT 3 Tourner le volant de manœuvre de la bouteille vers la droite jusqu à ce que le robinet soit complètement fermé 4 Enlever le c...

Page 10: ...ndommager la terrasse la pelouse etc avec des détergents Produits de nettoyage suggérés Détergent liquide pour vaisselle doux Brosse métallique Tampon à récurer en nylon Eau chaude Trombone Brosse à soies souples en laiton Nettoyage des éléments BRÛLEUR Nettoyer à la brosse métallique toute trace de corrosion se trouvant sur l extérieur du brûleur Nettoyer les orifices bouchés de conduite de gaz à...

Page 11: ...dores a temperatura alta durante un largo período la producción puede disminuir Esto es causado por una acumulación de escarcha en la conexión del tanque Esto es normal Esto puede evitarse mediante el uso de un tanque de 20 libras a granel y el adaptador opcional de tanque de la manguera HRDSP PO Box 4057 Logan UT 84321 1 800 650 2433 o 1 435 752 3922 Cocina de 2 quemadores alta poder de Montaña d...

Page 12: ...ya el flujo de aire de combustión y ventilación NOTA Este aparato está configurado para utilizar 16 4 oz cilindros desechables de propano Utilice solamente cilindros marcados propano cilindros desechables de propano se debe desconectar de la estufa cuando está en el almacenamiento Recargables de gas LP a granel Los depósitos con una capacidad máxima de 20 libras también se puede utilizar con un ad...

Page 13: ...aparato Nunca opere aparatos con tanques LP fuera de la posición correcta especificada en las Instrucciones de Montaje Siempre cierre la válvula del tanque LP y quite la tuerca de montaje antes de quitar el tanque LP de la posición de operación especificada NUNCA almacene un repuesto del tanque LP ni bajo ni cerca del aparato ni en áreas alrededor NUNCA llene el cilindro más allá del 80 lleno Un t...

Page 14: ...ridad de la válvula 5 Sostenga el regulador inserte la boquilla B en la válvula del tanque LP Apriete a mano la tuerca de acople sosteniendo el regulador en línea recta C con la válvula del tanque LP para que no se trasrosque la conexión 6 Gire la tuerca de acople en el sentido de las agujas del reloj para una parada firme completamente El regulador sellará sobre un elemento de contrapresión en la...

Page 15: ...e nilón Agua cliente Clip Cepillo de púas de metal suave Limpieza del componente QUEMADOR Quite la corrosión del exterior del quemador usando un cepillo de alambre Limpie los agujeros atascados del puerto del gas con un clip abierto Reemplace los quemadores corroídos o dañados que emitirían gas en exceso SUPERFICIES PLANAS OLLAS Y SARTENES PARA COCINAR Limpie la superficie para cocinar con agua cu...

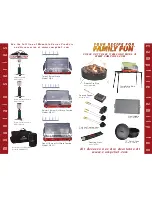
Page 16: ... Grill Stove Combo Model MS2G Denali 3 Burner Grill Stove Combo Model MS3G S e e t h e f u l l l i n e o f M o u n t a i n S e r i e s P r o d u c t s a n d A c c e s s o r i e s a t w w w c a m p c h e f c o m C h e c k O u t t h e s e i t e ms a n d M o r e at w w w campc h e f com A l l A c c e s s o r i e s A r e A v a i l a b l e A t w w w c a m p c h e f c o m Propane Fire Ring Model GCLOG T...

Page 17: ...o see the whole line of Family Fun Camp Chef gear and accessories go to www campchef com TANK SOLD SEPARATELY Smokers 3 Burner Stoves Grills 2 Burner Stoves Griddles Single Burner Stoves Ovens Cast Iron ...

Reviews: