background image

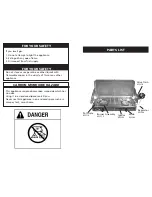
1.  DO NOT leave this appliance unattended 

while in use. The user must remain in the 
immediate area of the product and have a 
clear view of the product at all times during 
operation.

2.  Keep children and pets away from burner 

at all times. 

3.  The use of alcohol, prescription or non-

prescription drugs may impair your ability 
to properly assemble or safely operate this 
appliance.

4.   For OUTDOOR use only. Do NOT use in a 

building, garage or any other enclosed 
area. Do NOT use in or on recreational 
vehicles or boats. NEVER use this appliance 
as a heater. 

5.  Do not operate appliance under ANY 

overhead construction. Keep a minimum 
clearance of 1 foot (0.3 m) from the 
sides, front and back of appliance to 
ANY construction. Keep the area clear of 
all combustible material and flammable 
liquids, including wood, dry plants and 
grass, brush, paper, and canvas.  Never use 
this     appliance within 25 ft. (7.5 m) of     
any flammable liquid.

6.  Use ONLY on a level, stable surface.
7.  DO NOT place an empty cooking vessel 

on burner while in operation. Use caution 
when placing anything in the cooking 
vessel while burner is in operation. 

8.  Do NOT move the appliance when in use. 

Allow unit to cool to 115°F (45°C) before 
moving or storing. 

9.  This appliance will be hot during and after 

use. Use insulated oven mitts or gloves for 
protection from hot surfaces or splatter 
from cooking liquids.

10.  In case there is a fire, call the local fire 

department or dial 911. Stay clear from 
flames. Do not attempt to extinguish an 
oil or grease fire with water.

11.  Do not obstruct the flow of combustion 

and ventilation air.

NOTE: This appliance is set to use 16.4 oz. 
disposable propane cylinders.  Use only cylinders 
marked propane. Disposable propane cylinders 
must be disconnected from the stove when it is in 
storage.
Refillable Bulk LP-Gas Tanks with a maximum 
capacity of 20 pounds may also be used with an 
optional bulk tank adapter hose.  (Use Camp 
Chef Model HRDSP to connect to the bulk tank.)  
Refillable propane gas cylinders must be turned off 
at the LP-Gas supply cylinder when the stove is not 
in use.
The LP-gas cylinder(s) used with this stove must 
be constructed and marked in accordance with 
the specifications for LP-gas cylinders of the U.S. 
Department of Transportation or Transport Canada, 
CAN/CSA B339.

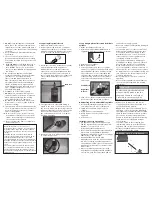
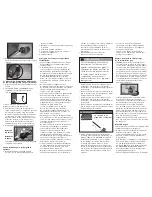
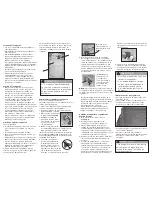
Setup using disposable Bottle

1. Make sure burner valves are off.
2.  Remove plastic cap from top of propane 

cylinder. Save cap for use in storing. Screw 
propane cylinder into regulator. Be careful 
not to cross thread. Hand Tighten only.

3.  Check the connection between the cylinder 

and the regulator with soapy water. 
Bubbles indicate a leak. Check that the 
connection is not cross-threaded and that 
it is tight. Perform another leak check. If 
there is still a leak, remove the cylinder and 
contact the manufacturer for service or 
repair.

4.  The regulator uses a threaded fitting to 

attach to the stove. It is necessary to hold 
the stove to make sure the fitting is seated. 
Align the regulator to the fuel tube on the 
rear of the stove and push on. Screw on 
the outer threaded sleeve in a clockwise 
direction until tight.

5.  Never operate stove with propane cylinder 

in an inverted position.

Setup using optional hose and refillable 
Cylinder

1.  Make sure burner valves are off.
2.  Attach Camp Chef Model HRDSP hose to 

regulator & regulator to stove (as shown).

3. Attach hose to cylinder.
4. Open cylinder valve.
5.  Perform leak check on hose to regulator, 

and hose to cylinder connections with soapy 
water. Bubbles indicate a leak. Check that 
the connection is not cross-threaded and 
that it is tight. Perform another leak check. 
If there is still a leak, remove the cylinder 
and contact the manufacturer for service 
and repair.

6.  Turn off fuel at the cylinder and disconnect 

both ends of the hose when not in use.

dismantling  hose and refillable Cylinder

1.  Before dismantling high pressure hose, be 

sure gas pressure in hose is eliminated.

2.  Ignite stove and turn off gas valve on 

cylinder.

3. Allow flame to self-extinguish.
4.  When flame is out, close valves on the 

appliance.

5. Remove hose.

installation Safety precautions

•  Use appliance only with LP (propane) gas 

and the regulator/valve assembly supplied.

• Appliance is not for use in or on 


   recreational vehicle and/or boats.
•  Do not modify this appliance. Modifications 

will result in a safety hazard. Questions 
regarding certification in other areas may be 
addressed to 1-435-752-3922.

•  Apartment Dwellers: Check with 

management to learn the requirements and 
fire codes for using an LP Gas appliance at 
an apartment. If allowed, use outside on the 
ground floor with a 10 foot clearance from 
walls or rails. 

•  Before opening LP tank valve, check the 

coupling nut for tightness. When appliance 
is not in use, turn off control knob and LP 

tank valve on supply cylinder. 

•  Never use LP tank if visibly rusted, damaged, 

or out of date.

•  If you notice grease or other hot material 

dripping from appliance onto valve, hose 
or regulator, turn off gas supply at once. 
Determine the cause, correct, clean and   
inspect valve, hose and regulator before 
continuing. Perform a leak test.

•  The regulator may make a humming or 

whistling noise during operation. This will 
not affect the safety or use of appliance. 

•  Clean and inspect the hose before each 

use of the appliance. If there is evidence of 
abrasion, wear, cuts or leaks, the hose must 
be replaced prior to the appliance being put 
into operation. See product tag for hose & 
regulator information.

•  Do not block holes in bottom or sides of 

appliance.

•  Never operate appliance with LP tanks out 

of correct position specified in Assembly 
Instructions. 

•  Always close LP tank valve and remove 

coupling nut before moving LP tank form 
specified operating position. 

•  NEVER store a spare LP tank under or near 

appliance or in enclosed areas. NEVER fill 
the cylinder beyond 80% full. An overfilled 
spare LP tank is hazardous due to possible 
gas released from the safety relief valve. 
Failure to follow these instructions exactly 
could cause a fire resulting in death or 
serious injury.

•  If you see, smell, or hear escaping gas, 

immediately get away from the LP tank/
appliance and call your fire department.

•  All spare LP tanks must have safety caps 

installed on the LP tank outlet.

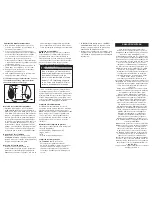
Leak test

Leak Check

regulator
& hose

WARNING

Combustion by-products produced 
when using this product contain 
chemicals known to the State of 
California to cause cancer, birth 
defects, or other reproductive harm.

WARNING

24 “

Hose is a trip hazard

Summary of Contents for Mountain MS2HP

Page 1: ...uctions before assembling and using the appliance Follow all warnings and instructions when using the appliance DO NOT DISCARD THIS INSTRUCTION MANUAL For outdoor use only Model MS2HP CAUTION This is a High Output stove Use low heat with griddles Do Not put empty cookware over burners damage may occur If using both burners on high for an extended period the output may decrease This is caused by a ...

Page 2: ...other liquids with flammable vapors in the vicinity of this or any other appliance CARBON MONOXIDE HAZARD This appliance can produce carbon monoxide which has no odor Using it in an enclosed space can kill you Never use this appliance in an enclosed space such as a camper tent car or home Ignitor MS 102 Burner Assembly MS 115 Valve Train MS 116 Pot Grate MS 114 Knob MS 103 Regulator MS 104 ...

Page 3: ...ith propane cylinder in an inverted position Setup Using Optional Hose And Refillable Cylinder 1 Make sure burner valves are off 2 Attach Camp Chef Model HRDSP hose to regulator regulator to stove as shown 3 Attach hose to cylinder 4 Open cylinder valve 5 Perform leak check on hose to regulator and hose to cylinder connections with soapy water Bubbles indicate a leak Check that the connection is n...

Page 4: ...pty LP tanks through an exchange service Use only those reputable exchange companies that inspect precision fill test and certify their cylinders Exchange your tank only for an OPD safety feature equipped tank as described in the LP Tank section of this manual Always keep new and exchanged LP tanks in upright position during use transit or storage Leak test new and exchanged LP tanks BEFORE connec...

Page 5: ...ep appliance area clear and free from combustible materials gasoline and other flammable vapors and liquids Keep the ventilation opening s of the cylinder enclosure free and clear from debris Suggested Cleaning Materials Mild dish washing liquid detergent Wire brush Nylon cleaning pad Hot water Paper clip Soft brass bristled brush Component Cleaning Burner should be wiped clean Hot soapy water and...

Page 6: ...u doux avec plaques de cuisson Ne pas mettre cuisson vides sur les brûleurs des dommages peuvent survenir Si vous utilisez les deux brûleurs à puissance élevée pendant une période prolongée la sortie peut diminuer Ceci est causé par une accumulation de givre dans le raccord de réservoir Ceci est normal Ceci peut être évité en utilisant un réservoir de 9 kg en vrac et adaptateur en option vrac tuya...

Page 7: ...ile ou de graisse au moyen d eau NOTE Le présent appareil est conçu pour utiliser des bouteilles de propane jetables de 465 g 16 4 oz Utiliser uniquement des bouteilles portant la mention propane Les bouteilles de propane jetables doivent être débranchées du four pendant l entreposage Des réservoirs en vrac de GPL rechargeables d une capacité maximale de 9 kg 20 livres peuvent également être utili...

Page 8: ...liser l appareil Se reporter à la fiche technique au sujet des informations relatives au tuyau et au détendeur Ne pas bloquer les trous situés sur le bas ou les côtés de l appareil Ne jamais faire fonctionner l appareil si la bouteille de gaz n est pas correctement positionnée conformément aux instructions de montage Fermer toujours le robinet de la bouteille de gaz et retirer l écrou de raccordem...

Page 9: ...fournis avec cet appareil Voir les instructions de montage ou la plaque signalétique de l appareil pour le numéro de modèle du détendeur 1 Placer la bouteille de GPL sur une surface de niveau sûre et stable 2 S assurer que le bouton de commande est à la position OFF ARRÊT 3 Tourner le volant de manœuvre de la bouteille vers la droite jusqu à ce que le robinet soit complètement fermé 4 Enlever le c...

Page 10: ...ndommager la terrasse la pelouse etc avec des détergents Produits de nettoyage suggérés Détergent liquide pour vaisselle doux Brosse métallique Tampon à récurer en nylon Eau chaude Trombone Brosse à soies souples en laiton Nettoyage des éléments BRÛLEUR Nettoyer à la brosse métallique toute trace de corrosion se trouvant sur l extérieur du brûleur Nettoyer les orifices bouchés de conduite de gaz à...

Page 11: ...dores a temperatura alta durante un largo período la producción puede disminuir Esto es causado por una acumulación de escarcha en la conexión del tanque Esto es normal Esto puede evitarse mediante el uso de un tanque de 20 libras a granel y el adaptador opcional de tanque de la manguera HRDSP PO Box 4057 Logan UT 84321 1 800 650 2433 o 1 435 752 3922 Cocina de 2 quemadores alta poder de Montaña d...

Page 12: ...ya el flujo de aire de combustión y ventilación NOTA Este aparato está configurado para utilizar 16 4 oz cilindros desechables de propano Utilice solamente cilindros marcados propano cilindros desechables de propano se debe desconectar de la estufa cuando está en el almacenamiento Recargables de gas LP a granel Los depósitos con una capacidad máxima de 20 libras también se puede utilizar con un ad...

Page 13: ...aparato Nunca opere aparatos con tanques LP fuera de la posición correcta especificada en las Instrucciones de Montaje Siempre cierre la válvula del tanque LP y quite la tuerca de montaje antes de quitar el tanque LP de la posición de operación especificada NUNCA almacene un repuesto del tanque LP ni bajo ni cerca del aparato ni en áreas alrededor NUNCA llene el cilindro más allá del 80 lleno Un t...

Page 14: ...ridad de la válvula 5 Sostenga el regulador inserte la boquilla B en la válvula del tanque LP Apriete a mano la tuerca de acople sosteniendo el regulador en línea recta C con la válvula del tanque LP para que no se trasrosque la conexión 6 Gire la tuerca de acople en el sentido de las agujas del reloj para una parada firme completamente El regulador sellará sobre un elemento de contrapresión en la...

Page 15: ...e nilón Agua cliente Clip Cepillo de púas de metal suave Limpieza del componente QUEMADOR Quite la corrosión del exterior del quemador usando un cepillo de alambre Limpie los agujeros atascados del puerto del gas con un clip abierto Reemplace los quemadores corroídos o dañados que emitirían gas en exceso SUPERFICIES PLANAS OLLAS Y SARTENES PARA COCINAR Limpie la superficie para cocinar con agua cu...

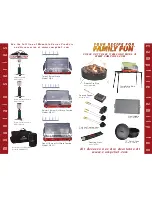
Page 16: ... Grill Stove Combo Model MS2G Denali 3 Burner Grill Stove Combo Model MS3G S e e t h e f u l l l i n e o f M o u n t a i n S e r i e s P r o d u c t s a n d A c c e s s o r i e s a t w w w c a m p c h e f c o m C h e c k O u t t h e s e i t e ms a n d M o r e at w w w campc h e f com A l l A c c e s s o r i e s A r e A v a i l a b l e A t w w w c a m p c h e f c o m Propane Fire Ring Model GCLOG T...

Page 17: ...o see the whole line of Family Fun Camp Chef gear and accessories go to www campchef com TANK SOLD SEPARATELY Smokers 3 Burner Stoves Grills 2 Burner Stoves Griddles Single Burner Stoves Ovens Cast Iron ...

Reviews: