15
F. ADVANCED SETTINGS (Advanced Settings)
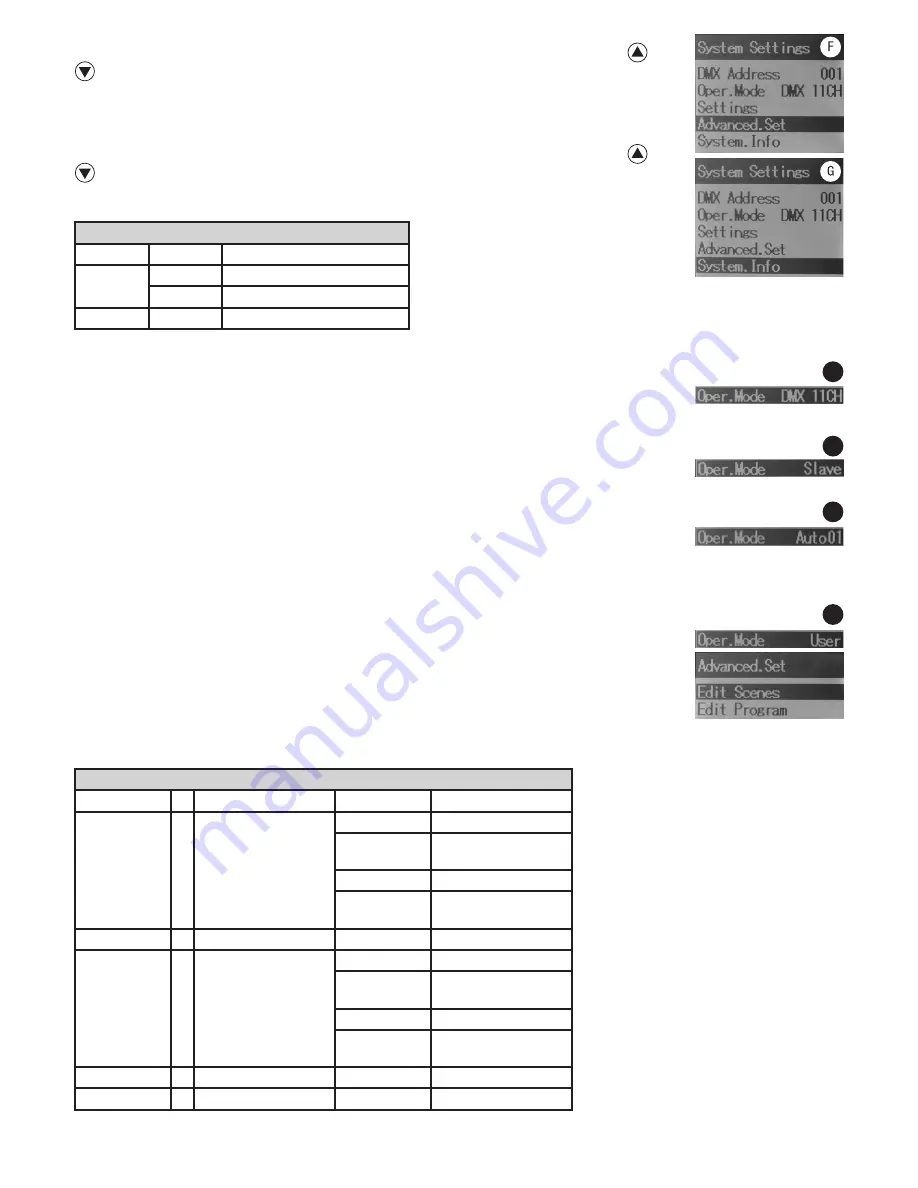
Pressing the MODE button will take you to the selection menu for system settings. Using the arrow buttons
and
, select the menu item “Advanced.Set” (dark background) and confirm by pressing ENTER. You will then be taken to
the sub-menu to set the following sub-menu items “Edit Scenes“ and “Edit Program“. Both of these points refer to the
Standalone mode “User”. Confirm the setting changes with ENTER and press the MODE button (possibly several times)
to return to the main display. Features and operation are explained below in point K. USER OPERATING MODE (User).
G. DEVICE INFORMATION (System Info)
Pressing the MODE button will take you to the selection menu for system settings. Using the arrow buttons
and
, select the menu item “System.Info” (dark background) and confirm by pressing ENTER. You will then be taken to
the sub-menu to display the device information. Use the arrow buttons again to select the desired parameters and then
press ENTER.
OPERATING MODES (Operating mode)
H. DMX MODE (DMX)
Four different DMX modes are available for selection: DMX 5-channel, 11-channel, 19-channel and 41-channel (DMX
05CH, 11CH, 19CH, 41CH). The setting is made as previously explained in point D. SETTING OPERATING MODE. You will
find DMX channel assignment tables on separate pages of this guide under DMX CONTROL.
I. SLAVE MODE (Slave)
The setting is made as previously explained in point D. SETTING OPERATING MODE. Connect the slave and the master
unit (same model) with a DMX cable. Enable one of the standalone modes (Auto, User, Sound, Static) in the master unit.
Now the slave unit follows the master unit.
J. AUTO MODE (Auto01 - 13)
The 13 various auto programs consist of a sequence of fixed programmed colour and motion changes. Pressing the
MODE button will take you to the selection menu for system settings. Using the arrow buttons, select the menu item
“Oper. Mode” (dark background) and confirm by pressing ENTER. The digits which show the operating mode, change their colour to red, and you can
use the arrow buttons to select the desired auto mode. Confirm with ENTER and select one of the 13 Auto programs (Auto01 - Auto13) using the +
and - buttons, confirm with ENTER and press the MODE button to return to the main display.
K. USER PROGRAM (User)
The user program is an auto program, in which the user (User) himself can create this program using up to 10 different
scenes. In order to be able to create this program, the following steps are necessary: Pressing the MODE button will
take you to the selection menu for system settings. Using the arrow buttons, select the menu item “Advanced.Set”
(dark background) and confirm by pressing ENTER. The display now shows “Edit Scenes” and “Edit Program”. Select
“Edit Scenes” with the arrow buttons and confirm with ENTER. With the help of the arrow buttons, you can now also
select one of the 10 available scenes (Scene01 - Scene10) in order to create them according to your own require-
ments. Confirm with ENTER. 11 different parameters, which in turn can be selected using the arrow buttons, are avail-
able for the production of a scene. Press the ENTER button and then use the + and - buttons to select the desired value and confirm with ENTER.
System Info
Time.Info
xh
= Gesamtbetriebszeit in Stunden
Temp.Info
Head.Temp = Temperatur in °C/°F
Temp.C/F
= Celsius / Fahrenheit
Software.V
= Sofware Version
Edit Scenes
Pan.Pos
= Pan Position
000 - 255
0 - 360°
Pan.Infi
= Pan Continuous Function
(Priority over Pan.Pos)
000 - 010
no function
011 - 125
Forward rotation, fast
-> slow
126 - 140
no function
141 - 255
Reverse rotation, slow->
fast
Tilt.Pos
= Tilt Position
000 - 255
0 - 360°
Tilt.Infi
= Tilt Continuous Function
(Priority over Tilt.Pos)
000 - 010
no function
011 - 125
Forward rotation, fast
-> slow
126 - 140
no function
141 - 255
Reverse rotation, slow->
fast
Motor.Spd
= Motor Speed
000 - 255
fast -> slow
Dimmer
= Scenes Dimmer
000 - 255
0 - 100%
H
I
J
K


