CT-BOX Viewer – Quick Start Guide
13
CHANNEL SETTINGS
The software treats every CT-BOX as a single channel of a conventional oscilloscope.
From the channel menu, the user can
show/hide
a channel, change the multiplication
scaling factor (
Scale
, expressed in [1/A]) and the
Offset
. Furthermore, the user can
enable the
normalization of the signal
(every channel is scaled w.r.t. its maximum of
the absolute value of the acquired window) and eventually
remove its DC
value (again
calculated considering the samples of the window).
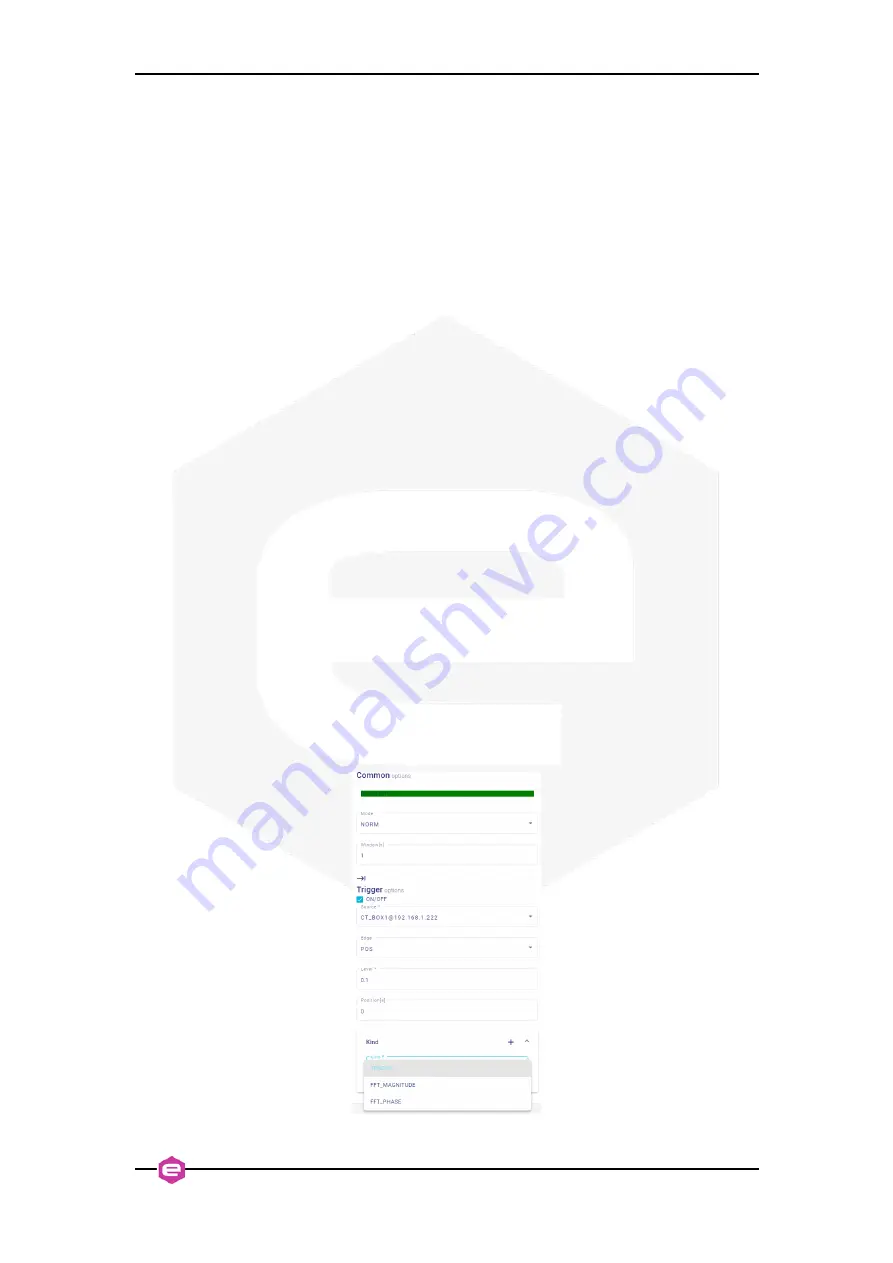
COMMON AND TRIGGER SETTINGS
Once the trigger is enabled (see
), the user can add (i) the trigger
Source
choosing among the added CT-BOX, (ii) the trigger
Edge
(positive, negative or both),
(iii) the trigger
Level
(expressed in [A]) and (iv) its
Position
on the time axes
(expressed in [sec]).
Concerning the time axes, the acquisition
Window
(expressed in [s]) can be changed
in the Common options section. In the same section, the user can find the RUN/STOP
indication (to easily understand the status of the current acquisition) and the trigger
MODE
, that can be:
•
NORMAL, it plots the signal any time the trigger condition is met, otherwise
it does not update the waveform;
•
AUTO, it automatically sets a trigger configuration in order to meet the
condition;
•
SINGLE, it plots the signal only the first time the trigger condition is met,
then it stops the window updating;
•
STOP, it forces the stop of the window updating.
KIND SETTINS
In the Kind Settings section, the user can choose the type of the waveform among
TRACES
(the current as a function of time) or its
FFT
(Magnitude or Phase) as a
function of the frequency.
Figure 12:
Trigger options in Oscilloscope mode.


