15
Fig. J`
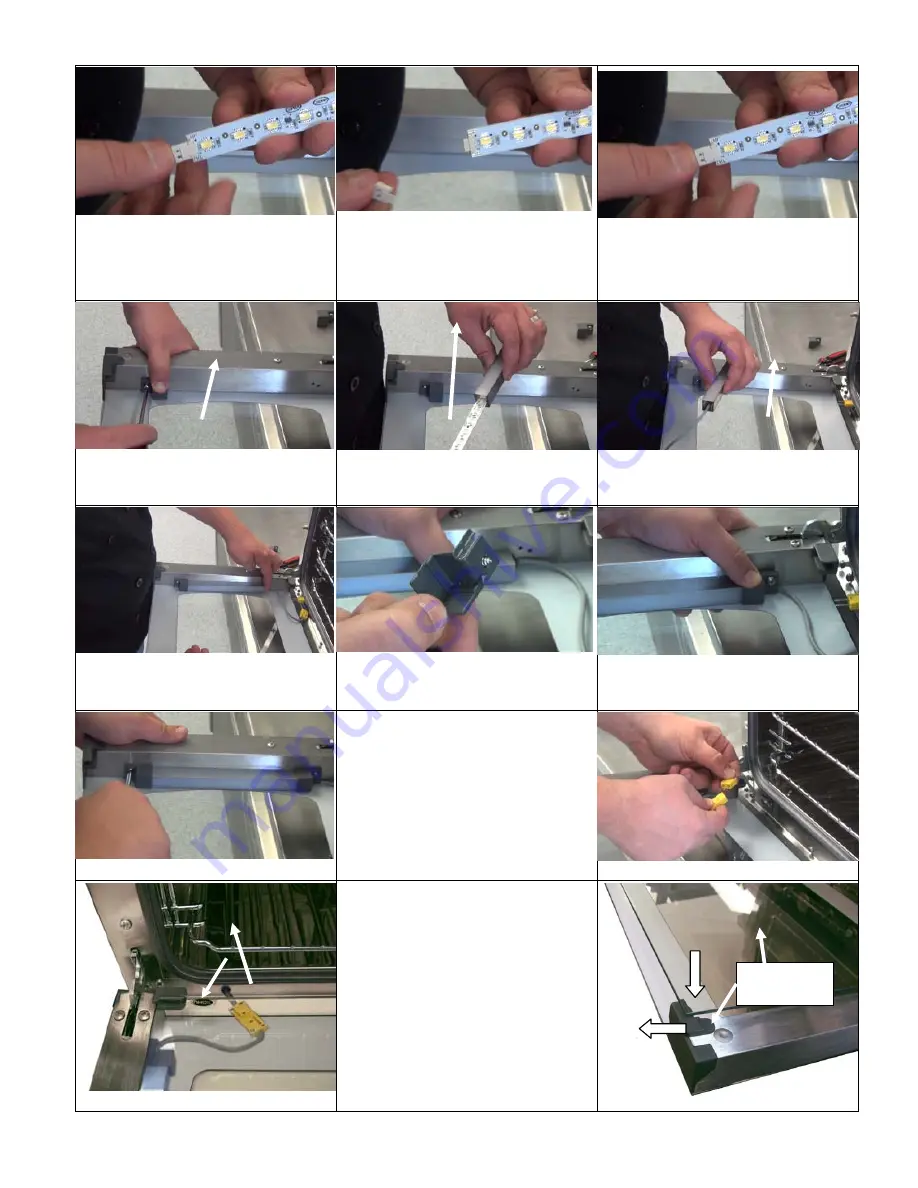
OLD LED light
Fig. K
8) Carefully unsnap the LED light
assembly from the wire clip, and replace
it with the new LED light assembly.
Figs. J-K-L.
Fig. L
NEW LED light
Fig. M
9) Replace the top cover bracket, but
do not fully tighten the screws yet.
Fig. N
10) Slide the LED light assembly fully
into the light cover.
Figs. N-O.
Fig. O
Fig. P
11) Slide the light cover into
the top bracket, making sure the
opaque side of the cover is facing out.
Fig. Q
12) With the wire notch facing
down
,
replace the bottom bracket.
Fig. R
13) Attach the bottom cover
bracket, making sure the wire is seated
in the wire notch.
Fig. S
14) Fully tighten the screws on the top
cover bracket.
Fig. S
15) Plug the halves of the cord connector
together. They only fit one way.
Fig. T.
Fig. T
Fig. U
16) Replace the inner door glass by
positioning it over the open oven door so
that the oval logo on the glass is facing down
in the left back corner.
Fig. U.
Slide the back edge of the door glass into the
door glass slots at the bottom of the door.
Fig. U.
17) Lower the glass until it is resting on the
glass holder clips.
Fig. V
18) Pull the glass holder clips back until the
glass drops into place in the door.
Then release the glass holder clips to hold the
glass in place.
19) Close the oven door.
Fig. V
Glass
holder clip


