Removing the Power Bridge Adapter
6C110 Overview and Setup Guide
3-7
3.
Remove the two lower screws and the two upper screws that hold the
power bridge adapter in place. Save the screws.
4.
Disconnect the power bridge adapter from the lower backplane.
5.
Place the power bridge adapter in a safe place in the event the power
supplies are upgraded to the 6C210-1 or 6C210-2 models.
6.
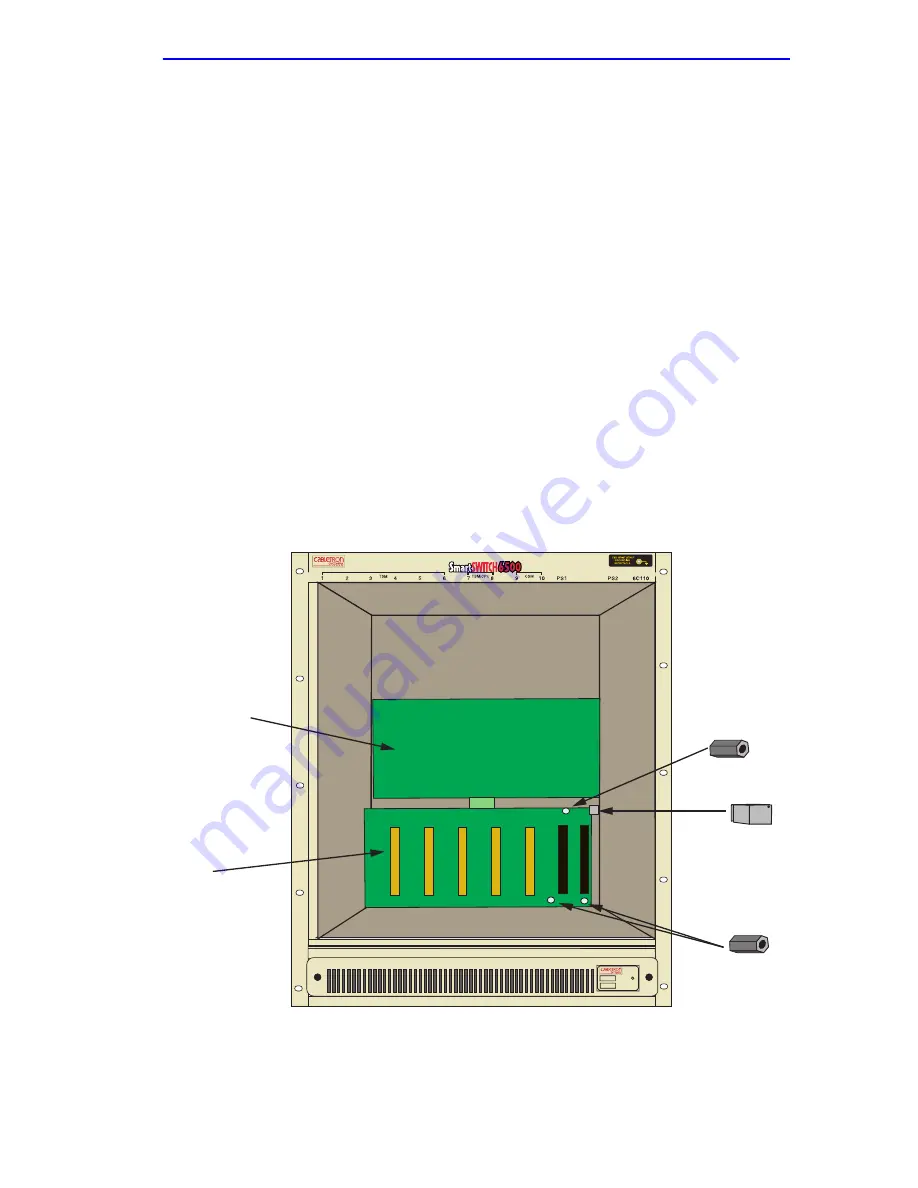
Using a .25-inch hex nut driver, remove the three standoffs that are
attached to the lower backplane. Refer to
Figure 3-5
.
7.
Place the three standoffs in a safe place in the event the power supplies
are upgraded to the 6C210-1 or 6C210-2 models.
8.
Locate the rectangular metal clip that is connected to the chassis card
cage. It is located directly to the right of lower backplane. Refer to
Figure 3-5
.
9.
Remove the support clip by lifting up on the clip. Place the support
clip, and the screw that secured it, in a safe place in the event the power
supplies are upgraded to the 6C210-1 or 6C210-2 models.
Figure 3-5
Removing the Standoffs and Support Clip
10.
Reinstall the three screws removed in
step 3
into the three receptacles
that formerly held the standoffs.
6C405
Upper Backplane
Lower Backplane
Standoff
Standoffs (2)
Support Clip
Summary of Contents for SmartSwitch 6500
Page 1: ...6C110 SmartSwitch 6500 Overview and Setup Guide 9032752 02...
Page 2: ......
Page 8: ...Contents vi 6C110 Overview and Setup Guide...
Page 16: ...Chapter 1 Introduction 1 8 6C110 Overview and Setup Guide...
Page 24: ...Chapter 2 Installation Requirements and Specifications 2 8 6C110 Overview and Setup Guide...
Page 50: ...Chapter 3 6C110 Setup 3 26 6C110 Overview and Setup Guide...


