ENGLISH
5. Navigation Functions
5.1 How to set a route toward a destination
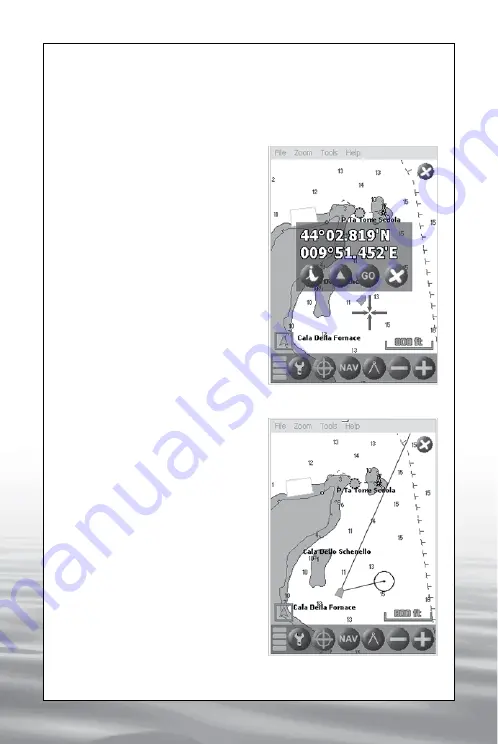
Click with the stylus on the desired destination and hold for 2 seconds: a
red cross will indicate the select-
ed point and the Info Menu win-
dow will open. Click the “GO”
button to activate the navigation
toward the selected point (IMG
2), a black circle will be traced
on the map around the selected
point (IMG 3).
When you select a Mark as de-
sired destination, a black circle
will be traced around the Mark’s
yellow triangle (IMG 4).
5.1.1 Course Over Ground
visualization
When the GPS signal is
received, and the speed over
round is higher than 0,3 Knots, a
grey line will indicate the Course
Over Ground “COG” (IMG 5).
It is possible to deactivate the
“COG” line visualization in the
software settings menu.
5.1.2 Track visualization
When the Track option is
activated in the settings Menu,
the track points are automatically
saved at intervals of time or
space.
To enable the track visualization
option, click on the “Setting”
button, select the folder named
“Tracks”, then select the option
“enabled”. In the same window
it is possible to set the saving
mode
(only
distance,only
time, time and distance, time
or distance), and to introduce
IMG 2 - Info Menu
IMG 3 - Navigation toward
a destination
offered by www.Busse-Yachtshop.de email: [email protected]


