


Page 16
For technical questions, please call 1-888-866-5797.
Item 62463
SAFET
y
ADV
ANCED
OPERA
TION
SETUP
BASIC
MAINTENANCE
TROUBLESHOOTING
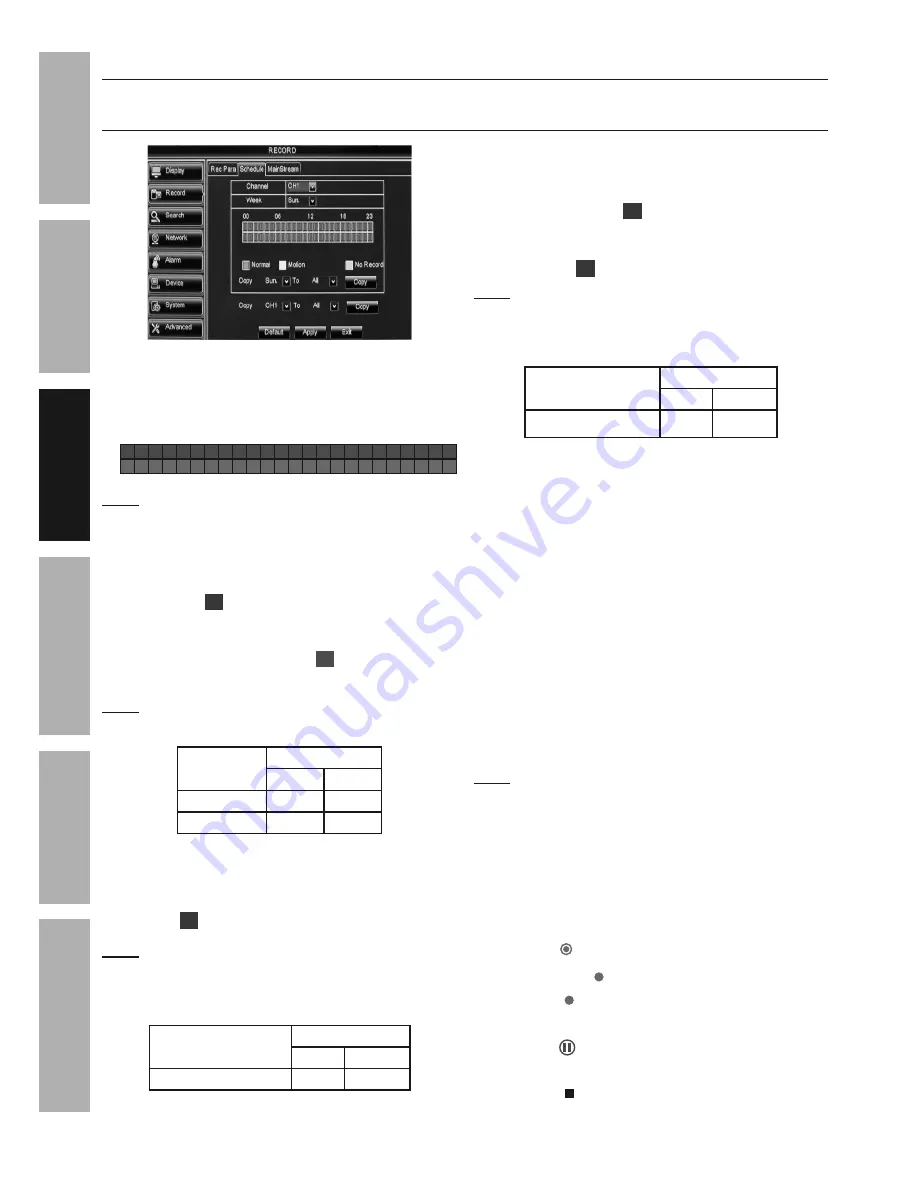
Recording Settings
Record > Schedule - Normal, Motion Detection and Manual Settings
(
To set advanced Motion Detection settings, go to Motion Detection Settings on page 23)
N
M
Figure M
1.
Schedule Table:
N
00
06
18
23
12
M
12 AM
Midnight 6 AM
12 PM
Noon
6 PM
11 PM
Note:
Click or click and drag to
select or deselect boxes.
2.
N - Normal:
• When green boxes are selected, DVR
will record during selected time frames
and red
R
will display on Live View.
• When gray boxes are selected, DVR will not
record and red HDD light will stop flashing. If
motion is detected, green
M
will display on
Live View, but no recording will be made.
Note:
If HDD light continues to flash after selecting
gray boxes, press
STOP
on DVR's front panel.
Normal
Schedule Table
Green
Gray
Record
X
Not Record
X
Figure N
3.
M - Motion:
When yellow boxes are
selected, DVR will record during selected
time frames when a camera detects motion
and red
M
will display on Live View.
Note:
To start recording several seconds BEFORE
motion is detected, ensure that
Pre-record
is set
to
ENABLE
according to
Record > Rec Para -
Recording Parameters on page 17, step 3.
Motion
Schedule Table
Green yellow
Motion Only
X
Figure O
4.
N & M: Normal with Motion -
When both
green and yellow boxes are selected:
• DVR will record constantly during selected time
frames and red
R
will display on Live View.
• DVR will record separate event during selected
time frames when a camera detects motion
and red
M
will display on Live View.
Note:
To start motion event recording several seconds
BEFORE motion is detected, ensure that
Pre-record
is set to
ENABLE
according to
Record > Rec Para
- Recording Parameters on page 17, step 3.
Motion
Schedule Table
Green yellow
Normal with Motion
X
X
5.
Copy
(Day of week):
Copy settings from one
Day to other Days for this channel only.
a. Select Day to copy from.
b. Select Day to copy to or select
ALL.
c. Click
Copy
, then click
OK.
6.
Copy (Channel):
Copy settings from one Channel
to other Channels for all the days of the week.
a. Select Channel to copy from.
b. Select Channel to copy to or select
ALL.
c. Click
Copy
, then click
OK.
Changes will be saved when you
click Apply then OK.
Changes will not be saved if you click
Exit or right click on screen.
Note:
To set advanced Motion Detection settings,
go to Motion Detection Settings on page 23.
7.
Manual Recording:
a. Click or click and drag all green and
yellow boxes until all boxes are gray.
b. Click
Apply
then
OK
. If HDD light continues
to flash, press
STOP
on DVR's front panel.
c. To record manually:
• Click
REC
on Pop-Up Menu,
• Press
REC
on DVR's front panel, or
• Press
on remote.
d. To stop recording manually:
• Click on Pop-Up Menu,
• Press
STOP
on DVR's front panel, or
• Press on remote.


