42
1
3
2
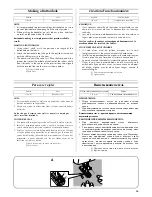
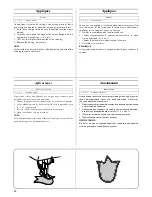
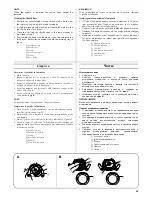
Changing the Bulb
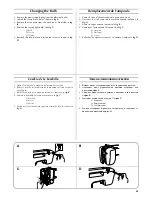
1. Remove the power supply plug from the electrical outlet.
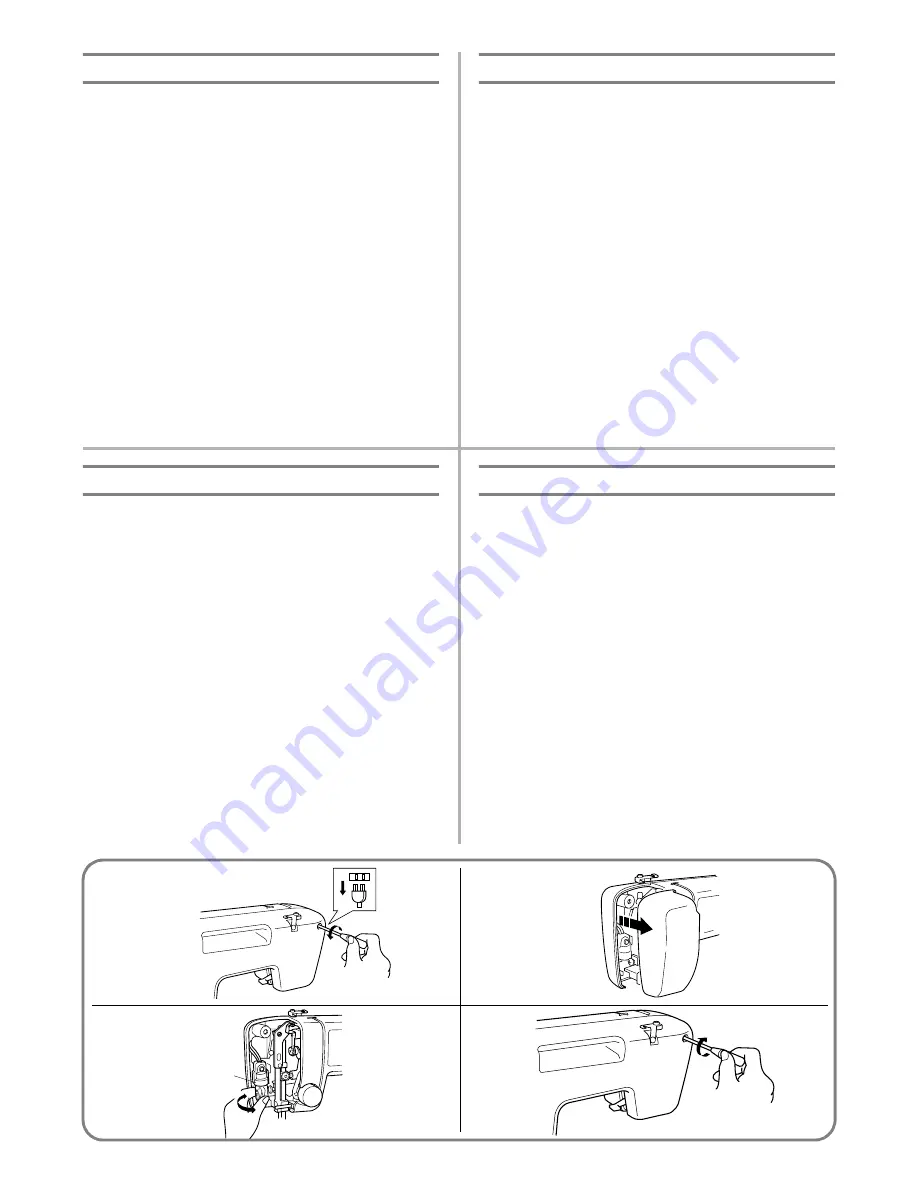
2. Loosen the face plate screw as shown in
fig. A
.
3. Remove the face plate from the machine as illustrated in
fig.
B
.
4. Replace the sewing light bulb. See
fig. C
.
a
Bulb
b
Loosen
c
Tighten
5. Reattach the face plate and fasten the screw as shown in
fig.
D
.
Remplacement de l’ampoule
1. Retirer la fiche d’alimentation de la prise de courant.
2. Desserrer la vis du capot de la machine comme indiqué à la
fig. A
.
3. Retirer le capot comme le montre la
fig. B
.
4. Remplacer l’ampoule de la lampe. Voir
fig. C
.
a
Ampoule
b
Desserrer
c
Visser
5. Rattacher le capot et resserrer la vis comme l’indique la
fig. D
.
Cambio de la bombilla
1. Quite el enchufe de la máquina de la toma de corriente.
2. Afloje el tornillo de la cubierta de la máquina tal como se indica
en la
fig. A
.
3. Retire la cubierta de la máquina tal como se indica en la
fig. B
.
4. Cambie la bombilla tal como se muestra en la
fig. C
.
a
Bombilla
b
Aflojar
c
Apretar
5. Vuelva a colocar la cubierta y apriete el tornillo tal como indica la
fig. D
.
Замена лампочки подсветки
1. Выньте вилку сетевого шнура из электрической розетки.
2. Отверните винт фронтальной крышки машины, как
показано на
рис. A
.
3. Снимите фронтальную крышку с машины, как показано
на
рис. B
.
4. Замените лампочку подсветки. См.
рис. С
.
a
Лампочка
b
Вывёртывание
c
Завёртывание
5. Заново установите фронтальную крышку и закрепите её
винтом как показано на
рис. D
.
A
B
C
D

