UPPER THREADING
36
j
Select a stitch pattern. (Example:
)
*
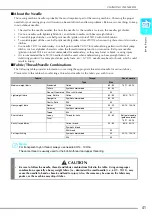
Refer to the “STITCH SETTING CHART” at the end
of this manual for proper stitch to use with presser
foot “J”.
→
The Selected stitch is displayed.
k
Press
to select the twin needle
mode.
a
Single needle/twin needle setting
→
appears.
l
Start sewing.
Sample of Twin Needle Sewing
Using Threads that Unwind
Quickly
■
Using the Spool Net
If using transparent nylon thread, metallic thread, or
other strong thread, place the included spool net
over the spool before using it. When using these
threads, threading must be done manually.
If the spool net is too long, fold it once to match it to
the spool size before placing it over the spool.
■
Using the Vertical Spool Pin
Use the vertical spool pin when using an irregularly
shaped thread spool, and when sewing or
embroidering with metallic thread.
a
Insert the vertical spool pin onto the bobbin
winder shaft.
b
Install the spool felt and the thread spool in
that order, and then thread the upper
thread.
Note
If the
key is light gray after selecting
the stitch, the selected stitch cannot be sewn
in the twin needle mode.
CAUTION
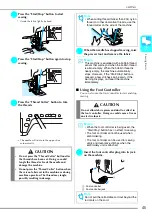
Be sure to set the twin needle mode when using
the twin needle. Using the twin needle while the
machine is in single needle mode could cause the
needle to break, resulting in damage.
a
Memo
• When threading the spool with the spool net
on, the thread may not come out enough.
Make sure that 5-6 cm (approx. 2 - 2-1/2
inches) of thread are pulled out.
• It may be necessary to adjust the thread ten-
sion when using the spool net.
Memo
• When setting the thread spool, set it so that
the thread winds off from the front of the
spool.
• If using metallic thread, we recommend that
you use a 90/14 home sewing machine nee-
dle.
• This method keeps the thread from twisting
as it comes off the spool pin.
a
d c
b
a
Spool net
b
Thread spool
c
Spool pin
d
Spool cap
d
c
b
a
a
Bobbin winder shaft
b
Vertical spool pin
c
Spool felt
d
Thread spool
Summary of Contents for 882-S85
Page 2: ......
Page 7: ...v ...
Page 12: ...Contents x ...
Page 20: ...NAMES OF MACHINE PARTS AND THEIR FUNCTIONS 8 ...
Page 54: ...CHANGING THE NEEDLE 42 ...
Page 68: ...USEFUL FUNCTIONS 56 ...
Page 126: ...SEWING THE STITCHES 114 ...
Page 208: ...EMBROIDERY APPLICATIONS 196 ...
Page 236: ...USING THE MEMORY FUNCTION 224 ...
Page 264: ...UPGRADING YOUR MACHINE S SOFTWARE 252 ...
Page 275: ......
Page 276: ...XF3896 001 English 882 S85 Printed in Taiwan ...


