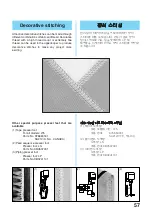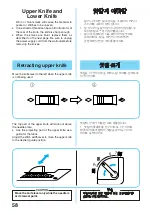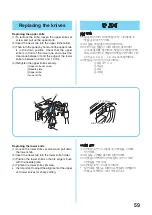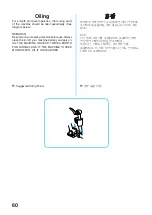
55
Pin tuck stitching with
blind stitch presser foot
The Pin tuck stitch uses a rolled edge to add shape
and decoration to any sewing project. Fold the fabric
on a line where the pin tuck is to be located and guide
the fold through the serger. Contrasting thread in the
upper looper adds an accent to your project.
Use the blind stitch presser foot to make narrow
overlock stitches to produce seams in the form of
tucks at equal distances from each other.
For thin fabrics, it’s a good idea to choose a fine
thread which will run smoothly.
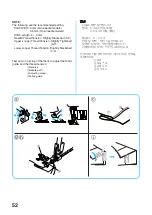
a
Replace the presser foot with a blind stitch presser
foot (multipurpose presser foot). (Refer to page
50.)
b
Set up the machine for narrow overlock stitching.
(Refer to pages 45–48.)
c
Draw equally spaced lines on the fabric with a
fabric pencil as guides for pin tuck placement.
Fold the fabric along one of the lines and press
in place lightly with an iron.
d
Turn the handwheel counterclockwise to set the
needle at its highest position.
e
Lift the presser foot lever and insert the fabric with
the folded edge in such a way that the needle
pierces just the folded edge.
f
Lower the presser foot lever, adjust the fabric
guide toward the folded edge.
g
Align the blind stitch presser foot guide with the
line on the right side of the stitch finger.
By turning the screw forward (toward you) the
stitch guide will go to the right. By turning the
screw backward (away from you) the stitch guide
will go to the left.
h
Align the fold with the guide and insert the fabric
up to the needle position.
i
Guide the fold in the fabric to sew half way between
the needle and the upper knife.
j
Continue sewing until all marked lines have been
sewn.
•
Correct minor contractions by hand.
Test sew on a scrap of the fabric to adjust the fabric
공그르기 노루발을 사용한
핀턱 스티칭
핀턱 스티치는 말은 단을 사용하여 재봉물에
모양과 장식을 더합니다. 핀턱이 위치할
선을 기준으로 천을 접고 접힌 곳을 재봉기에
통과시킵니다. 윗루퍼 실이 대비되면 재봉물에
악센트가 더해집니다.
일정 간격의 턱 모양으로 솔기를 형성하려면
공그르기 노루발을 사용해 좁은 오버로크
스티치를 하세요. 얇은 천에는 부드럽게 재봉될
가는 실을 선택하는 것이 좋습니다.
a
노루발을 공그르기 노루발(다목적 노루발)로
교체하세요. (50 페이지 참조.)
b
좁은 오버로크 스티칭용으로 재봉기를
설정하세요. (45–49 페이지 참조.)
c
핀턱 위치를 잡기 위해 재단 연필로 천에
일정 간격의 선들을 그리세요. 선 중 하나를
기준으로 천을 접고 다리미로 살짝 누르세요.
d
풀리 다이얼을 시계 반대 방향으로 돌려
바늘을 가장 높은 위치로 올리세요.
e
노루발 레버를 올리고 바늘이 접힌 단을 바로
관통하도록 단이 접힌 천을 삽입하세요.
f
노루발 레버를 내리고 접힌 단 쪽으로 천
가이드를 조절하세요.
g
공그르기 노루발 가이드를 스티치 핑거
오른쪽의 선과 맞추세요.
나사를 앞(사용자 쪽)으로 돌리면 스티치
가이드가 오른쪽으로 이동합니다. 나사를 뒤(
사용자에서 먼 쪽)로 돌리면 스티치 가이드가
왼쪽으로 이동합니다.
h
접힌 곳을 가이드와 맞추고 천을 바늘
위치까지 삽입하세요.
i
천의 접힌 곳을 이동시키면서 바늘과 윗칼
사이의 중간쯤까지 재봉하세요.
j
계속해서 모든 표시선을 다 재봉하세요.
•
손으로 사소한 수축을 바로잡으세요.
Summary of Contents for 2034D
Page 2: ......
Page 11: ...3 ...
Page 33: ...25 2 3 4 5 6 7 2 1 2 3 6 7 6 4 5 ...
Page 35: ...27 2 3 5 6 4 7 2 1 2 3 4 3 6 7 6 7 6 4 5 ...
Page 72: ...English Korean 2034D XB2073 001 Printed in Taiwan ...

