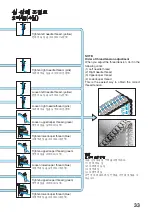
47
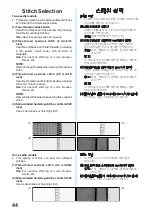
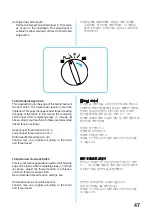
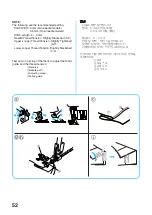
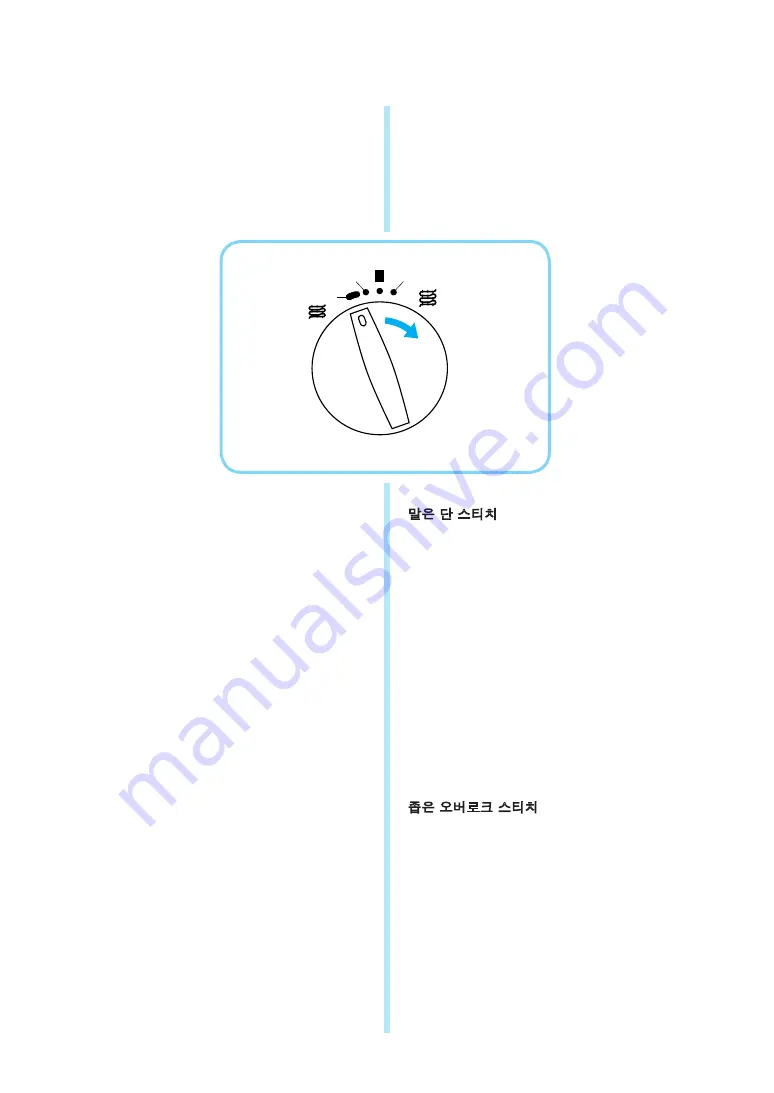
(6) 땀길이를 조절하세요. 땀길이 조절 레버를
그림처럼 ‘R’ 위치로 설정하세요. 이 조절은
좁은 오버로크 스티치 또는 말은 단 스티치에
적합합니다.
말은 단 스티치
이 재봉은 천의 단을 단 스티치 안쪽으로 맙니다.
아랫루퍼 장력이 팽팽해야 합니다. 팽팽한 장력은
윗루퍼 실을 당겨 천의 단이 남아 있는 스티치
핑거 둘레로 접히게 합니다. 위의 (1) ~ (6)
단계를 완료한 후에 다음의 권장 실 장력 설정으로
재봉기를 조정하세요.
윗루퍼 실 장력 1-4
아랫루퍼 실 장력 5-7
오른쪽 바늘 실 장력 4
장력은 사용하는 천과 실에 따라 아주 약간 다를
수 있습니다.
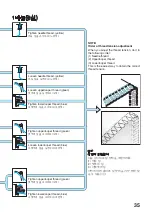
좁은 오버로크 스티치
천의 단 마감에 사용되는 장식 재봉입니다. 위의
(1) ~ (6) 단계를 완료한 후에 일반 3실 오버로크
스티치용으로 실 장력을 조절하세요.
권장 실 장력 설정은 다음과 같습니다.
모든 실 장력을 4로 설정합니다.
장력은 사용하는 천과 실에 따라 아주 약간 다를
수 있습니다.
(6) Adjust the stitch length.
Set the stitch length adjustment lever to “R” position
as shown in the illustration. This adjustment is
suitable for either Narrow Overlock stitch or Rolled
Edge stitch.
To Do Rolled Edge Stitch
This application rolls the edge of the fabric inside of
the hem stitch. The lowerlooper tension should be
tightened. This pulls the upperlooper thread causing
the edge of the fabric to fold around the remaining
stitch finger. After completing steps (1) through (6)
above, adjust your machine to these recommended
thread tension settings:
Upperlooper thread tension at 1-4
Lowerlooper thread tension at 5-7
Right needle thread tension at 4
Tension may vary slightly according to the fabric
and thread used.
To Do Narrow Overlock Stitch
This is a decorative application used for finishing the
edge of the fabric. After completing steps (1) through
(6) above, adjust the thread tension to achieve a
normal 3-thread overlock stitch.
Recommended thread tension settings are:
All thread tensions should be set at 4
Tension may vary slightly according to the fabric
and thread used.
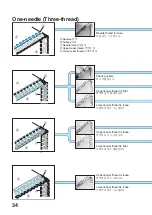
2
R
4
3
Summary of Contents for 2034D
Page 2: ......
Page 11: ...3 ...
Page 33: ...25 2 3 4 5 6 7 2 1 2 3 6 7 6 4 5 ...
Page 35: ...27 2 3 5 6 4 7 2 1 2 3 4 3 6 7 6 7 6 4 5 ...
Page 72: ...English Korean 2034D XB2073 001 Printed in Taiwan ...

