53
Flatlock stitching with
blind stitch presser foot
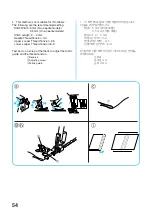
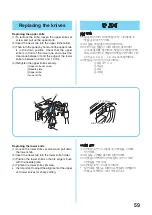
The Flatlock stitch is primarily used as a decorative
finish on a project. The finished stitch can look like
a ladder or small parallel lines when the fabric is
pulled flat. Either stitch finish can be used on the right
side of the fabric. If you sew with the wrong sides
together, the upper looper thread will decorate the
right side when pulled flat. If you sew with the right
sides together, the needle thread ladder will decorate
the right side when pulled flat.
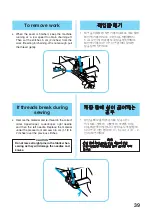
a
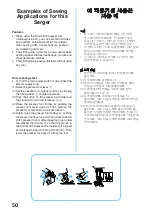
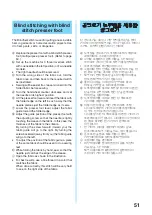
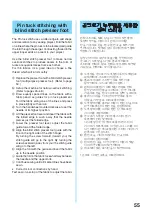
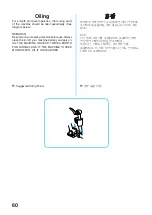
Replace the presser foot with a blind stitch presser
foot (multipurpose presser foot). (Refer to page
50.)
b
Set up the machine for 3 thread overlock with
one needle in the left position (on Two-needle
models).
•
The right needle should be removed.
c
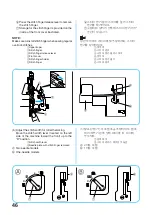
Fold the fabric as shown in the illustration.
d
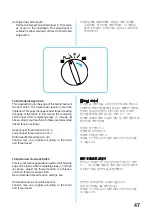
Turn the handwheel counter clockwise to set the
needle at its highest position.
e
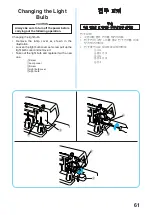
Lift the presser foot lever and insert the fabric with
the folded edge in such a way that the needle
pierces just on the fold.
f
Lower the presser foot lever, adjust the fabric
guide toward the folded edge.
g
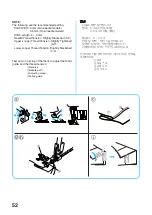
Adjust the guide position of the presser foot with
the adjusting screw so that the needle moves
down to a position 1/8 inch (2.5–3.0 mm) inside
the folded edge of the fabric, so that some of the
stitching loops over the edge.
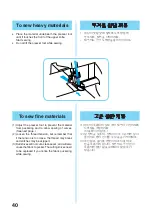
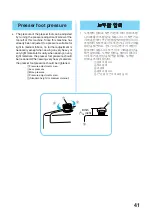
By turning the screw forward (toward you) the
fabric guide will go to the right. By turning the
screw backward (away from you) the fabric guide
will go to the left.
•
To adjust the position of the fabric guide, a piece
of the same fabric can be used to do a sewing
test.
h
While holding the fabric pieces together, sew at
a constant speed down the fold.
i
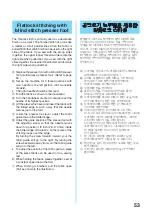
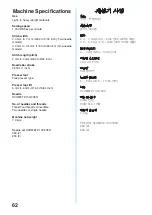
When stiching is finished, pull the fabric open
(flat) as shown in the illustration.
공그르기 노루발을 사용한
플랫로크 스티칭
플랫로크 스티치는 재봉물의 장식 마감에 주로
사용됩니다. 마감된 스티치는 천을 평평하게
당겼을 때 사다리나 작은 평행선처럼 보입니다.
어느 쪽 스티치 마감이든 천의 겉면에 사용할 수
있습니다. 안쪽을 같이 재봉하면 평평하게 당겼을
때 윗루퍼 실이 겉면을 장식합니다. 겉면을 같이
재봉하면 평평하게 당겼을 때 바늘 실이 겉면을
장식합니다.
a
노루발을 공그르기 노루발(다목적 노루발)로
교체하세요. (50 페이지 참조.)
b
(2바늘 모델에서) 왼쪽 바늘을 사용해 3실
오버로크용으로 재봉기를 설정하세요.
•
오른쪽 바늘은 제거해야 합니다.
c
그림처럼 천을 접으세요.
d
풀리 다이얼을 시계 반대 방향으로 돌려
바늘을 가장 높은 위치로 올리세요.
e
노루발 레버를 올리고 바늘이 접힌 곳을 바로
관통하도록 단이 접힌 천을 삽입하세요.
f
노루발 레버를 내리고 접힌 단 쪽으로 천
가이드를 조절하세요.
g
바늘이 천의 접힌 단 안쪽으로 1/8 인치
(2.5–3.0 mm) 위치로 내려가도록 조절 나사로
노루발의 가이드 위치를 조절하세요. 그러면
스티치의 일부가 단을 감게 됩니다.
나사를 앞(사용자 쪽)으로 돌리면 천 가이드가
오른쪽으로 이동합니다. 나사를 뒤(사용자에서
먼 쪽)로 돌리면 천 가이드가 왼쪽으로
이동합니다.
•
천 가이드 위치를 조절하기 위해서 같은
천조각으로 재봉 시험을 할 수 있습니다.
h
접힌 천을 같이 잡고 일정한 속도로 접힌 곳을
재봉하세요.
i
스티칭이 끝나면 그림처럼 천을 (평평하게)
펼치세요.
Summary of Contents for 2034D
Page 2: ......
Page 11: ...3 ...
Page 33: ...25 2 3 4 5 6 7 2 1 2 3 6 7 6 4 5 ...
Page 35: ...27 2 3 5 6 4 7 2 1 2 3 4 3 6 7 6 7 6 4 5 ...
Page 72: ...English Korean 2034D XB2073 001 Printed in Taiwan ...

