


Brillcam Inc. Copyright 2020-2021
Page 34 , Total 83
•
16 Split:
the user can select 16 channels to show simultaneously from the channel 1-16;
Please be noted that on some NVR models, if the user select the multly splits for preview, it
’s
possible to
use the sub-stream of the channel to show. The stream can be automatically switched to main stream if
the user click the select channel to show it as 1 split.
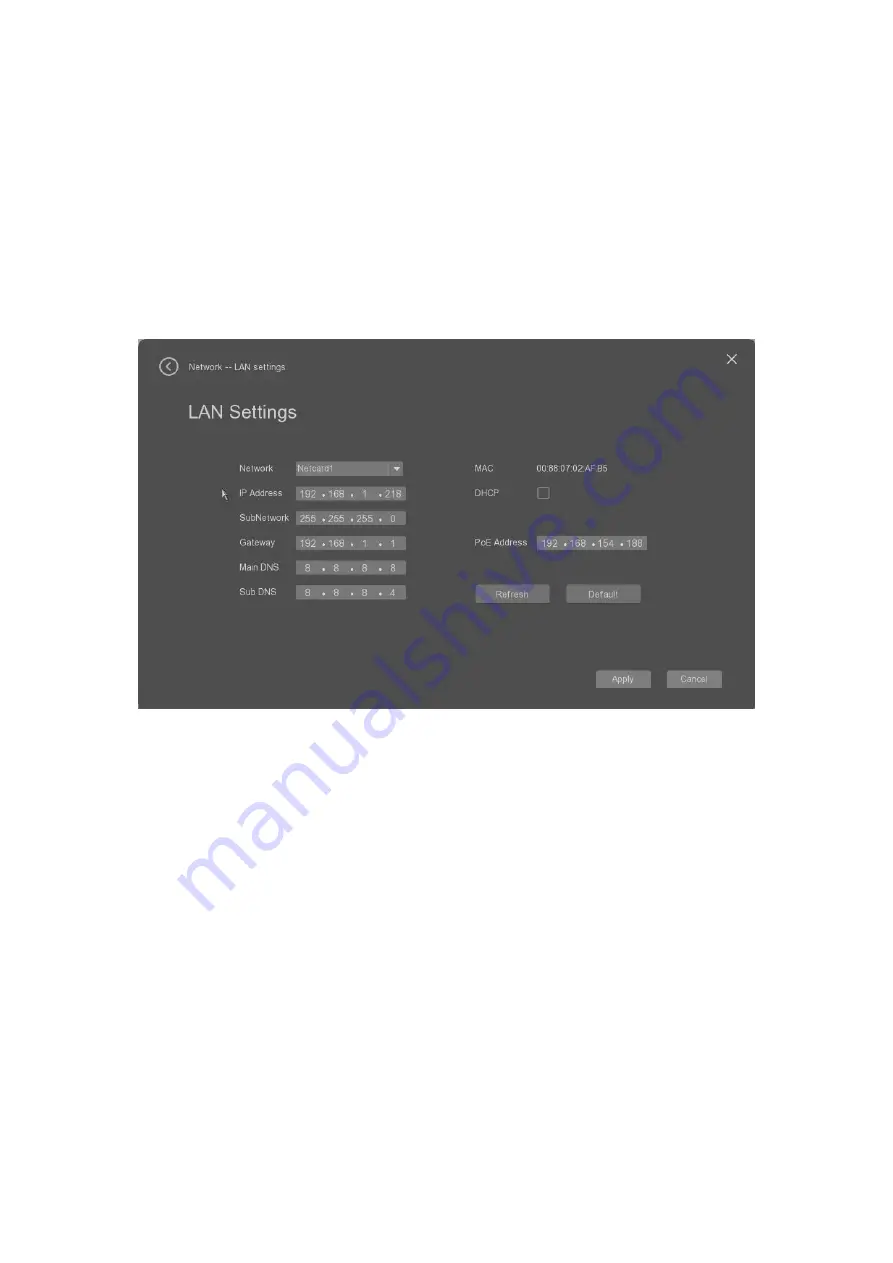
2.8
Network settings
The user can select
“
Wired network
”
to start the quick network settings here as below.
•
Network card
: The default network card 1;
•
IP address
: the user can set the IP address of the NVR, it can be used to access from the web interface,
for example the user can use Internet Explorer to access the NVR remotely.
•
Subnet mask
: the user can set the subnet mask; the default is 255.255.255.0;
•
Gateway
: it allows the user to set the gateway of the network;
•
Main DNS
: it allows the user to set the main DNS address.
•
Sub DNS
: it allows the user to set the sub DNS address.
•
MAC
: it shows the MAC address of the NVR to the user.
•
DHCP
:
The user can check it to enable the NVR to use DHCP mode to get the IP address from the router
automatically.
•
PoE Address
: It allows the user to change the starting IP address of the PoE port. It
’s only
applied for
the NVR with PoE ports built-in.
Refresh
: click to refresh the new settings;
Default
: click it to restore all parameters to the default settings;
Apply:
it allows the user to save the settings.
Cancel::
it allows the user to give up the settings.