1 695 655 779
2010-11-9
|
Robert Bosch GmbH
Standard calibration | WBE 4140 | ��
en
2.
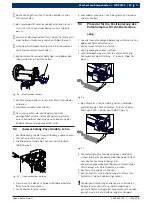
Move the slides with distance A and width B to
standby position and press <
OK
>.
A
B
651046-11
3.
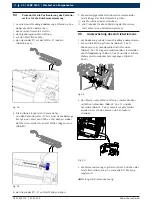
Move the reading cursor of distance 0 mm. Set the
value read and press <
OK
>.
4.
Move the cursor of distance A against the interior of
the flange. Measure and set the value read and press
<
OK
>.
651046-12
5.
Keeping the distance A cursor in standby, move the
cursor of width B width against the external part of
the flange and press <
OK
>.
651046-13
6.
Assemble the width calibration pin on the external
part of the flange. Move the width cursor against the
end of the pin and press <
OK
>.
651046-14_Mi
7.
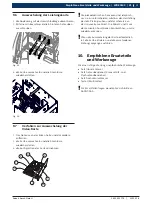
Remove the pin and assemble a 14'' or 15'' steel
sample wheel using the relevant hold-down nut.
651046-15_Mi
8.
Set the wheel measurements and, with the distance
reading cursor resting on the wheel itself, press
<
OK
>.
651046-16_Mi
Procedure completed.
!
Valid procedure with updated SW 6.16 version,
otherwise proceed with the software upgrade.

