
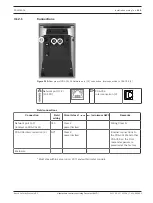


PRAESENSA
Installation wiring | en
115
Bosch Security Systems B.V.
Underwriters Laboratories Listing Document (ULLD)
2021.12.21 | V0.15b | F.01U.402.882
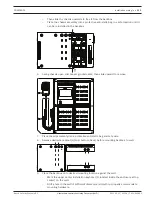
–
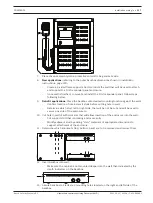
If labels and/or button caps need to be installed, it is possible easier to do before re-
attach the chassis to the backbox. See
Labeling, page 94 and/or Mounting a button
–
Slide chassis assembly over mounting pins in backbox.
–
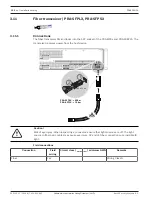
Connect two network cables to the PRA-CSLW. See
–
Provide strain relief of network cables using cable ties secured to the back of the
backbox.
–
IMPORTANT
: Re-install the ground cable.
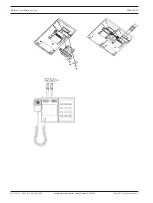
14. Secure chassis assembly to backbox using two wingnuts removed in step 4.
15. Replace and secure outer plexiglass door:
–
Slide outer plexiglass door over hinges on left side of the backbox.
–
IMPORTANT
: Re‑install the ground cable.
–
Close door, lock by turning key counter clockwise 90 degrees.
–
Remove key.
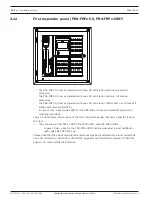
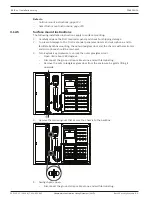
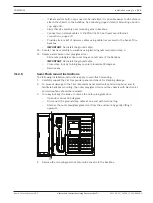
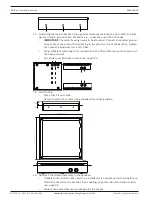
3.12.6
Semi-Flush mount instructions
The following installation instructions apply to semi‑flush mounting:
1.
Carefully unpack the First responder panel and check for shipping damage.
2.
To prevent damage to the First responder panel electronics and microphone, and to
facilitate backbox mounting, the outer plexiglass door and the chassis with electronics
and microphone should be removed.
3.
Turn keylock key clockwise to unlock the outer plexiglass door:
–
Open door about 180 degrees.
–
Disconnect the ground strap cable at one end with terminal lug.
–
Remove the outer plexiglass glass door from the enclosure by gently lifting it
upwards.
4.
Remove the two wingnuts that secure the chassis to the backbox.