49
EN
4.2 Remote control
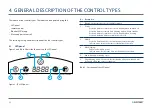
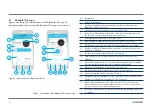
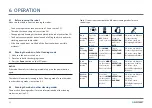
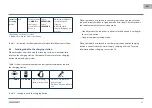
Figure 3 and Table 6 describe the items on the remote control.
Figure 3 - The remote control
No. Description
1
Display: Shows time, date, modes and information.
2
HOME: Press this button and the robot will start automatic charging.
3
ON/OFF:
• Press this button to switch the robot to Standby when switched off.
• Press this button to start in Auto Cleaning mode when in Standby.
• Press this button to switch the robot to Standby when cleaning.
4
Direction buttons:
• In standby mode: move the robot forward, backward, turn left or turn
right.
• In Clock mode: increase or decrease the time and date while setting
time or scheduling.
5
Max: Enhance the suction power.
6
Clock Setting : Press this button to set the time.
7
Mode Cleaning: Switch between different cleaning modes
• MODE 1: Edge Cleaning mode: the robot will start cleaning along the
walls.
• MODE 2: Area Cleaning mode: the robot will start cleaning 2 m² in a
zigzag pattern. After cleaning that 2 m² area, it will stop.
• MODE 3: Random Cleaning mode: the robot will start to clean the area
randomly.
• MODE 4: Intensive Cleaning mode: the robot will clean the same area
twice (areas with less than 40 m²).
• MODE 5: the robot will stop the cleaning cycle and go to standby.
(There is no “MODE 5” displayed on the remote LCD panel).
8
PLAN: Schedule a cleaning cycle.
Table 6 - Description of the remote control items
ON/OFF
PLAN
HOME
MODE
CLK
MAX
1
8
7
2
3
4
5
6

