23
5.4
Working with the machine
Make sure the drum is off the surface and the machine is levelled.
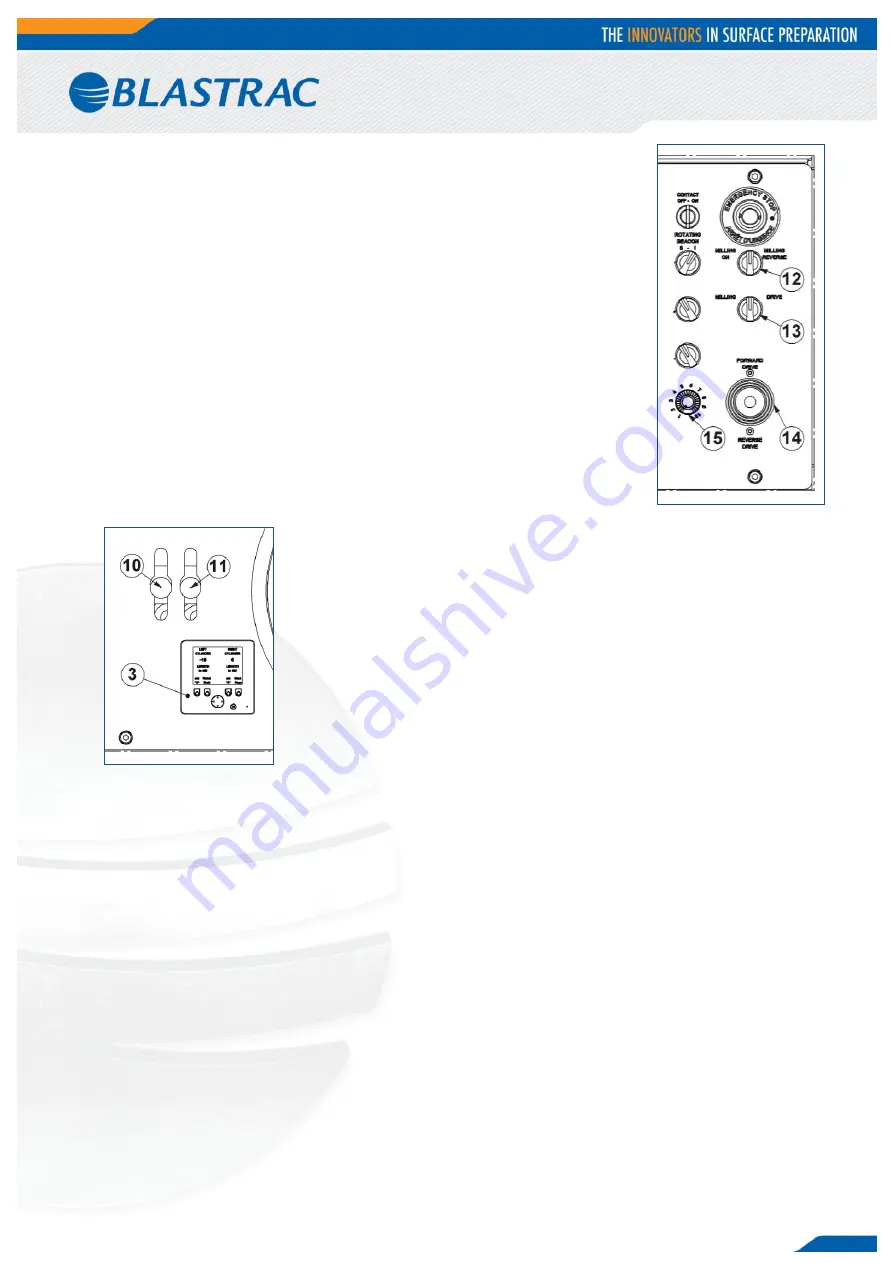
Turn switch (13) from “Drive” to “Milling”.
Turn switch (12) to “Milling ON”
and wait for a few seconds to start up the drum
Set the “Speed” button (15) on “1”
o
The “Speed” button helps you to set the maximum speed.
1 is a low maximum speed and 9 is high maximum speed.
Lower the machine carefully with both handles (10) & (11)
make sure the machine stays in a levelled position.
Lower the machine until you hear the picks hitting the floor. Make sure
the machine is levelled.
Push the left “Set 0” button on the display (3) to set the height of the
left cylinder to 0.
(If you also have the measuring system on the right cylinder you also
push the right button “Set 0”
Now lower the machine slowly to the essential depth, use both handles
(10) & (11) to keep the machine levelled.
o
Don’t try to take away to much in one pass, it is better to do more passes.
If the depth is set, push the joystick slowly to the front.
The right side of the machine is in the same line as the pattern of the drum, so you can follow this line
to have a good milling pattern with having just a very small overlay with your previous line.
If the driving speed is too low, you can set the “Speed” button(15) to 2, 3 or even higher.
If you are almost at the end of your milling line, lower the driving speed.
At the end of your line, stop driving and lift the machine with both handles (10) & (11) so the drum is
lifted from the surface.
Stop the drum by turning the “Milling” switch (12) to the middle position.
If you can drive forward, you drive with the joystick.
If you want to go backwards, you first have to change switch (13) from “Milling” to “Drive”.
o
This is always the best and safest way to drive with the machine.


