


116
1.877.877.2269
BLACKBOX.COM
NEED HELP?
LEAVE THE TECH TO US
LIVE 24/7
TECHNICAL
SUPPORT
1.877.877.2269
CHAPTER 2: CONFIGURATION
Adding a New Private VLAN: Click Add New Private VLAN to add a new private VLAN ID. An empty row is added to the table, and the
private VLAN can be configured as needed. The allowed range for a private VLAN ID is the same as the switch port number range. Any
values outside this range are not accepted, and a warning message appears. Click “OK” to discard the incorrect entry, or click “Cancel”
to return to the editing and make a correction.
The Private VLAN is enabled when you click “Save”.
The Delete button can be used to undo the addition of new Private VLANs.
2.15.2 PORT ISOLATION
The Private VLAN membership configurations for the switch can be monitored and modified here. Private VLANs can be added or
deleted here. Port members of each Private VLAN can be added or removed here.
Private VLANs are based on the source port mask, and there are no connections to VLANs. This means that VLAN IDs and Private
VLAN IDs can be identical.
A port must be a member of both a VLAN and a Private VLAN to be able to forward packets. By default, all ports are VLAN unaware
and members of VLAN 1 and Private VLAN 1.
A VLAN unaware port can only be a member of one VLAN, but it can be a member of multiple Private VLANs.
WEB INTERFACE
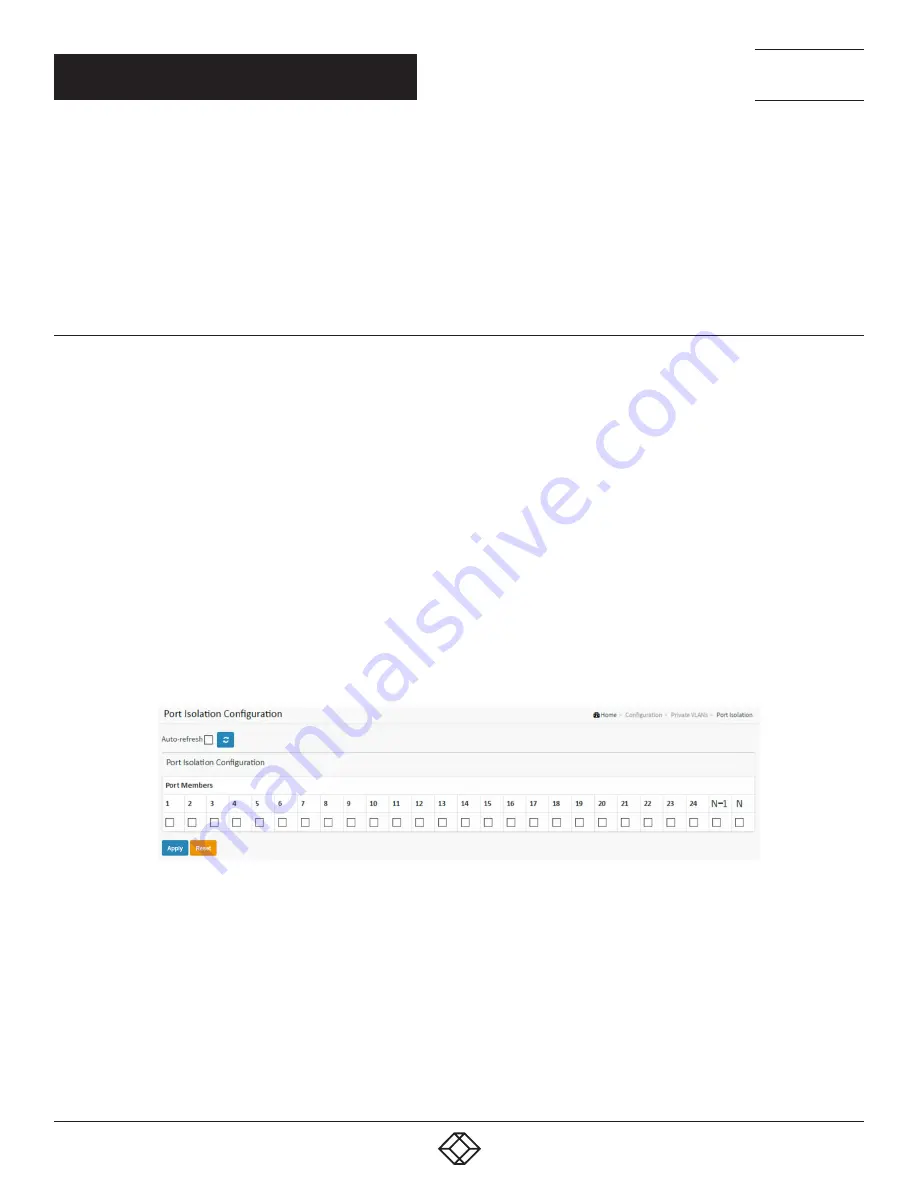
To configure Port Isolation Configuration in the web interface:
1. Click Configuration, Private VLAN and Port Isolation.
2. Select Port Isolation Configuration.
3. Click the Apply to save the setting.
4. If you want to cancel the setting, then you need to click the Reset button. It will revert to previously saved values.
FIGURE 2-67. PORT ISOLATION CONFIGURATION SCREEN
PARAMETER DESCRIPTION
Port Members: A check box is provided for each port of a private VLAN. When checked, port isolation is enabled on that port. When
unchecked, port isolation is disabled on that port. By default, port isolation is disabled on all ports.
Buttons
Apply: Click to save changes.
Reset: Click to undo any changes made locally and revert to previously saved values.
Auto-refresh: Check this box to refresh the page automatically. Automatic refresh occurs every 3 seconds.
Refresh: Click to refresh the page immediately.


