


68
Subnet Mask:
the default Subnet mask on the router.
Enable IGMP Snooping:
Enable or disable the IGMP Snooping function. Without IGMP snooping,
multicast traffic is treated in the same manner as broadcast traffic - that is, it is forwarded to all
ports. With IGMP snooping, multicast traffic of a group is only forwarded to ports that have
members of that group.”
When enabled, you will see two modes:
L
Standard Mode:
In standard mode, multicast traffic will flood to all bridge ports when no
client subscribes to a multicast group.
L
Blocking Mode:
In blocking mode, the multicast data will be blocked when there are no
client subscribes to a multicast group, it won’t flood to the bridge ports.
Enable LAN Side Firewall:
Blocking all service on the LAN side. After activating it, the user on the
LAN side can't access CPE any more. But, you still can enjoy the internet service on the LAN side.
But
Note
that by default the remote access (HTTP service in WAN side, you can go to
Service
to
enable remote access service) is disabled, thus if you enable LAN Side Firewall, then in this case,
you can have no access to manage this CPE through both LAN and WAN, the only method you
can adopt is to restore the CPE to default setting.
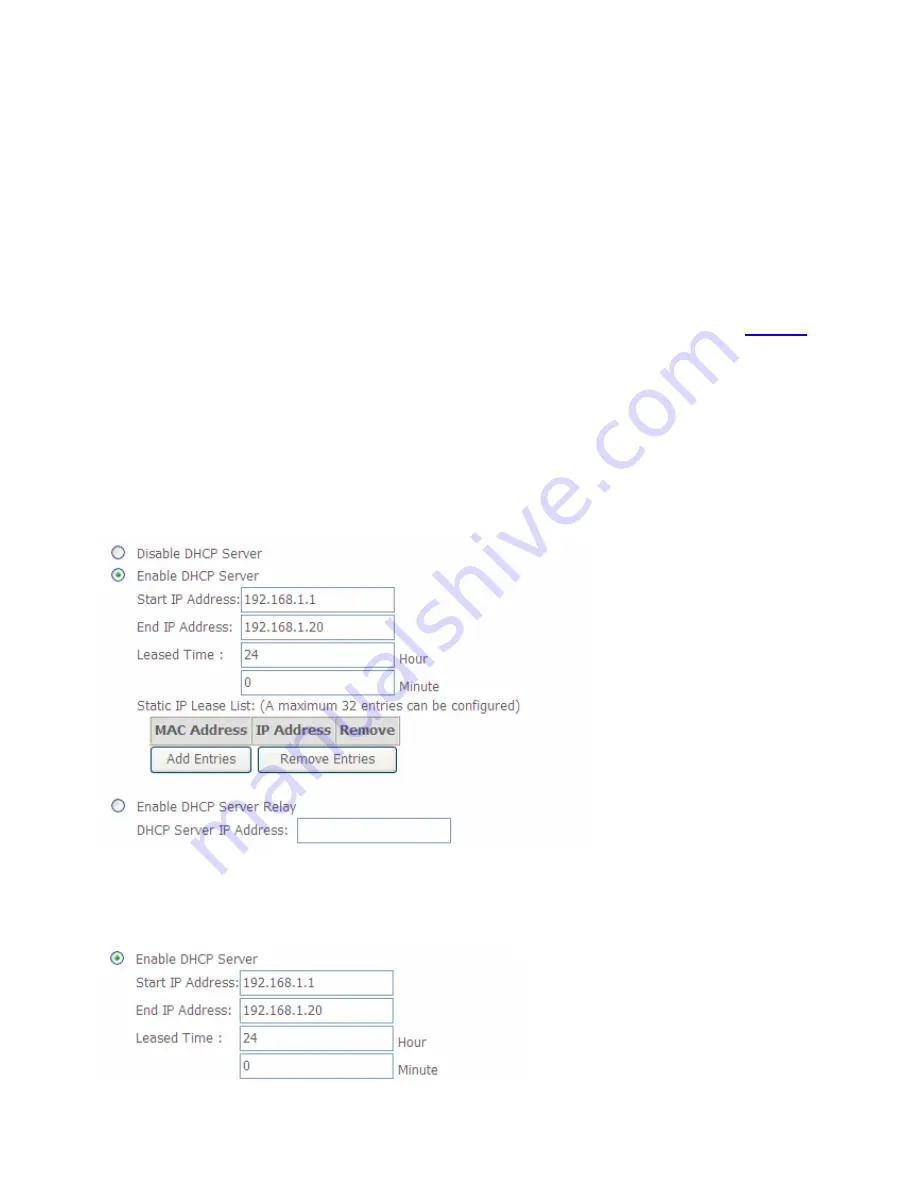
DHCP Server
You can disable or enable the DHCP (Dynamic Host Configuration Protocol) server or enable the
router’s DHCP relay functions. The DHCP protocol allows your router to dynamically assign IP
addresses to PCs on your network if they are configured to obtain IP addresses automatically.
L
Disable DHCP Server:
Disable the DHCP Server function.
L
Enable DHCP Server:
Enable the DHCP function, enter the information wanted. Here as
default.
Start IP Address:
the start IP address of the range the DHCP Server used to assign to the Clients.
Summary of Contents for BiPAC 7700N
Page 11: ...8 Important note for using this router ...
Page 16: ...13 Connecting Your Router Users can connect the ADSL2 router as follows ...
Page 41: ...38 Reset Click this button to reset the statistics ...
Page 54: ...51 Click Next to go on to set DNS Server ...
Page 60: ...57 Click Next to go on to set DNS ...
Page 65: ...62 Click Next to set the default gateway of this connection Click Next to set the DNS ...
Page 100: ...97 3 Click Apply to save your settings The added rule will be listed as below ...
Page 133: ...130 ...
Page 143: ...140 If you need not the rules check the remove checkbox and press Remove to delete it ...


