


155
TR- 069 Client
TR-069 (short for Technical Report 069) is a DSL Forum (which was later renamed as Broadband
Forum) technical specification entitled CPE WAN Management Protocol (CWMP). It defines an
application layer protocol for remote management of end-user devices. It defines an application layer
protocol for remote management of end-user devices.
As a bidirectional SOAP/HTTP based protocol it can provides the communication between customer
premises equipment (CPE) and Auto Configuration Server (ACS). It includes both a safe
configuration and the control of other CPE management functions within an integrated framework. In
the course of the booming broadband market, the number of different internet access possibilities
grew as well (e.g. modems, routers, gateways, set-top box, VoIP-phones).At the same time the
configuration of this equipment became more complicated –too complicated for end-users. For this
reason, TR-069 was developed. It provides the possibility of auto configuration of the access types.
Using TR-069 the terminals can get in contact with the Auto Configuration Servers (ACS) and
establish the configuration automatically and let ACS configure CPE automatically.
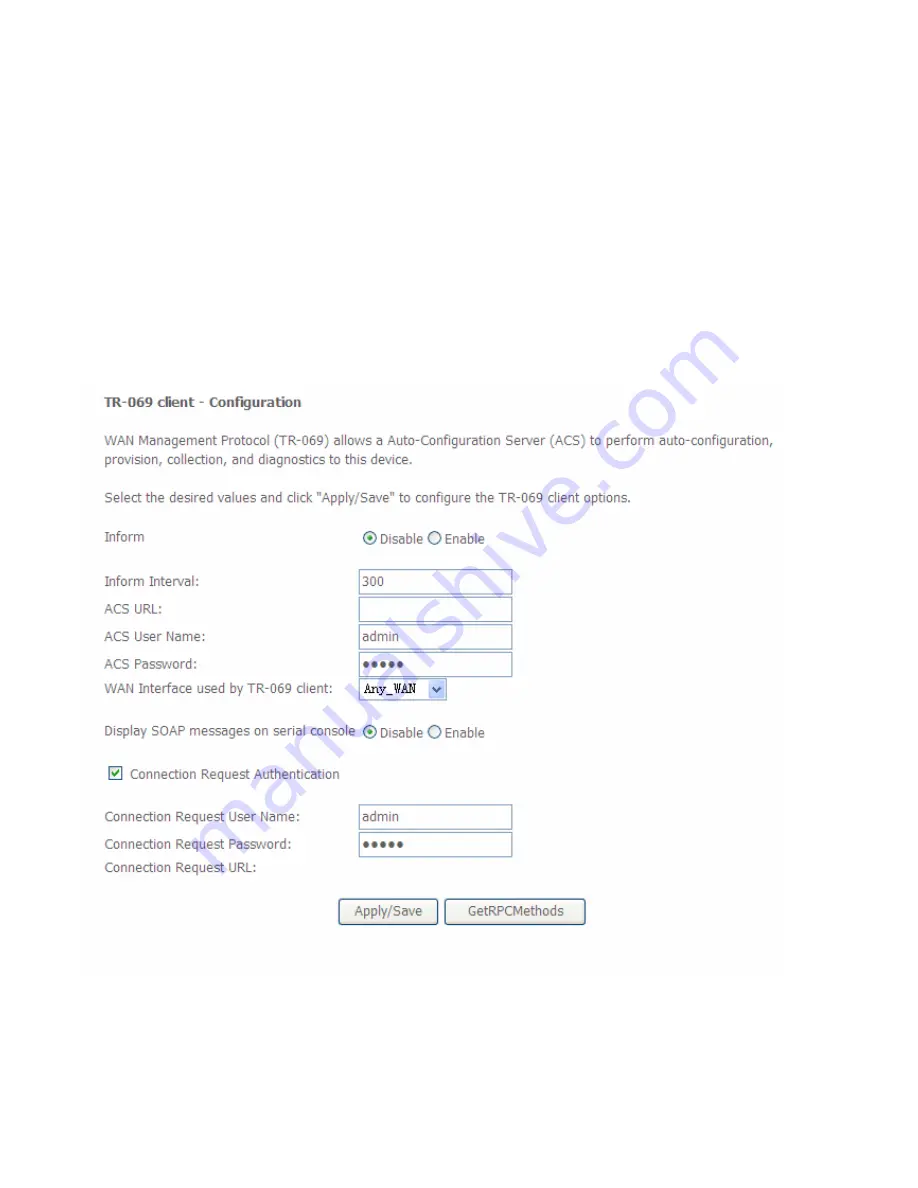
Inform:
select enable to let CPE be authorized to send Inform message to automatically connect to
ACS.
Inform Interval:
Specify the inform interval time (sec) which CPE used to periodically send inform
message to automatically connect to ACS. When the inform interval time arrives, the CPE will send
inform message to automatically connect to ACS.
ACS URL:
Enter the ACS server login name.
Summary of Contents for BiPAC 7700N
Page 11: ...8 Important note for using this router ...
Page 16: ...13 Connecting Your Router Users can connect the ADSL2 router as follows ...
Page 41: ...38 Reset Click this button to reset the statistics ...
Page 54: ...51 Click Next to go on to set DNS Server ...
Page 60: ...57 Click Next to go on to set DNS ...
Page 65: ...62 Click Next to set the default gateway of this connection Click Next to set the DNS ...
Page 100: ...97 3 Click Apply to save your settings The added rule will be listed as below ...
Page 133: ...130 ...
Page 143: ...140 If you need not the rules check the remove checkbox and press Remove to delete it ...


