51
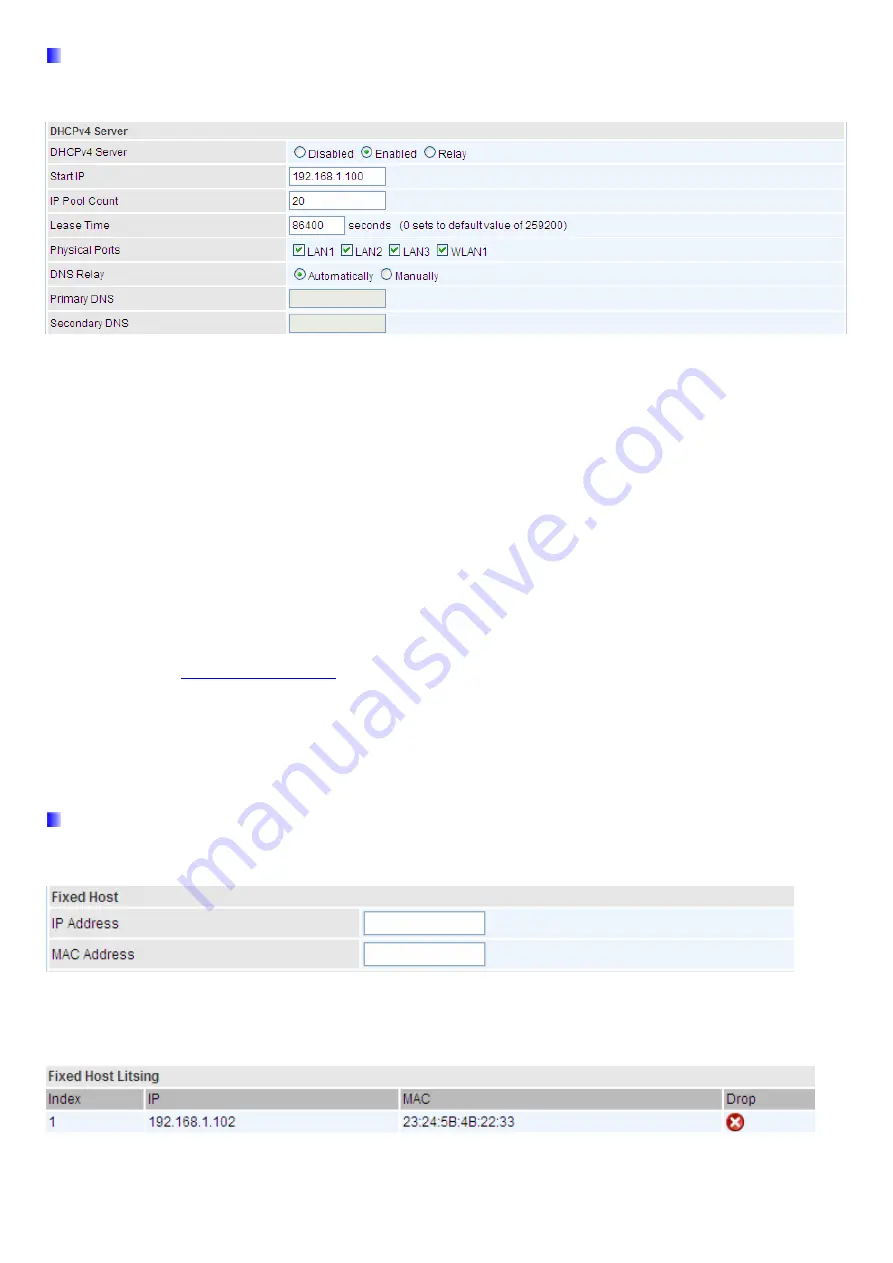
DHCPv4 Server
DHCP (Dynamic Host Configuration Protocol) allows individual clients to obtain TCP/IP configuration at start-up
from a server.
DHCPv4 Server:
If set to
Enabled
, your BIPAC 6300VNOZ can assign IP addresses, default gateway and DNS
servers to the DHCP client.
If set to
Disabled
, the DHCP server will be disabled.
If set to
Relay
, the BIPAC 6300VNOZ acts as a surrogate DHCP server and relays DHCP requests and
responses between the remote server and the clients. Enter the IP address of the actual, remote DHCP
server in the Remote DHCP Server field in this case.
When DHCP is used, the following items need to be set.
Start IP:
This field specifies the first of the contiguous addresses in the IP address pool.
IP Pool Count:
This field specifies the count of the IP address pool.
Lease Time:
The current lease time of client.
Physical Ports:
Select to determine if the DHCPv4 server is applicable to the specific port or ports. By default,
all ports can obtain local IP from DHCPv4 server.
DNS Relay
Select Automatically obtained or Manually set (if selected. Please set the exactly information). If you
set Static IP in the
field, then select Manually here and set the specific DNS information.
Primary DNS Server:
Enter the IP addresses of the DNS servers. The DNS servers are passed to the DHCP
clients along with the IP address and the subnet mask.
Secondary DNS Server:
Enter the IP addresses of the DNS servers. The DNS servers are passed to the
DHCP clients along with the IP address and the subnet mask.
Fixed Host
In this field, users can map the specific IP (must in the DHCP IP pool) for some specific MAC, and this
information can be listed in the following table.
IP Address:
Enter the specific IP. For example: 192.168.1.110.
MAC Address:
Enter the responding MAC. For example: 00:0A:F7:45:6D:ED
When added, you can see the ones listed as showed below:
Summary of Contents for BiPAC 6300VNOZ
Page 37: ...31 4 2 1 Device Info Users will see device s basic information in this page EWAN...
Page 47: ...41 Step3 Set your wireless connection Click NEXT to continue...
Page 49: ...43 Switch to Status Device Info to view the status...
Page 64: ...58 PIN Method Configure AP as Enrollee 1 Jot down the WPS PIN eg 03454435 Press Start WPS...


