background image

BGS technic KG

Bandwirkerstr. 3

D-42929 Wermelskirchen

Tel.: 02196 720480

Fax.: 02196 7204820

[email protected]

www.bgstechnic.com

© BGS technic KG, Copying and further use not allowed

2.4.2     ELECTROMAGNETIC EFFECTS 


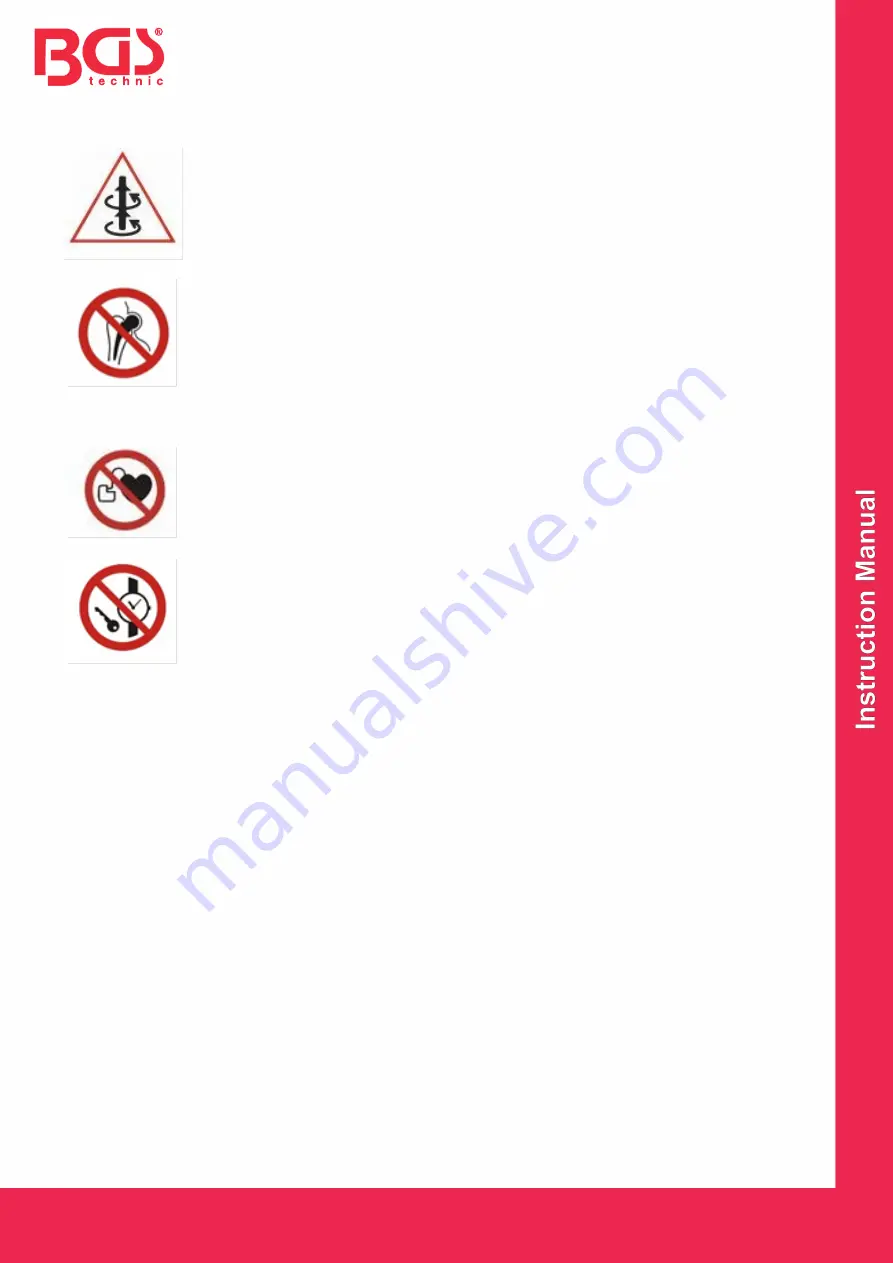
The electromagnetic field (EMF) may affect implanted medical devices. The 
device is not intended to be used by users of cardiac pacemakers or other 
implanted medical devices. 
 
While working, maintain a safe distance between body parts and the heated 
inductor, as specified in its instructions for use.   
 
Short-term tissue exposure to high-intensity time-variable magnetic field may lead 
to tissue warming by the induced current. 
 
Long-term exposure to high-intensity time-variable magnetic field may lead to:   
-undesirable effects on nerve activity 
-fatigue 
-headaches 
-blood cell production disorders 


ELECTROMAGNETIC EFFECTS 


Persons with other metallic or electronic surgical implants are not allowed to work 
with the device and have to keep a safe distance of at least 1 m from the device.  
 
When working with the device, do not wear any metal objects such as jewels, 
rings, watches, necklaces, identification plates, belt buckles, piercing or clothes 
with metal components such as metal rivets, buttons, zip fasteners, etc..  
 
The device can heat these metal objects very fast and thus cause serious burns 
or even ignition of clothes! 

! Users of these devices should immediately consult their medical doctor to avoid potential troubles 
connected with them while handling the device. 
 

INSPECTION AND MAINTENACE


Scheduling device maintenance has to consider the degree and circumstances of device use. 
Considerate use and preventive maintenance help prevent needless defects and malfunctions. 
Perform checks as per standards and law in force. Only workers with adequate electrical engineering 
qualifications may carry out any jobs on the device. 


WARNING! 

Any handling of the power supply, including maintenance, requires its disconnection from the power 
line. To prevent injuries, always disconnect the power cable and wait at least 2 minutes before 
removing the casing. Discharge the capacitor circuits before any further work.   


Periodic maintenance includes cleaning the device every half a year: 

1.  Disconnect the device plug from the socket and wait about 2 minutes (the capacitors inside the 

device will discharge). Then remove the upper device casing.  

2.  Clean all dirty power electric connections and tighten any loose ones. 
3.  Clean the internal device parts (coolers in particular) to remove dust and dirt – for example 

using a soft brush and vacuum cleaner. 

4.  The upper casing has to be earthed – remember to connect the yellow-and-green earthing wire 

before screwing it on. 

5.  After maintenance, carry out safety measurements as per standards in force.  

Note: Never use solvents or thinners (e.g., acetone), because they may damage insulation, plastic 
parts and lettering on the front panel!! 

Summary of Contents for 2170

Page 1: ...or der Inbetriebnahme lesen Sie bitte alle Hinweise in dieser Anleitung sorgfältig durch Für eine optimale und langfristige Nutzung sind alle Gebrauchs und Wartungsanweisungen streng zu befolgen In Ihrem Interesse empfehlen wir die Wartung und eventuelle Reparaturen unserem Servicecenter zu überlassen das über entsprechende Ausstattung und speziell geschultes Personal verfügt Alle unsere Geräte un...

Page 2: ... und Wartung 6 4 Lagerung 7 5 Inbetriebnahme 7 5 1 Auspacken und erste Inbetriebnahme 7 5 2 Nachfüllen der Kühlflüssigkeit 7 6 Austauschbare Aufsätze für Induktive Heizgeräte 7 6 1 Verfahren für den Austausch des Aufsatzes eines Wärmeinduktors 8 7 Über das Gerät und die Aufheizung 8 7 1 Unterstützte Technologien 8 7 2 Betriebsarten der Aufheizung und deren Nutzung 9 7 3 Zeitgesteuerte Aufheizung 9...

Page 3: ... unter 15 Jahren bedient werden sondern von entsprechend geschulten Personen mit entsprechender Qualifikation Verwenden Sie das Gerät nicht unter Einfluss von Drogen Alkohol oder Medikamenten In der Umgebung stehende Personen und Tiere halten Sie während der Arbeit in sicherem Abstand und dies auch während das erhitzte Material abkühlt Vermeiden Sie Arbeiten im Regen Wasser und in feuchter Umgebun...

Page 4: ...ße Oberfläche Verbrennungsgefahr SYMBOL ERLÄUTERUNG ACHTUNG Stromschlaggefahr Brandgefahr Warnung vor elektromagnetischem Feld Kein Zutritt für Personen mit Herzschrittmachern Implantaten aus Metall Mitführen von Metallteilen oder Uhren verboten Augenschutz Atemschutz und Masken Handschutz verwenden 2 3 GESUNDHEITSGEFAHR SYMBOLE 2 3 1 STROMSCHLAG ACHTUNG Niemals Abdeckungen entfernen oder Tätigkei...

Page 5: ...hren Achten Sie auf Brandstellen in der Nähe des Gerätes Halten Sie Brennstoffe von der Arbeitsumgebung fern Platzieren Sie das Gerät nicht auf über oder in die Nähe von brennbaren Oberflächen Das Gerät nicht verwenden wenn sich in der Nähe Gegenstände befinden die brennbare Staubpartikel Gas Dämpfe oder Flüssigkeiten enthalten können Nach der Beendigung der Arbeit überprüfen Sie den Arbeitsbereic...

Page 6: ...ihrem Arzt beraten um Unannehmlichkeiten in Bezug auf den Umgang mit dem Gerät zu vermeiden 3 REGELMÄSSIGE KONTROLLE UND WARTUNG Bei der Planung der Wartung des Gerätes sind das Maß und die Umstände der Nutzung des Gerätes zu berücksichtigen Schonende Verwendung und präventive Wartung helfen unnötige Störungen und Fehlfunktionen zu vermeiden Führen Sie die Kontrollen gemäß geltenden Normen und Ges...

Page 7: ...in die im Lieferumfang enthalten ist 6 Schließen Sie das Gerät an einer Steckdose 230V an und schalten Sie das Gerät mit dem Schalter auf der Rückseite ein 7 Es schaltet automatisch die Entlüftung des Kühlkreislaufes ein während dessen blinkt auf dem Display FIL Der Kühlmittelstand sinkt deutlich während der Füllung 8 Nach Beendigung der Entlüftung schalten Sie das Gerät aus und füllen Sie die Küh...

Page 8: ...igkeit der Verbindung zu prüfen Zeigt das Gerätedisplay die Ausgangsleistung an ist alles in Ordnung Wird eine Meldung A Fr angezeigt wurde die richtige Verbindung auf den Kontaktflächen nicht hergestellt In so einem Fall ist eine sichere Verwendung der Anlage nicht mehr möglich 7 ÜBER DAS GERÄT UND DIE AUFHEIZUNG 7 1 Unterstützte Technologien DHCS3 Heating Control System 3 Technologie die eine ko...

Page 9: ...inge Wärmeverluste insbesondere bei offenen Spulen oder beim Entfernen der Spule vom Material 2 Modus der gesteuerten Leistung CP In diesem Modus versucht die Anlage die eingestellte Wärme oder Energiemenge in das Material zu übergeben und zu halten Der Vorteil ist also die kontrollierte Wärmemenge im Material was in Verbindung mit Zeiteinstellung eine relativ genaue Aufheizung auf gegebene Temper...

Page 10: ...schluss 5 ohne Funktion bei diesem Modell 2 Display 6 Kontrollleuchte Regelung 3 Kontrollleuchte Aufheizung 7 Kontrollleuchte Timer 4 Kontrollleuchte Kühlung Überhitzung 8 Encoder Pos Beschreibung Pos Beschreibung 1 Kühlmittelbehälter Deckel 9 Steuerungskabel 2 Griff 10 Brenner Steuerungstaste 3 USB Anschluss 11 Induktionsaufsatz 4 Display 12 Brennerhalterung 5 Encoder 13 Hauptschalter 6 Belüftung...

Page 11: ... Ist alles in Ordnung geht das Gerät in den Standby Betrieb über 8 3 Standby Betrieb Es handelt sich um einen Bereitschaftsbetrieb in dem man durch ein Drehen des Encoders die gewünschte Wärmeleistung nach gewähltem Modus einstellen kann Modus der gesteuerten Leistung CP die Anzeige leuchtet rot der Anwender stellt die gewünschte Leistung in der maximalen Leistung ein und das Gerät ändert automati...

Page 12: ...en über den Aufheizungsprozess und das Gerät Es erleichtert die Auswahl und Optimierung von Induktionsspulen für das zu erwärmende Material die Beseitigung von eventuellen Problemen usw Wenn Sie Info anzeigen wollen drücken Sie Encoder bis die Anzeige rot leuchtet Durch ein Drehen des Encoders wählen Sie Parameter aus die Sie anzeigen wollen und bestätigen Sie die Auswahl durch ein Drücken der Tas...

Page 13: ...ial und die Aufheizung hat maximale Effizienz Bei niedrigem PF wird in das Material nur ein Teil der Energie übertragen und ein Teil der Energie oszilliert in der Spule PF ist am höchsten mit Fokussier Aufsatz der direkt am Material angelegt wird Mit größerem Abstand vom Material wird PF schnell reduziert Bei offenen Spulen gilt je genauer die Spule am Material sitzt und der Abstand zwischen dem M...

Page 14: ...eige leuchtet grün Nun stellen Sie durch ein Drehen des Encoders den gewünschten Parameterwert ein Die Einstellung bestätigen Sie mit Tastendruck womit Sie zu weiteren Parametern gelangen oder durch das Wählen von gelangen Sie zu weiteren Einstellungen Um sofort zur Leistungseinstellung zurückzukehren drücken Sie Encoder lang Die Anzeige hat folgende Zustände Anzeige Beschreibung rot Parameterwahl...

Page 15: ...llen von Kühlflüssigkeit und Entlüftung Manuelles Einschalten der Entlüftung und Füllen der Kühlflüssigkeit CoL Kühleinstellung Dient zur Auswahl der bevorzugten Kühleinstellung Zur Verfügung stehen folgende Möglichkeiten Lo leiser Betrieb wo der Anwender leise Kühlung bevorzugt und nichts gegen die höhere Temperatur des Griffes hat Geeignet beispielsweise für kleine Werkstätten und Produktionen S...

Page 16: ... A der Gruppe 2 klassifiziert Die Anlage der Klasse A ist eine Anlage geeignet zur Nutzung auf allen Plätzen ausgenommen derjenigen die in Wohnbereiche fallen und derjenigen die direkt an ein Niederspannungsnetz der Stromleitung die Gebäude genutzt zu Wohnzwecken versorgt angeschlossen sind Die Anlagen der Gruppe 2 sind Anlagen in denen die Hochfrequenzenergie in der Frequenzzone 9 kHz bis 400GHz ...

Page 17: ...t Before commissioning please read carefully all the instructions contained in this Manual Instructions for use and maintenance shown herein have to be strictly observed for optimum and lasting use We recommend in your own interest committing maintenance and any repairs to our servicing organisation since it has available the appropriate tools and specially trained staff All our machines and equip...

Page 18: ...tromagnetic effects 6 3 Inspection and maintenace 6 4 Storage 7 5 Activate the device 7 5 1 Unpacking and first start 7 5 2 Coolant refilling 7 6 Replaceable heating inductor extenders 7 6 1 Heating inductor extender replacemant procedure 8 7 About the device and heating 8 7 1 Supported technologies 8 7 2 Heating modes and their application 9 7 3 Time controlled heating 9 8 Device controls 10 8 1 ...

Page 19: ... 15 years properly trained and with adequate qualification can operate the equipment Do not use the equipment when under the influence of drugs alcohol or medication Keep persons standing around and animals at a safe distance while working with the device including while the heated material is cooling down Avoid working in rain water and humid environments Keep the working area well ventilated and...

Page 20: ... Hot surface Risk of burns SYMBOL EXPLANATION CAUTION Risk of electric shock Risk of fire Electromagnetic field risk Do not use cardiac pacemakers implanted devices and watches or other metal objects Always use Predective goggles predective masks and predective gloves 2 3 SYMBOLS INDICATED HEALTH RISKS 2 3 1 ELECTRIC SHOCK CAUTION Never remove casing and do any activity with the induction heater u...

Page 21: ...rns Be careful about fire if the device is kept near one Keep inflammable substances outside the working area Do not put the device on over or near inflammable surfaces Do not use the machine if it is near objects that may contain inflammable particles of dust gas vapour or liquids After completion of work with the device check the area to make sure everything is secure and there is no risk of spa...

Page 22: ...s of these devices should immediately consult their medical doctor to avoid potential troubles connected with them while handling the device 3 INSPECTION AND MAINTENACE Scheduling device maintenance has to consider the degree and circumstances of device use Considerate use and preventive maintenance help prevent needless defects and malfunctions Perform checks as per standards and law in force Onl...

Page 23: ...ttached to the grip by default screw it on 5 Fill the device with the coolant supplied with the device via the filling hole 6 Connect the device to a 230V socket and turn it on using the switch at the back of the device 7 The cooling circuit venting is activated automatically and the letters FIL flash on the display during this The coolant level decreases noticeably during the filling 8 After comp...

Page 24: ...the device without any heating inductor load If the device display shows the output power everything is alright If it shows A Fr the contact between the contact surfaces is incorrect In that case safe use of the device is no longer possible 7 ABOUT THE DEVICE AND HEATING 7 1 Supported technologies DHCS3 Heating Control System 3 Technology enabling controlled heating with multiple pass real time co...

Page 25: ...heating particularly for open coils or when moving focus coil away from material 2 Control power mode CP In this mode the device tries to deliver and maintain the set amount of introduced heat or energy to the material The advantage is thus the controlled amount of heat introduced to the material which combined with timing enables relatively accurate heating to a set temperature e g for repeated p...

Page 26: ... Without function on this model 2 Display 6 Control indicator 3 Heating indicator 7 Timer indicator 4 Cooling and overheating indicator 8 Encoder Pos Description Pos Description 1 Coolant reservoir cap 9 Control cable 2 Handle 10 Induction torch control button 3 USB Connector 11 Induction focus head 4 Display 12 Induction torch holder 5 Encoder 13 Main switch 6 Cooling vents 14 Coolant level indic...

Page 27: ... If everything is in order the device switches to standby 8 3 Standby This is the initial device status which allows turning the encoder to set the desired heating power or temperature depending on the mode selected Controlled power mode CP indicator lamp glows red the user sets the desired heating power in of maximum heating power and the device automatically adjusts the required parameters to ma...

Page 28: ...rogress green flash timer active timeout 8 5 Info Info enables display of basic information about the heating process and the device It thus facilitates selection or optimisation of induction coils for the material to be heated removal of any problems etc If you wish to display Info press the encoder repeatedly until the indicator lamp glows red Turn the encoder to select the parameter to display ...

Page 29: ...of the energy is transmitted into the material and part oscillates in the coil The PF is the highest with a focus adapter applied tightly to a thick material Moving away from the material quickly reduces the PF For open coils the more accurately the coil sits on the material and the smaller the gap between the coil and the material the higher the PF and the more efficient the heating The recommend...

Page 30: ...he indicator lamp glows green Now you can turn the encoder to set the desired parameter value Press the encoder to confirm the setting this will return you to selection of another parameter or select to go to the next setting To exit to power settings immediately press and hold down the encoder The display has the following states Indicator lamp Status red parameter selection green value setting T...

Page 31: ...onstruction industry workshops etc FIL Coolant filling and venting Used for manual activation of venting and coolant filling CoL Cooling settings Used for selecting the preferred cooling mode The following options are available Lo silent mode where the user prefers quieter cooling and does not mind higher grip temperature It is convenient for small workshops and production floors that require sile...

Page 32: ...N 55011 ed 4 2017 The Class A facility is a facility suitable for use in all places other than those in residential areas and those connected directly to a low voltage power line network that supplies buildings used for residential purposes The installations of the group 2 are systems in which the radio frequency energy in the frequency zone 9 kHz to 400GHz is intentionally generated and used 12 D...

Page 33: ......

Reviews: