Network Instructions
1.
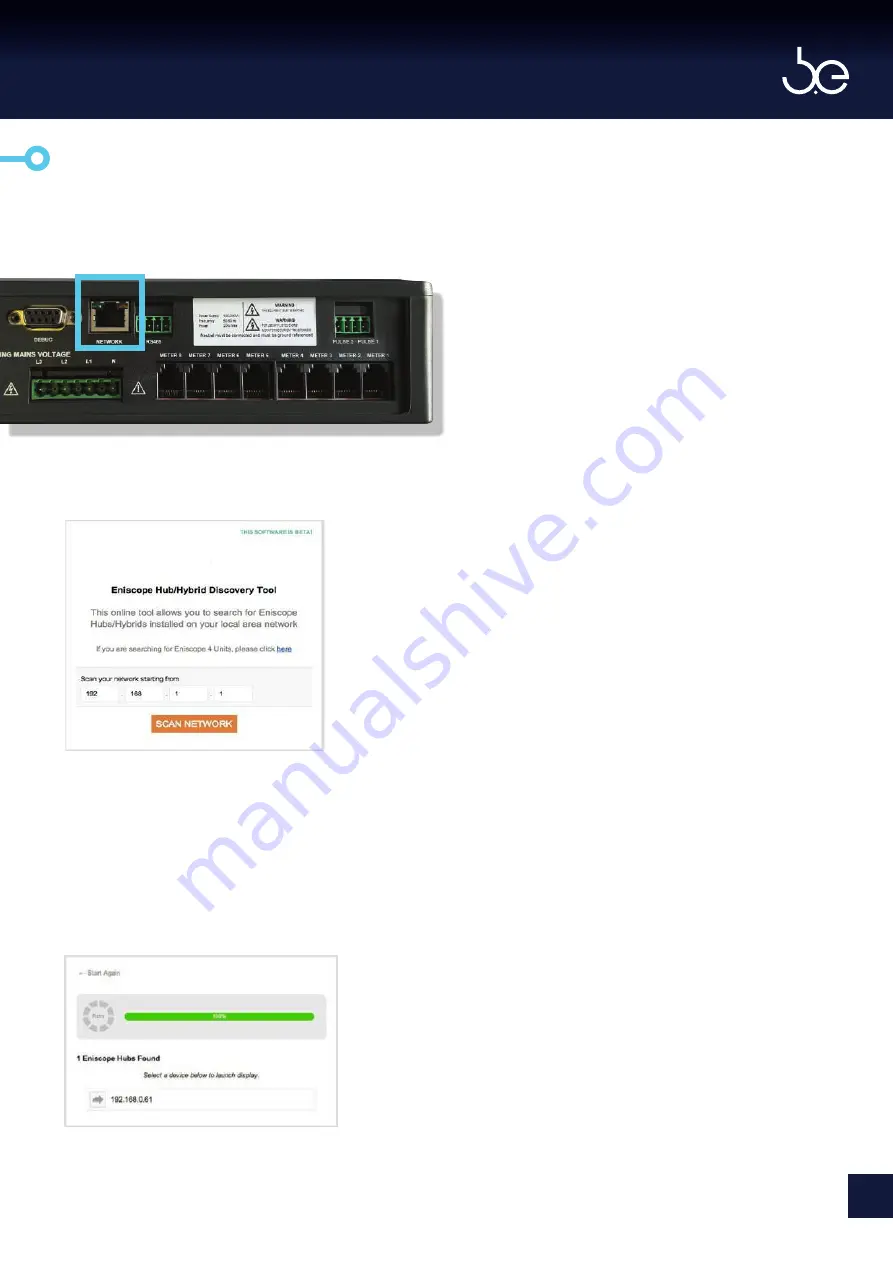
Connect the Eniscope to your Local Area
Network (LAN) via RJ45 connection and cable.
2.
Now use the HUB discovery tool found at
http://discovery.bestsupportdesk.com/
Ensure you enter in the correct network range and
then select scan network. The tool will now search
the network for any Eniscope’s installed that have
been assigned a DHCP address (depending on the
network the Eniscope may take up to 10min to
register).
3.
Once the Eniscope has been found click the
mouse pointer on the IP Address.
Note:
Network Range.
Please ensure the computer you are
using, is on the same network range
as the Eniscope and has Internet
access.
For example, the Eniscope connected by
cable to your network (LAN), might be on
192.168.0.xxx IP range. While your office
computer might be using wireless connection
(WAN) on 192.168.1.xxx IP range.
To find your computer IP Range, speak to your
administrator or refer to the Troubleshooting
section or look at the networking section at
our support desk.
http://help.bestsupportdesk.com
If you are unable to see any
Eniscope listed, please refer to the
‘Troubleshooting’ section of the
manual.
27
[ E N S C O P E H Y B R I D M A N U A L ]


