9
ASSEMBLY
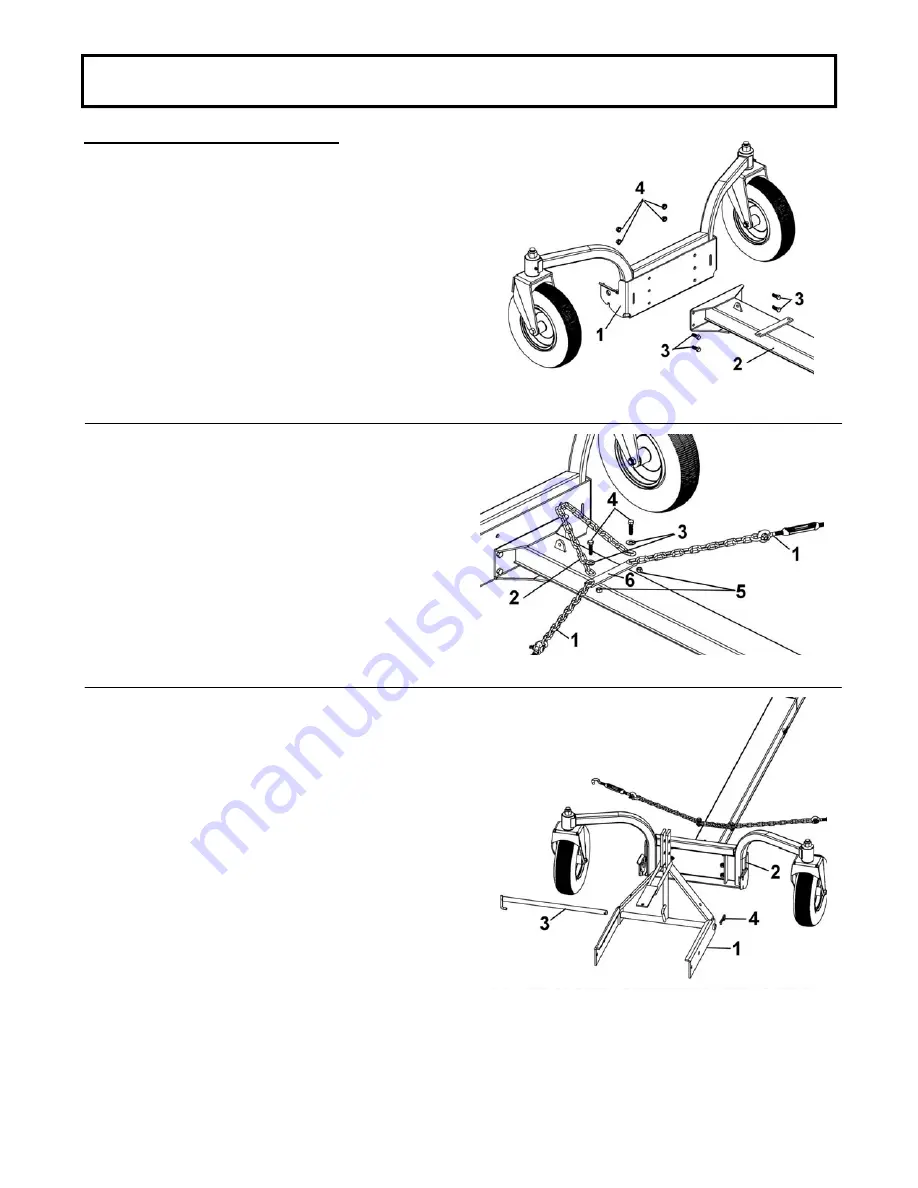
Install the wheel support to the subframe
PREPARING THE SUBFRAME
Assemble the wheel support (item 1) on the subframe
(item 2) with four hex bolts 3/8" x 1" (item 3) and four
flange nuts 3/8" (item 4).
NOTE:
The set of holes used to assemble the wheel
support to the subframe depends on the height of the
vehicle. Once installed the subframe must be parallel
with the ground.
Install the assembled turnbuckles
Install the assembled turnbuckles (item 1) and chain
(item 2) on the bracket (item 6) that is welded on the
subframe (as shown).
Secure the chains with two hex bolts 5/16" x 1" (item
3), two flat washers 3/8" (item 4) and two nylon insert
lock nuts 5/16" (item 5).
Slightly tighten the nuts to allow the parts to move
freely.
Install the snowblower (item 1) to the wheel support
(item 2). Slide the pin (item 3) through the assembly
to hold everything together. Hold the pin in place with
the hair pin 4mm (item 4) as shown.
NOTE:
Make sure the pin is in the locked position.
Install snowblower


