background image

Fernseher / Bedienungsanleitung

41 / 116  TR

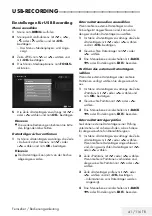
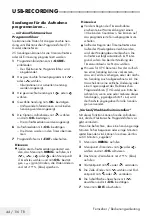
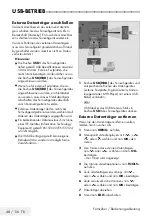
Einstellungen für USB Recording

Menü anwählen

Menü mit »

MENU

« aufrufen.

Menüpunkt »Aufnahmen« mit »

V

«, »

Λ

«, 

»

<

« oder »

>

« wählen und mit »

OK

« 

bestätigen.


–  Das Menü »Medienplayer« wird ange-

zeigt.

Zeile »PVR« mit »

V

« or »

Λ

« wählen und 

mit »

OK

« bestätigen.

Das Menü »Mediaoptionen« mit »

TOOLS

« 

aktivieren.

MedienPlayer > PVR

Channel_1_201548_154649.ts

Dienstag

xx xxx xxxx

Zurück

BACK

Anzeigemodus

Auto 

Auto-Vorschau

Ein

Diaschauintervall

5

Datenträgerverwaltung

Mediaoptionen

Die Zeile »Datenträgerverwaltung« mit »

V

« 

oder »

Λ

« wählen und mit »

OK

« bestätigen.

Hinweis:

7

  Die weitere Bedienung entnehmen Sie bitte 

den folgenden Abschnitten.

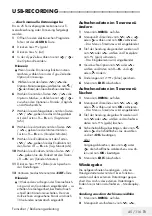
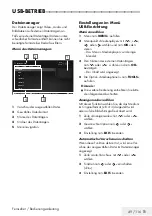
Datenträger sicher entfernen

Im Menü »Datenträgerverwaltung« die Zeile 
»Laufwerk sicher trennen« mit »

V

« oder 

»

Λ

« wählen und mit »

OK

« bestätigen.

Hinweis:

7


Der Datenträger kann jetzt von der Buchse 
abgezogen werden.

USB-RECORDING

 -------------------------------------------------------------------------------------------

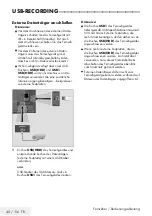
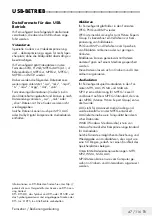
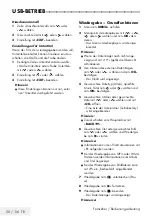
Externe Datenmedien auswählen

Wenn mehrere externe Datenträger an das 
Fernsehgerät angeschlossen sind, können Sie 
den gewünschten Datenträger auswählen.

Im Menü »Datenträgerverwaltung« die Zeile  
»Datenträger« mit »

V

« oder »

Λ

«  wählen 

und mit »

OK

« bestätigen.

Gewünschten Datenträger mit »

V

« oder 

»

Λ

« wählen.

Eine Menüebene zurückschalten mit »

BACK


« oder Einstellung mit »

EXIT

« beenden.

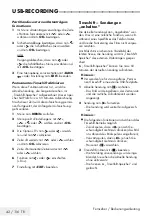
Partition des externen Datenträgers 
wählen

Wenn der externe Datenträger über mehrere 
Partitionen verfügt, wählen Sie die gewünschte 
aus.

Im Menü »Datenträgerverwaltung« die Zeile  
»Partition« mit »

V

« oder »

Λ

« wählen und 

mit »

OK

« bestätigen. 

Gewünschte Partition mit »

V

« oder »

Λ

« 

wählen.

Eine Menüebene zurückschalten mit »

BACK


« oder Einstellung mit »

EXIT

« beenden.

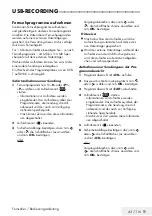
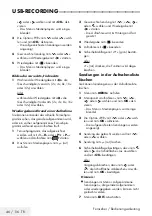
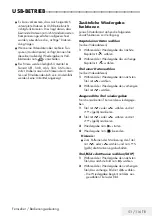
Externe Datenträger prüfen

Sie können externe Datenträger einer Prüfung 
unterziehen und so herausfinden, ob sich diese 
für die gewünschte Funktionalität eignen.

Im Menü »Datenträgerverwaltung« die Zeile 
»Datenträger« mit »

V

« oder »

Λ

« wählen. 

Wenn mehrere Datenträger angeschlossen 
sind, den gewünschten Datenträger mit »

V

« 

oder »

Λ

« wählen.

Zeile »Partition« mit »

V

« oder »

Λ

« wählen. 

Wenn mehrere Partitionen vorhanden sind, 
die gewünschte Partition mit »

V

« oder »

Λ

« 

wählen.

Zeile »Datenträger prüfen« mit »

V

« oder 

»

Λ

« wählen und mit »

OK

« bestätigen.


–  Informationen zum Datenträger werden 

angezeigt.

Eine Menüebene zurückschalten mit »

BACK


« oder Einstellung mit »

EXIT

« beenden.

Summary of Contents for B49L 8840

Page 1: ...Television User Manual TR I EN I DE ...

Page 2: ...nda 18 AYARLAR 18 Ev ağına bağlanma ayarları 18 Televizyon kanallarının ayarlanması 19 İlk kurulum genel bakış 20 İlk kurulumun yapılması 24 Dijital kanallar için Kanal Düzenleyicisi 28 GÖRÜNTÜ SES AYARLARI 28 Görüntü ayarları 30 Ses ayarları 32 TV NİN ÇALIŞMASI TEMEL FONK SİYONLARI 32 Açma ve kapatma 32 Kanalları seçme 32 Kanalları listelerden seçme 32 Sinyal kaynağı seçme 32 Ses seviyesini ayarl...

Page 3: ...rtlar Koşullar ve Gizlilik içeriklerini görüntülemesi ve onayını geri çekmesi 57 SMART inter ctive TV 4 0 internet uygu lamaları 57 USB klavye ve fare 57 Smart İnter ctive TV ye Başlarken 59 Uygulama Portalı Giriş Ekranı 59 Uygulama portalı giriş ekranında gezin me 60 WEB TARAYICISI 60 Web tarayıcısı menüsü 60 Web tarayıcısı uygulaması 61 DİL AYARLARI 61 Menü dilinin değiştirilmesi 61 Ses dilinin ...

Page 4: ...dının Değiştirilmesi 90 Gizli bir ağa televizyonun bağlanması 91 DETAYLI KANAL AYARLARI 91 Uydu bağlantılı tüm dijital televizyon istasyonlarının otomatik olarak aranması 92 Uydu bağlantılı dijital televizyon istasyon larının manuel aranması 93 Dijital uydu kanalları için anten ayarları ve kanalların otomatik aranması 94 Dijital uydu kanalları için anten ayarları ve SCR sistemi ile kanalların otom...

Page 5: ...rüntü ekranda kalırsa ekranda kalıcı izler belirebilir Bu bir garanti talebinde kullanılabilecek bir kusur değildir Arayüz kriterleri Bu ürün Türk Telekominikasyon şebekelerinde kullanıma uygun olarak üretilmiştir Güvenlik UYARI Elektrik kazası riski 7Televizyonun içini açmayın Açılması durumun da güvenlik riski oluşabilir ve ayrıca ürününüz garanti kapsamından çıkar 7 Televizyon yalnızca birlikte...

Page 6: ...tında camdan veya plastikten yapılmış bir levha kullanabilirsiniz Kumaş veya paspas benzeri altlıklar kullan mayın Elektromanyetik gürültü 7 Ürünle bağlantılı olarak kullanılan cihazlar uydu alıcısı DVD oynatıcı vb ya da ürünün yakınındaki yayınım yapan cihazlar modem vb görüntüde parazite ve seste gürültüye neden olabilir 7 Ürün üzerinde kullanılan bağlantı kabloları 3m den küçük olmalıdır 7 Ciha...

Page 7: ...lantı noktasına bağlayabi lirsiniz Dosya tarayıcıyı kullanarak istediğiniz dosya biçimlerini örneğin MP4 MP3 ya da JPEG verileri seçip oynatabilirsiniz 7 Televizyonunuzun Web tarayıcısında kablosuz USB klavye ve mouse desteği ile kullanıcıya internet sayfalarında gezinirken kolaylık sağ lamaktadır GENEL BİLGİLER 7 Zaman kaydırma fonksiyonunu kullanarak bir programı hızlı ve kolay bir şekilde uzakt...

Page 8: ...bilir 7 Tam ekran olmayan görüntülerin sürekli ekran da kalmasını engelleyiniz yayıncı tarafından tam ekran yollanmayan içerikleri görüntü formatlarını değiştirerek tam ekran haline getirebilirsiniz 7 TV nizi yüksek parlaklık ve veya kontrast değerleri ile izlemeniz bu etkinin daha hızlı belirmesine neden olacağından TV nizi mem nun olacağınız en düşük parlaklık ve kontrast seviyesinde izlemeniz ö...

Page 9: ... Manual 1 3 5 4 2 Standart aksesuarlar 1 Televizyon 2 Uzaktan kumanda 3 Uzaktan kumanda için pil 4 Ayak için vidalar ve montaj talimatları 5 Kullanım kılavuzu Opsiyonel aksesuarlar Kullanımı Kolay Uzaktan Kumanda Kullanımı Kolay Uzaktan Kumanda pil Temizleme bezi ...

Page 10: ...lolu TV ağının DVB C dijital istasyon ları için anten kablosunu televizyon seti üzerindeki ANT IN anten girişine takın veya y 2c Analog istasyonlar için anten kablosunu televizyon seti üzerindeki ANT IN girişine takın Not 7 İç mekan antenini bağlarken yayını en iyi şekilde alana kadar anteni farklı konumlar r r da denemeniz gerekebilir 3 Elektrik kablosunu duvardaki prize takın Not 7 Cihazı elektr...

Page 11: ...in yetkili bayii ile görüşün Şunlara ihtiyacınız olacaktır 7 Bir makas 7 Bir yıldız başlı tornavida VESA montaj kiti için montaj talimatlarını izleyin 1 Televizyonu üzerindeki filmi çıkartmadan ekran altta kalacak şekilde düzgün bir yüzeye koyun 2 Makasları kullanarak arka taraftaki filmi keserek açın 3 Gerekli kabloları televizyonun konektörle rine bağlayın Bu kılavuzdaki Bağlantılar bölümüne bak...

Page 12: ...aklanan zarar lardan dolayı üretici sorumluluk kabul etmemektedir Çevre uyarısı 7 Pil veya cihaz ambalajı üzerinde bulunan bu sembol bu cihazla birlikte verilen pilin evsel atık olarak değerlendirilmemesi gerektiğini göstermektedir Bazı piller üzerinde bu sembol kimyasal bir sembolle birlikte kullanılabilir Pillerin içindeki cıva oranı 0 0005 den fazlaysa cıva için HG kimyasal sembolü kurşun oranı...

Page 13: ...Televizyon Kullanma Kılavuzu 13 115 TR GENEL BAKIŞ Televizyon cihazının bağlantıları ...

Page 14: ...esi ile ses kanal azaltın 7 SERVICE Servis amaçlıdır 7 LAN Ağ bağlantısı 7 Optic Out optik ses çıkışı 7 USB HDD Programları kaydetmek için harici bir sabit disk gibi veri medyaları buraya bağlanır 7 HDMI3 ARC Dijital ses ve görüntü verileri için giriş 7 HDMI2 Dijital ses ve görüntü verileri için giriş 7 SATELLITE Uydu anteni sinyal girişi Tek kablolu SCR sistemi için uygundur 7 ANT IN Anten kablos...

Page 15: ... arasında geçiş yapar Uygulama portalını açar Stand by konumundan açar istasyonları adım adım seçer Ses seviyesini ayarlar Bilgi görüntüler Menü ve uygulamalardan çıkar Kanal listesini açar Elektronik TV rehberini açar Televizyonu standby konu mundan açar kanalları doğ rudan seçer Kanal listesini seçer TÜM FAV 1 ila FAV 4 Kaydetme oynatma duraklatma veya durdurma sadece dijital televizyon kanallar...

Page 16: ... yalnızca harici veri ortamı üzerindendir 8 Dosya tarayıcısında oynatmayı baş latır DLNA menüsünde oynatmayı baş latır Durdurma Canlı sinyal sırasında zaman kaydır ması dijital TV modunda yalnızca harici veri ortamı üzerinden DLNA menüsünde oynatılan dosyayı duraklatır 7 Teletekst modunda ekran bölme fonksiyonunu seçer dosya tarayıcısında oynatmayı son landırır PVR modunda kaydı veya oynatmayı son...

Page 17: ...tmektedir Bazı yerlerde sembol kimyasal bir sembol ile birleştirilerek kullanılmış olabilir Piller 0 0005 den fazla civa veya 0 004 den fazla kurşun içeriyorsa civa için Hg kurşun için Pb kim yasal sembolü işaretin altına eklenir Pillerin doğru şekilde atılmasını sağlayarak pillerin uygun olmayan şekilde atılması neticesinde çevre ve insan sağlığında meydana gelebi lecek potansiyel zararların enge...

Page 18: ... WLAN kullanılırken pek çok seçenek vardır Otomatik bağlantı tüm bağlantı ayarları IP Adresi Netmask Gateway ve DNS bilgileri modemden otomatik olarak alınır Yönlendiriciye bağlı olarak aşağıdaki seçe nekleri kullanabilirsiniz Seçenek WPS PBC Basmalı Düğme Yapı landırması Bir WPS PIN ile bağlantı Ağ şifresini girerek bağlanmak Manuel bağlantı tüm bağlantı ayarları IP Adresi Netmask Gateway ve DNS ...

Page 19: ...1 adım 16 Kablosuz WPS bölüm sayfa 86 Oto sayfa 21 adım 12 Manuel Bölüm sayfa 84 Oto sayfa 21 adım 16 Manuel Bölüm sayfa 88 Düğme Bölüm sayfa 86 PIN Bölüm sayfa 86 Kanal Düzenleyici sayfa 24 TV kanalları ayarı sayfa 22 adım 24 DVB T sayfa 23 adım 33 DVB C sayfa 22 adım 28 DVB S sayfa 22 adım 23 Oto sayfa 22 adım 28 Manuel bölüm sayfa 98 Oto sayfa 22 adım 23 Manuel bölüm sayfa 92 Oto sayfa 23 adım ...

Page 20: ...ylayın veya V veya Λ düğmesiyle Arttırılmış seçeneğini seçin ve OK düğmesiyle onay layın Ev Modu EUP ye uygun ve önceden ayarlı enerji tasarrufu sağlayan TV ayarla rını barındırmaktadır AYARLAR Arttırılmış eğer televizyonunuzu bir demo gösterimi amacı ile kullanacaksanız bu modda arttırılmış görüntü ve ses ayar ları kullanılır Arttırılmış modda daha fazla enerji tüketilir 6 V veya Λ düğmesiyle Aya...

Page 21: ...ı açmak istiyor musunuz mesajını veya düğmesiyle Evet seçip OK düğmesiyle onaylayın 17 V veya Λ düğmesiyle Erişim Noktası Seç satırını seçin ve OK düğmesiyle onaylayın Erişim Noktası Seç menüsü görüntülenir ve mevcut kablosuz ağlar taranarak menü de görüntülenir 18 V veya Λ düğmesi ile bağlanmak iste diğiniz ağı seçip OK düğmesine basarak onaylayın Kablosuz bağlantı şifre ekranı görüntüle nir 19 V...

Page 22: ...le Kanal Düzenleyici yi seçin Kablolu dijital televizyon kanallarının ayarlanması DVB C 28 V veya Λ düğmesiyle Kablo seçeneğini seçin ve OK düğmesiyle onaylayın 29 V veya Λ düğmesiyle Standart Mod seçeneğini seçin ve OK düğmesiy le onaylayın 30 V veya Λ düğmesiyle Tarama Tipi satırını seçin veya düğmesiyle Hızlı veya Tam seçeneğini seçin Hızlı tarama fonksiyonu kanalları ya yın sinyalindeki kablo ...

Page 23: ...nı Dijital yalnızca Analog kanallarını mı Analog yoksa ikisini de birden mi Dijital Analog aramak istediğinizi belirlemek için veya düğmesiyle Dijital ve Analog öğelerini seçip işaretlemek veya işareti kaldırmak için OK düğmesine basın 35 Aramaya başlamak için y Kırmızı düğ mesine basın Otomatik Kanal Arama menüsü görünür ve kanal aranmasına başlanır Arama tamamlandı mesajı göründü ğünde tarama ta...

Page 24: ...üyü açın 2 V veya Λ düğmesiyle Ayarlar menüsünü OK ile onaylayın 3 veya düğmesiyle Kaynak öğesini seçip V veya Λ düğmesiyle Kanal Düzenleyici satırını seçin ve OK düğme siyle onaylayın Kanal Düzenleyici menüsü görüntülenir Önemli 7 Tüm kaynaklar için uydu kablo ve anten program tablosu ve favori listeleri ayrı ayrı saklanmaktadır 7 Program tablosu seçildiğinde bulunduğunuz kaynağın program tablosu...

Page 25: ...üğmesiyle OK seçeneğini seçip OK düğmesine basın veya iptal etmek için Hayır seçeneğini seçip OK düğmesine basın 5 Kanal Düzenleyici menüsünden çıkmak için EXIT düğmesine basın Kanal düzenleyicide kanalları farklı kanal konumlara taşıma 1 Kanal Düzenleyici menüsünde taşımak istediğiniz kanal veya kanalları V veya Λ düğmesiyle seçip OK düğmesine basarak televizyon kanalını vurgulayın Kanal ile işar...

Page 26: ...ici de veya ile işaretlidir Aynı kanalı birden fazla favori listesine ekleyebilirsiniz Her favori listesine en fazla 250 kanal eklenebilir AYARLAR Notlar 7 Favori listesinden kanal silebilirsiniz yyy sarı düğmesine basın kanalın bulunduğu favoriler listesini V veya Λ ile seçin ve OK düğmesine basarak onaylayın Silmek istediğiniz kanalı veya kanalları V veya Λ tuşlarıyla seçin ve kanalı OK tuşuna b...

Page 27: ...EXIT düğmesine basın AV kanallarının yeniden adlandırılması AV kaynakları bağladığınız cihaza göre yeni den adlandırabilirsiniz Örneğin TV nin HDMI1 kaynağına HDMI kablosuyla bağladığınız bir bilgisayar için kaynak ismini PC yapabilirsiniz 1 Giriş Kaynağı menüsünü ile açın 2 Adını değiştireceğiniz AV kaynağını veya ile seçin ve yyyy mavi düğme sine basın Yeni İsim menüsü görüntülenir 3 OK düğmesin...

Page 28: ...z olduğunda gerektiğinde kullanılması gerekmek tedir Bunlar aynı zamanda zayıf malzemeli görüntüyü geliştirebilir ancak aktarım ve görüntü kalitesinin kusursuz olduğu görüntüyü olumsuz olarak etkileyebilir 7 Canlı Renk Renk kontrastını ve kontrast ayarını arttırır Bu ayar çoğunlukla normal resimlerle kullanım için çok güçlüdür ve sadece gerekli olursa kullanılmalıdır düşük veya kapalı aksi halde g...

Page 29: ...ı bölgeleri azaltır Dolayısıyla iyi resim malzemesi olduğunda en az düzeyde kullanılmalıdır 7 Dijital Gürültü Azaltımı Bu fonksiyon yalnızca dijital alım kaynaklarıyla ve AV ön ayarlarıyla seçilebilmektedir MPEG sıkış tırmasından kaynaklanan dijital program lardan gelen DVB T alıcılarından ve düşük aktarım oranlarından ya da DVD oynatı cılardan gelenler gibi kusurlardan piksel blokları kaynaklı pa...

Page 30: ...a Λ düğmesiyle Ses Modu satırını seçin 2 veya düğmesiyle Film Doğal Konuşma veya Müzik seçeneğini seçin Gece Modu Gece Modu sesteki dalgalanmaları ve ses sevi yesi yükselmelerini engeller 1 V veya Λ düğmesiyle Gece Modu satırını seçin 2 veya düğmesiyle gece modunu onaylayın Açık veya devre dışı bırakın Notlar 7 Diğer ayarlar Gelişmiş öğesi altında yer almaktadır V veya Λ ile Gelişmiş satırını seçi...

Page 31: ...e seçip ayar işlemini tekrarlayın 5 Ayarı kaydetmek için BACK düğme sine basın Otomatik ses Televizyon kanalları farklı ses seviyelerinde yayınlanır Otomatik Ses Seviyesi Sınırlandırma AVL fonksiyonu kanal değiştirdiğinizde sesin aynı seviyede korunmasını sağlar 1 Ses menüsünden V veya Λ ile Ge lişmiş satırını seçin ve OK düğmesiyle onaylayın 2 V veya Λ düğmesiyle AVL satırını seçin ve ardından ve...

Page 32: ...ital seçeneğini seçmek için veya düğmelerini kullanarak yyyy mavi düğmesine basın ve OK düğmesiyle onaylayın 7 Enerji tasarrufu için Radyo modunda ekra nı kapatabilirsiniz 70 sayfadaki KON FOR FONKSİYONLARI bölümüne bakın Kanalları listelerden seçme Çeşitli listelerden kanal seçebilirsiniz örneğin ALL FAV1 FAV4 1 Favori listesi menüsünü çağırmak için FAV düğmesine basın Favoriler menüsü görüntülen...

Page 33: ...ekteki kanal BBC1 dir ile daha önce izlemekte olduğu nuz kanal arasında geçiş yapabilirsiniz 4 Zap fonksiyonundan çıkmak için EXIT düğmesine basın TV NİN ÇALIŞMASI TEMEL FONKSİYONLAR Tools menüsünde aşağıdaki ayarları bulabi lirsiniz Uyku zamanlayıcısı Uyku Zamanlayıcısı televizyon için bir kapan ma zamanı girebilirsiniz Bu süre sona erdikten sonra televizyon stand by moduna geçer 1 TOOLS düğmesi ...

Page 34: ...ro AV soketinde görüntü doğru geometriye sahip olacak şekilde ekranı tümüyle doldurur 4 3 formatı Görüntü 4 3 formatında gösterilir LetterBox formatı Letterbox ayarı özellikle 16 9 formatındaki programlar için uygundur Genellikle ekranın üst ve altında bulunan siyah kenarlıklar ortadan kaldırılır 4 3 görüntü ekranı doldurur İletilen görüntüler büyütülür ancak üst ve alttan biraz kırpılır Görüntü g...

Page 35: ...ayarını seçin Kullanıcı ses ayarını değiştirebilirsiniz sayfa 31 deki Ekolayzer bölümüne bakın 4 Ayarları sonlandırmak için EXIT düğme sine basın Görüntü ayarları 1 TOOLS düğmesi ile Araçlar menüsünü açın 2 V veya Λ düğmesiyle Resim Modu satırını seçin 3 veya düğmesine basarak görüntü ayarını seçin Not 7 Oyun resim ayarı sadece HDMI mo dunda seçilebilir 4 Ayarları sonlandırmak için EXIT düğme sine...

Page 36: ...r Not 7 7 şerli adımlar halinde kanalları atlamak için P veya P düğmesine basın 3 Mevcut program hakkındaki bilgiye OK düğmesini kullanarak geçiş yapın Notlar 7 Seçilen program kaydedilebilir harici bir veri ortamı bağlıysa Bunu yapmak için OK düğmesiyle detay sayfasına geçip V veya Λ düğmesiyle Kaydet öğesini seçerek OK düğmesiyle onaylayın 7 Seçilen programı hatırlatma zamanlayıcısına eklemek iç...

Page 37: ...V modern yapısı içeriği ve yüksek çözü nürlüklü HD görüntü ve videolarıyla gelecek nesil interaktif teletekst yayını sunmaktadır HbbTV yayını almak için televizyon Internet e bağlı olması gerekir HbbTV hizmeti sunan bir TV kanalına geçilince ilgili mesaj görüntülenir ...

Page 38: ...yle oynatma işlemini durdu run HbbTV nin devre dışı bırakılması ve etkinleştirilmesi Bu özellik ile HbbTV yi kapatabilir böylece HbbTV yayını yapan kanallarda HbbTVm uyarı ları görüntülenmez 1 MENU düğmesiyle menüyü açın 2 ve V Λ düğmesi ile Ayar lar öğesini OK ile onaylayın 3 veya ile Yayın öğesini seçip V düğmesiyle onaylayın Yayın menüsü etkindir 4 V veya Λ ile Gelişmiş öğesini seçin ve OK düğm...

Page 39: ...geçe bilirsiniz 1 1 0 düğmelerini kullanarak teletekst sayfa numarasını girin ve ardından 6 düğmesine basın Sayfa bulunduğunda sayfa numarası görüntülenir 2 Teletekst sayfasına geçmek için 6 düğme sine basın Karakter boyutunu büyütme Ekrandaki metni okumakta zorlanıyorsanız karakter boyutunu iki katına çıkartabilirsiniz 1 Teletekst sayfasının boyutunu büyütmek için 5 düğmesine art arda basın Sayfa...

Page 40: ...e kayıtlarınızı onarılan televizyonda izleyemeyebilirsiniz 7 Beko harici depolama aygıtı üzerinde de polanan veri kaybından sorumlu değildir 7 DTV kaynağında kaydettiğiniz dosyaları PVR medya oynatıcı ile oynatmanız önerilir Harici veri ortamı kullanımında muhtemel kısıtlamalar Yayını yapan istasyona bağlı olarak bazı tele vizyon istasyonlarının çeşitli kısıtlamalar uygula dığını görebilirsiniz Be...

Page 41: ...iyacı olan örneğin harici sabit disk USB aygıt bağla nır 1 Harici sabit diski televizyonun USB HDD USB arayüzüne takın veya y bellek çubuğunu televizyonun USB1 arayü züne takın Notlar 7 USB standardına göre televizyonun USB1 soketi 500 mA lık akımı destekler Harici sabit disk vb gibi daha yüksek güç harcayan cihazlarınızı televizyonun sadece USB HDD USB arayüzüne bağlayabilir r r siniz 7 USB HDD U...

Page 42: ...ile Disk satırını seçin ve OK düğmesine basarak onaylayın 2 V veya Λ düğmesi ile harici veri ortamını seçin OK düğmesine basarak onaylayın 3 BACK düğmesi ile geri dönün veya ayarları sonlandırmak için EXIT düğme sine basın Harici veri ortamında bölüm seçme Harici veri ortamında birkaç bölüm varsa birini seçin 1 Disk Yönetimi menüsünde V veya Λ ile Bölüm satırını seçin ve OK düğmesi ne basarak onay...

Page 43: ...ogramları nın duraklatılması İzlediğiniz bir programı duraklatabilirsiniz Bu kullanışlı bir işlevdir Örneğin bir film seyreder ken telefon çaldı filmi durdurup hiçbir şey kaçır madan kaldığınız yerden devam edebilirsiniz Son sahne freeze frame görüntüsü ekranda görüntülenir ve zaman kaydırma harici veri ortamına kaydedilir Zaman kaydırma modunda harici veri ortamın da bulunan boş hafıza kadar kayı...

Page 44: ...3 veya düğmesiyle Evet sçeneğini seçin veya iptal etmek için Hayır sçeneğini seçip OK düğmesiyle onaylayın Notlar 7 Kaydı bitirdiğiniz zaman otomatik olarak harici veri ortam üzerine depolanır 7 Harici veri ortamı kayıt esnasında çıkarıl ması durumunda kayıt otomatik olarak iptal edilir ve harici veri ortamına kaydedilemez Kanal listesinden bir programı kaydet me 1 OK düğmesine basarak kanal liste...

Page 45: ... verir 10 saniye sonunda kaydedilecek olan kanal otomatik olarak açılır 7 Zamanlayıcı kaydı kayıttan yürütme sıra sında başlarsa kayıttan yürütme durdurulur Uyarı ekranında Evet seçeneği seçilmediği taktirde geri sayım tamamlandığında kayıt otomatik olarak başlar 7 Sadece UPC müşterileri için Not Bir program kaydedilirken muhtemel Program Kılavuzu hataları dolayısıyla önceki veya sonraki programın...

Page 46: ...için EXIT düğme sine basın Notlar 7 Zamanlayıcı kaydı başlamadan önce bir uyarı iletisi görüntülenir ve 10 saniye geriye sayarak kanala geçmek için fırsat verir 10 saniye sonunda kaydedilecek olan kanal otomatik olarak açılır USB KAYIT Zamanlayıcının düzenlenmesi Programlanmış zamanlayıcıları düzenleyebilir siniz 1 MENU düğmesiyle menüyü açın 2 V Λ veya ile Plan Listesi menü öğesini seçip OK düğme...

Page 47: ... Kayıt işlemi gerçekleştirilirken kaydedilmekte olan mevcut yayını veya daha önce kaydedilmiş olan bir yayını izleyebilirsiniz 1 Kaydı başlatmak için 1 0 veya P P düğmesiyle kanalı seçin ve düğmesine basın 2 PVR içeriğini görüntülemek için y kırmızı düğmesine basın 3 V veya Λ düğmesiyle izlemek istedi ğiniz programı seçin ve 8 düğmesiyle oynatmayı başlatın 4 Oynatmayı sonlandırmak için 7 düğme sin...

Page 48: ... İleri Ses Kodlaması nı belirtir Advanced Audio Coding ve MPEG tarafından geliştirilmiş tir AAC aynı veri oranında bitrate daha yüksek ses kalitesi sunar WMA Windows Media Audio ise Microsoft tarafından geliştirilen ses verileri için bir sıkıştır ma standardıdır Bu formatlar ses dosyalarının CD ses kalitesine benzer kalitede depolama cihazlarına kaydedil mesini sağlar Cihazın desteklediği dosya uz...

Page 49: ...ard diskin de güç kablosu çekilme lidir 7 USB Aygıtından herhangi bir dosya oku nurken USB Aygıtının TV den çıkarılmaması gerekmektedir 7 ITE Bilgi Teknolojisi Donanımları cihazları için EN 55022 EN 55024 te tanımlan dığı üzere iki yönlü veri aktarımı mümkün değildir 7 USB üzerinden aktarım kendi başına bir çalışma modu değildir Bu yalnızca ek bir fonksiyondur 1 Televizyonun üzerindeki USB HDD USB...

Page 50: ... içinde gezinme USB İŞLEMİ USB kurulum menüsündeki ayarlar Menüyü seçme 1 MENU düğmesiyle menüyü açın 2 V Λ veya ile Medya Mer kezi menü öğesini seçip OK düğmesiyle onaylayın 3 V veya Λ düğmesiyle harici veri orta mını seçin ve OK düğmesiyle onaylayın 4 Medya Ayarları öğesini TOOLS ile seçin 5 V veya Λ ile Disk Yönetimi satırını seçin ve OK düğmesiyle onaylayın Not 7 İlave işlemler aşağıdaki bölüm...

Page 51: ...Medya Oynatıcı menüsü görüntülenir 3 V veya Λ düğmesiyle harici veri orta mını seçin ve OK düğmesiyle onaylayın Seçtiğiniz harici veri ortamının Medya Oynatıcı menüsü görüntülenir Not 7 Harici veri ortamının içeriği görüntülenmi yorsa yenilemek için yyy sarı düğmesi ne basın 4 veya düğmesiyle istediğiniz filtre ti pini Tümü Film Müzik veya Fotoğraf seçin 5 V veya Λ düğmesi ile klasörü seçin ve OK ...

Page 52: ...ca desteklenen video dosyaları 1 Oynatma sırasında sonraki bölümü düğmesi ile seçin 2 Oynatma sırasında önceki bölümü düğmesi ile seçin Dosyalarda başlık seçimi yalnızca desteklenen video dosyaları 1 Oynatma sırasında sonraki başlığı Λ düğmesi ile seçin 2 Oynatma sırasında önceki başlığı V düğmesi ile seçin Seçilen şarkıları çalma Yalnızca işaretli şarkıları çalar 1 V veya Λ düğmesiyle istediğiniz...

Page 53: ...sında oynatma çalma hızını 3 veya 4 düğmelerine basarak seçebilirsiniz 2 Oynatmaya devam etmek için 8 düğme sine basın Resim görüntüsünü döndürme yalnızca resim dosyaları Resimler 90 döndürülebilir 1 Oynatma çalma esnasında kontrol panelini OK düğmesiyle açın 2 seçimi için veya düğmesiyle OK seçeneğini seçin Resim 90 saat yönünde döner USB İŞLEMİ Tekrarlama fonksiyonları Bir seçili parça yalnızca ...

Page 54: ...nüsünden Settings seçeneğini seçip açılan menüden Allow new devices and computers automatically seçeneği seçebilirsiniz Bu işlemler tamam landıktan sonra televizyon Library bulunan dosyalardan sadece desteklediği formatları görüntüleyebilir Medya paylaşımında sorun yaşamamak için modem ve bilgisayarınızdaki güvenlik duvarı Firewall ayarlarını kontrol ediniz Dijital medya sunucusunun seçil mesi 1 M...

Page 55: ...in 8 düğmesine basın Diğer oynatma seçenekleri 1 Oynatmayı duraklatmak için düğme sine basın 2 Oynatmaya devam etmek için 8 düğme sine basın 3 İstediğiniz dosyaya ulaşana kadar 5 veya 6 düğmesine basın 4 Oynatmayı sonlandırmak için 7 düğme sine basın 5 BACK düğmesiyle içeriğe geri dönün 6 DLNA özelliğinden çıkmak için EXIT düğmesine basın 7 Güvenlik sorusunu onaylamak için Evet seçeneğini seçin ve...

Page 56: ...uyabileceği sayfaya yön lendirilir 7 Kullanıcının tüm Şartlar Koşullar ve Gizlilik içeriğini görmesi sağlandıktan sonra her iki içeriği de Kabul veya Reddet seçeneği vardır Ayrı ayrı ret ya da kabul işlemi yapa maz 7 Kullanıcı Kabul seçeneğini seçerse TV kullanımına devam eder 7 Kullanıcı Reddet seçeneğini seçerse 7 TV nin bir sonraki açılışı ve internete bağlanışında Bilgilendirme sayfası tekrar ...

Page 57: ...u değişikliklerden dolayı Beko sorumlu tutulamaz 7 Beko SMART inter ctive TV 4 0 ile sağlanan internet uygulamalarında deği şiklik yapma sınırlama genişletme yer değiştirme kullanımdan kaldırma gibi tüm değişiklikleri yapma hakkını saklı tutar 7 Bazı uygulamaların Login işlemleri sırasında o uygulamanın gerçek web sayfasına bağlantı kurmak gerekebilir Bağlanılan bu sayfalarda uygulamaya Login için...

Page 58: ...l edin Bkz Bkz sayfa 82 veya 85 Tüm uygulamaların görüntülenmesi SMART inter ctive TV 4 0 anasayfasında gösterilen uygulamar televizyonda çalışacak uygulamardan sadece bir kaç tanesidir Diğer uygulamaları Tüm Uygulamalar dan görüntü leyebilir ve seçebilirsiniz 1 Menüden Uygulama Dükkanı nı seçin veya düğmesine basın Uygulama Portalı görüntülenir 2 Tüm Uygulamalar a giriş yapmak için Tüm uygulamala...

Page 59: ... veya düğmesi ile istenilen uy gulamayı seçip OK düğmesine basarak onaylayın Kısa bir süre sonunda uygulamanın ana menüsü görüntülenir 2 Uygulamanın kullanımı daha çok uygula manın kendi yapısına bağlıdır Ekrandaki açıklamaları takip ediniz Not 7 Ayarlar menüsünden uygulama portalının ülkesini değiştirebilir ve seçili ülkenin uygu lamarının da Tüm Uygulamalar sayfasın da görünmesini sağlayabilirsi...

Page 60: ...bu u Web tarayıcısı uygulaması Web tarayıcısı internette gezinebilmenizi sağlar 1 MENU düğmesiyle menüyü açın 2 V Λ veya ile Web Tara yıcı menü öğesini seçip OK düğmesiyle onaylayın Web Tarayıcı görüntülenir 3 Λ veya V düğmesiyle URL giriş alanını seçin ve OK düğmesiyle onaylayın Sanal klavye görüntülenir 4 Adresi girip Enter düğmesini seçip OK düğmesi ile onaylayın Notlar 7 Diğer fonksiyonlar ekr...

Page 61: ...ırmızı ikincil ses dili olarak ayarlamak için yy yeşil düğmesine basın Menünde birincil ve ikincil olarak ayarla nan diller görüntülenir 4 Bir menü seviyesi geri gitmek için BACK düğmesine basın veya ayarı sonlandır mak için EXIT düğmesine basın Altyazı dilinin değiştirilmesi yalnızca dijital televizyon kanalları için Altyazıları devre dışı bırakabilir altyazı dilini seçebilir ikinci bir altyazı d...

Page 62: ...ik Ayarları menüsünden V veya Λ düğmesiyle Altyazı Modu öğesini seçin 2 veya düğmesiyle Kapalı İşitme engelliler veya Temel öğesini seçin 3 Önceki menüye dönmek için BACK düğmesine basın veya ayarı sonlandırmak için EXIT düğmesine basın Sesli anlatım sesli altyazı lar Sesli anlatım görme engelliler için ek bir ses kanalıdır Aktörlerin aktiviteleri etraflarında bu lunanlar sahne değişiklikleri görü...

Page 63: ...üğmesine basın veya ayarı sonlandır mak için EXIT düğmesine basın Otomatik kapanma Bu fonksiyon televizyona 5 dakika süreyle herhangi bir görüntü sinyali gönderilmediğinde veya Avrupa düzenlemeleri gereğince televizyo nun tuş takımı ve kumandadaki herhangi bir tuşa basılmadığı sürece kurulumunuza bağlı olarak televizyonu 2 4 6 veya 8 saat içinde stand by moduna geçirir 1 Gelişmiş menüsünden V veya...

Page 64: ...landırmak için EXIT düğmesine basın 4 Not 7 USB modunda müzik dinlerken ekran kapanıyorsa MENU düğmesine basıp bu özelliği kapatmak için veya Kapalı seçeneğini seçin Hava Durumu Gösterimi Televizyonunuz bulunduğunuz yere göre internet üzerinden hava durumu bilgisini alıp menünün şağ üst köşesinde görüntüler Bu bildirimi açıp kaparabilirsiniz 1 Gelişmiş menüsünden V veya Λ düğmesiyle Hava Durumu Gö...

Page 65: ...yıcısı menüsünde televizyon için açılış zamanı girebilirsiniz Televizyon bekleme modundaki ayarlı süre geç tikten sonra önceden ayarlanmış ses ve istenen kanalla açılır 1 V veya Λ ile Açılma Zamanlayıcısı satırını seçin ve OK düğmesiyle onayla yın 2 V veya Λ düğmesiyle Mod satırını seçin ve televizyonun ne zaman açılması gerektiğini belirlemek için veya düğmesini kullanın 3 V veya Λ düğmesiyle Sin...

Page 66: ...e Kapanma Zamanla yıcısı satırını seçin ve OK düğmesiyle onaylayın 2 V veya Λ düğmesiyle Mod satırını seçin ve televizyonun ne zaman kapanması gerektiğini belirlemek için veya düğmesini kullanın 3 V veya Λ düğmesiyle Saat Ayar la satırını seçin ve 1 0 düğmeleriyle zamanı girin 4 Ayarı kaydetmek için yyyy mavi düğme sine basın 5 Bir menü seviyesi geri gitmek için BACK düğmesine basın veya ayarı son...

Page 67: ...ak için EXIT düğmesine basın Not 7 TV kısa gözden geçirme modundaysa izlenmekte olan içeriğin gerçek ebeveyn de recesi yerine canlı yayındaki programın aile koruma derecesi izlenen içerik için geçerli hale gelir Sonuç olarak kısa gözden geçir me modunda izlenen aile koruma dereceli içeriğin mutlaka aile koruma dereceli içerik olarak gösterilmesi gerekmez Aynı şekilde aile koruma dereceli olmayan i...

Page 68: ...dunuzu yeniden girin 5 Önceki menüye dönmek için BACK düğmesine basın veya ayarı sonlandırmak için EXIT düğmesine basın EBEVEYN AYARLARI Bir televizyon kanalını engelle me Çocuklar için uygun olmayan televizyon kanal larını kişisel PIN kodunu kullanarak ayrı ayrı engelleyebilirsiniz 1 MENU düğmesiyle menüyü açın 2 Ayarlar menü öğesini OK ile onayla yın 3 veya ile Kaynak menü öğesini seçip V düğmes...

Page 69: ...dunu girin Engellenmiş kanal görüntülenir Not 7 Kanal değiştirildiğinde kanal tekrar engel lenecektir PIN kodunun sıfırlanması PIN kodunuzu unutursanız bu işlevi kullanın 1 Ebeveyn Kontrolü menüsünden V veya Λ düğmesiyle PIN i Değiştir satırını seçip veya düğmesiyle onaylayın 2 Gelen şifre ekranına 1 0 düğmeleriyle 2 3 5 6 PIN kodunu girin 3 1 0 düğmeleriyle dört haneli yeni kişisel PIN kodunuzu g...

Page 70: ...arak güncellenir 3 Önceki menüye dönmek için BACK düğmesine basın veya ayarı sonlandırmak için EXIT düğmesine basın Manuel ayar Zamanın tespit edilememesi veya sizin yerel sa atinizle aynı olmaması halinde yerel saat farkını kendiniz de ayarlayabilirsiniz 1 Gelişmiş menüsünden V veya Λ düğmesiyle Zaman Ayarı satırını seçip veya düğmesiyle Manuel seçe neğini seçin Saat Dilimi ve Günışığı Tasarrufu ...

Page 71: ...araması yapılıyor Not 7 Herhangi bir yazılım yoksa menü otomatik olarak kapanır 3 Yeni yazılım varsa bu yazılımı yy yeşil düğmesine basarak yükleyin Yeni yazılım yüklenecek Uyarı 7 Güncelleme sonrasında televizyon kapanıp açılacaktır Güncelleme sırasında televizyo nun elektriğini kesmeyin Not 7 Otomatik yazılım güncelleme kontrolü için V veya Λ ile Kaynak menüsünden Gelişmiş ile OAD satırını seçin...

Page 72: ...sini OK ile onayla yın 3 veya ile TV satırını seçip V düğmesiyle onaylayın TV menüsü görüntülenir 4 V veya Λ ile Aksesuarlar satırını seçin ve OK düğmesiyle onaylayın 5 V veya Λ düğmesiyle istediğiniz satırı seçin ve OK düğmesiyle onaylayın veya düğmesiyle gerekli fonksiyo nu seçin 6 Önceki menüye dönmek için BACK düğmesine basın veya ayarı sonlandırmak için EXIT düğmesine basın Not 7 Aksesuarlar ...

Page 73: ...i seçip OK düğmesine basın Kısa bir süre sonra Kurulum Rehberi menüsü görüntülenir 3 Sayfa 20 de televizyonun ilk kurulumu ve kanalların aranması bölümdeki ayarlarla devam edin Kanal geçmişinin silinmesi Bu fonksiyon Ana menüde bulunan kanal geç mişini silmenizi sağlamaktadır 1 Hakkında menüsünden V veya Λ düğmesiyle Kanal Geçmişini Temizle satı rını seçip OK düğmesiyle onaylayın Güvenlik sorusu g...

Page 74: ...ızda televizyonunuz harici cihazın bağlı oldu ğu HDMI kaynağına geçecektir televizyonunuz açık olması gerekir Menü dilinin seçilmesi Televizyonunuzdan menü dilini seçtiğinizde ha rici cihazınızın da menü dili değişecektir DVD oynatıcınız destekliyorsa HARİCİ CİHAZ KULLANMA Harici cihazın standby modundan kapa tılması Televizyonunuz bekleme konumuna standby aldıktan sonra harici cihaz açıksa örneği...

Page 75: ...i Düz Geçiş Deck veya Zap seçin Notlar 7 Düz Geçiş her cihaz tipinde seçilebilir bir seçenek olarak menüde yer alır Deck ve Tuner Control seçenekleri bağlı olan harici cihaza göre menüde değişir 7 Seçilen kontrol tipinde kumanda düğmeleri hangi işlevi yaptığını deneyerek kontrol ediniz 7 DIGILINK uyumlu harici cihaz fonksiyonları için cihazın kullanma kılavuzuna bakın 7 Ayarı sonlandırmak için EXI...

Page 76: ...larını izleyebilmenizi sağlar Bağlantı seçenekleri 7 Harici cihazlarınızı bağladığınız televizyon soket ler i harici cihaz da bulunan soketlere ve kullanılabilir sinyallere bağlıdır 7 Çoğu harici cihaz da görüntü sinyalinin çözünürlüğü televizyondaki giriş soketleri ne uyarlanmalıdır harici cihazın kullanım kılavuzuna bakın Bağlantı seçenekleriyle ilgili bölümdeki yönergelere bakarak hangi değerle...

Page 77: ... kullanımı 1 Video kayıt cihazını DVD oynatıcıyı veya set üstü kutusunu açıp kullanmak istediğiniz fonksiyonu seçin 2 düğmesine basın veya düğmesiyle giriş sinyalini seçin HDMI1 HDMI2 HDMI3 ve OK düğmesiyle onaylayın HARİCİ CİHAZLARI KULLANMA Kulaklıklar Kulaklıkları takma 1 Kulaklık fişini televizyonun kulaklık soketine 3 5 mm ø jaklı fiş takın Kulaklıklar için ses ayarını seçme 1 MENU düğmesiyle...

Page 78: ...cektir 4 yyyy mavi düğmeyle cihaz aramaya başlayın HDMI3 ARC kaynağına bağlı olan ses sistemi listede görüntülenecektir 5 V veya Λ düğmesi ile aygıtı seçin ve OK düğmesiyle onaylayın Notlar 7 Eğer ses sistemi aynı zamanda oynatıcı Örneğin DVD oynatıcı işlevi dahil Ev sine ma sistemi özelliğine sahip ise HDMI CEC listesinde iki farklı cihaz listelenir Birincisi oynatıcı ikincisi ise ses oynatıcı ci...

Page 79: ...ın 4 veya ile Ses menü öğesini seçip V düğmesiyle onaylayın Ses menüsü görüntülenir 5 V ile Gelişmiş satırını seçin ve OK düğmesiyle onaylayın 6 V düğmesiyle Ses Çıkışı satırını seçin 7 veya düğmesiyle Sabit veya Ayarlanabilir seçeneğini seçin Notlar 7 Ayarlanabilir seçimi yapıldığında Ses Çıkış Ses Seviyesi menü seçeneğinden ses seviye ayarı yapılabilir 7 Ses çıkışı sadece hi fi sistemi AV alıcıs...

Page 80: ...mı yapmak içinse Görüntü yü Ver seçeneğini seçmelisiniz 3 Dizüstü bilgisayar veya mobil aygıtınızdan Miracast uygulamasını başlatıp televizyonu nuzu seçin Görüntüyü al öğesini seçip OK düğmesiyle onaylayın Dizüstü bilgisayar veya mobil aygıtınızdan Miracast uygula masını başlatıp televizyonunuzu seçin veya y Görüntüyü ver öğesini seçip OK düğmesiyle onaylayın Ağdaki Miracast uyumlu görüntü alabile...

Page 81: ... hangi CA modülünün bulunduğunu görmek için CA Modülü alt menüsüne gidin 7 Televizyonunuzdaki CI yuvasına ilk kez bir CA modülü takarken televizyon CA modülü nü kaydedene kadar kısa bir süre bekleyin CA modülü ve akıllı kartlar için erişim kontrolü 1 MENU düğmesiyle menüyü açın 2 V Λ veya düğmesiyle Ayarlar menü öğesini OK ile onayla yın 3 veya ile Kaynak menü öğesini seçip V düğmesiyle onaylayın ...

Page 82: ...eko TV Remote uygulamasını telefonunuza ücretsiz indirerek telefonunuz ile televizyonunuzu kumanda edebilirsiniz Ağ bağlantısı Televizyonunuzu kablolu veya kablosuz olarak yerel ağa bağlayabilirsiniz Kablolu ağ bağlantısı kullanmak istiyorsanız bu sayfadaki yönergeler ile başlayınız Kablosuz ağ bağlantısı kullanıyorsanız sayfa 85 Kablosuz ağ bağlantısı bölümündeki yönerge leri takip edin Not 7 Aşa...

Page 83: ...ğlantı Tipini Değiştir Kablolu Ağ Ayarları Otomatik Gelişmiş Görüntü Per XX XXX XXXX Kaynak Zamanlayıcı Ses Ağ TV Ebeveyn Ayarlar Ağ Alanı Değiştir Bağlan Bağlantı Testi Seç Geri BACK 4 Bağlantı Tipini Değiştir satırını OK düğmesiyle onaylayın 5 V veya Λ düğmesiyle Kablolu seçeneğini seçin ve OK düğmesiyle onaylayın AĞ KURULUMU 6 V veya Λ düğmesiyle Ağ Ayarları satırını seçin ve veya düğmesiyle Ot...

Page 84: ...rları Manuel IP Adresi 192 168 000 200 DNS 192 168 000 254 Netmask 255 255 255 200 Gateway 192 168 000 254 Görüntü Per XX XXX XXXX Kaynak Zamanlayıcı Ses Ağ TV Ebeveyn Ayarlar Ağ Alanı Değiştir Bağlan Bağlantı Testi Giriş Modu Çıkış Gelşmişi Kapat EXIT BACK 8 V düğmesiyle IP Adresi satırını seçin 1 0 ile IP adresini girin 9 V ile DNS satırını seçin 1 0 ile IP adresini girin 10 V düğmesiyle Netmask...

Page 85: ...r mansı her kablosuz ağda olduğu gibi ağı kullanan kullanıcı sayınına bağlı olduğu unutulmamalıdır 7 Ev ağında kullanılmayan ağ ekipmanlarını gereksiz ağ trafiği yaratacağından kapatıl ması önerilir AĞ KURULUMU 7 Modem veya kablosuz ağ paylaştırıcısını yüksek bir yere koymak kablosuz bağlantı çekim gücünü arttırır 7 Kablosuz bağlantı çekim gücü modemin tipine ve televizyonun modeme uzaklığına bağl...

Page 86: ...n seçeneği ni seçip modem bağlantısını kurun Erişim Noktası üzerindeki WPS tuşuna basın mesajı görüntülenir 9 Router üzerindeki WPS tuşuna basınız 10 Erişim noktası üzerinden WPS düğmesine bastıktan sonra devam etmek için veya düğmesi ile Devam seçeneğini seçin ve OK düğmesiyle onaylayın Gateway Bağlantısı Başarılı mesajı görüntülenir 11 yy yeşil düğmesine basarak yapılan ayarlar ile ağ bağlantısı...

Page 87: ...n bekleyin mesajı görüntülenir ve bağlantı başarılı ise Gateway Bağlantısı Başarılı İnternet Bağlantısı Başarılı mesajları ve MAC adresi görüntülenir 14 Ayarı sonlandırmak için EXIT düğmesine basın Ağ şifresini girerek otomatik bağlan mak Yönlendiriciniz WPS PBC veya WPS PIN girişi ni desteklemiyorsa bu yöntemi bağlantı kurmak için uygulayın 1 MENU düğmesiyle menüyü açın 2 Ayarlar menü öğesini OK ...

Page 88: ...tik bir IP adresi gerektiriyorsa IP Adresi Netmask Gateway ve DNS değerlerini manuel olarak girmelisiniz IP Adresi Net mask Gateway ve DNS değerlerini ISS Internet Servis Sağlayıcınızdan alabilirsiniz 1 MENU düğmesiyle menüyü açın 2 V Λ veya düğmesiyle Ayarlar menü öğesini OK ile onayla yın 3 veya ile Ağ menü öğesini seçip V düğmesiyle onaylayın Ağ ayarları menüsü görüntülenir 4 Bağlantı Tipini De...

Page 89: ...satırını seçin 1 0 ile Gateway adresini girin 12 V veya Λ düğmesiyle Erişim Noktası Seç satırını seçin ve OK düğmesiyle onaylayın Mevcut kablosuz ağlar taranarak Erişim Noktası Seç menüsünde görüntülenir 13 V veya Λ düğmesiyle bağlanmak istediğiniz ağı seçip OK düğmesiyle onaylayın Kablosuz bağlantı şifre ekranı görüntüle nir Not 7 Kablosuz modemin TV tarafından ağda bulunabilmesi için ağ isminin ...

Page 90: ...r sayılar ve küçük harfler özel karakterler arasında geçiş yapabilir siniz Girilen karakteri silmek için Del düğme sini seçip OK düğmesiyle onaylayın 8 SSID yi yy yeşil düğmesine basarak onaylayın 9 V düğmesiyle Güvenlik tipi satırını seçin ve veya düğmesiyle gereken seçeneği WPA2 seçin 10 y kırmızı ile ayarı onaylayın Ağ artık Erişim Noktası Seç menüsünde dir 11 V veya Λ düğmesi ile ağı seçip OK ...

Page 91: ...pini seçin Yalnızca dijital kanallarını mı Dijital yoksa yalnızca radyo mı Radyo ya da ikisini bir den mi Dijital Radyo aramak istediğinizi belirlemek için V veya Λ düğmesiyle Dijital ve veya Radyo öğelerini seçip işaretlemek ya da işareti kaldırmak için OK düğmesine basın 9 Tarama Modunu seçin Yalnızca ücretsiz dijital televizyon kanal larını mı Ücretsiz yoksa yalnızca şifreli dijital televizyon ...

Page 92: ...öğeleri V veya Λ düğmesiyle seçin Servis Tipi Yalnızca televizyon kanallarını mı DTV yoksa yalnızca radyo mu Radyo ya da ikisini birden mi Radyo TV aramak istediğinizi belirlemek için veya düğmesine basın Tarama Tipi Yalnızca ücretsiz dijital televizyon kanal larını mı Ücretsiz yoksa yalnızca şifreli dijital televizyon kanallarını mı Şifreli ya da ikisini birden mi Ücretsiz Şifreli aramak istediği...

Page 93: ... DETAYLI KANAL AYARLARI LNB seçimi Sadece gerekli olan Kapalı veya Di SEqC 1 0 seçimini yapın 9 Anten ayarlarından çıkmak için yyyy mavi düğmesine basın 10 Kanal Tipini seçin Yalnızca dijital kanallarını mı Dijital yoksa yalnızca radyo mı Radyo ya da ikisini bir den mi Dijital Radyo aramak istediğinizi belirlemek için V veya Λ düğmesiyle Dijital ve veya Radyo öğelerini seçip işaretlemek ya da işar...

Page 94: ...kablo yönlendirici çoklu anahtar multiswitch varsa SCR seçene ğini kullanın OK dğümesine basın veya düğmesiyle SCR seçeneğini seçin V düğmesiyle LNB Frekansı Yüksek seçeneğini seçip frekansı 1 0 düğmesi ile beş hane olarak girin DETAYLI KANAL AYARLARI V düğmesiyle LNB Frekansı Düşük seçeneğini seçip frekansı 1 0 düğmesi ile beş hane olarak girin Seçimi onaylamak için yy yeşil düğme sine basın LNB ...

Page 95: ...ünde arama tamamlanır Not 7 Arama işlemi EXIT düğmesiyle sona erdirilebilir 13 yyy sarı ile kanal Düzenleyicisine geçin veya Ayarı sonlandırmak için EXIT düğmesine basın Dijital uydu kanalları için anten ayarları ve DiSEqC 1 0 ile kanal ların otomatik aranması Not 7 Aşağıdaki bölümde anlatılan LNB ayarları uydu sistemleri hakkında önemli bir uzman lık gerektirmektedir Konu ile ilgili yetkili satıc...

Page 96: ...için OK düğmesine basın 11 Tarama Modunu seçin Yalnızca ücretsiz dijital televizyon kanal larını mı Ücretsiz yoksa yalnızca şifreli dijital televizyon kanallarını mı Şifreli ya da ikisini birden mi Ücretsiz Şifreli aramak istediğinizi belirlemek için V veya Λ düğmesiyle Ücretsiz ve veya Şifreli öğelerini seçip işaretlemek ya da işareti için OK düğmesine basın 12 Aramaya başlamak için y kırmızı düğ...

Page 97: ...nız lütfen Frekans ve Network ID için Otomatik ayarını seçin Tarama Hızlı seçeneğiyle yapılamı yorsa Tam öğesini seçin Geçerli tüm kanallar Tam taramada ayarlanır ve kaydedilir Bu tarama işlemi uzun sürebilir Kablo operatörü hızlı tarama fonksiyonu nu desteklemezse bu seçeneğin kullanıl ması tavsiye edilir Not 7 Aramayı hızlandırabilirsiniz Bunun için fre kans ve ağ kimliği bilgileri gereklidir Ka...

Page 98: ...nan kanallar listede göründüğünde arama işlemi tamamlanmış olur 8 Ayarı sonlandırmak için EXIT düğmesine basın Dijital karasal TV kanallarının otomatik olarak aranması 1 MENU düğmesiyle menüyü açın 2 V Λ veya düğmesiyle Ayarlar menü öğesini OK ile onayla yın 3 veya ile Kaynak menü öğesini seçip V düğmesiyle onaylayın 4 Λ ile Otomatik Kanal Arama satırını seçin ve OK düğmesiyle onaylayın 5 V veya Λ...

Page 99: ...2 basamaklı doğrudan 1 0 düğmeleriyle girin Arama başlar Bulunan kanallar listede göründüğünde arama işlemi tamamlanmış olur 8 Ayarı sonlandırmak için EXIT düğmesine basın DETAYLI KANAL AYARLARI Otomatik servis güncelleme Bu işlevi etkinleştirildiğinde ağ operatörlerinin olası değişiklikleri otomatik olarak güncellenir Televizyon bekleme stand by modunda olma lıdır Bu güncelleme her tür alımı kara...

Page 100: ...n ve OK düğmesiyle küçük onay işaretini kaldırın 7 Aramaya başlamak için y kırmızı düğme sine basın Notlar 7 Tarama başladıktan sonra bir güvenlik so rusu görünür Evet seçeneğini onaylamak için OK düğmesine basın Kanal listesindeki tüm kanal ve favori listeleriniz silinip yeniden derlenecektir Analog Arama menüsü görünür ve televizyonun aranmasına başlanır Alınan televizyon kanalı sayısına bağlı o...

Page 101: ...tlı analog kanalların değiştirilmesi Televizyon kanallarının ayarlanması sırasında otomatik kanal arama fonksiyonuyla kaydedil miş olan kanallar varsa bunları silebilirsiniz Ayrıca bir kanalın adını değiştirebilir veya gire bilirsiniz Kanal listelerini seçme 1 MENU düğmesiyle menüyü açın 2 V Λ veya düğmesiyle Ayarlar menü öğesini OK ile onayla yın 3 veya ile Kaynak menü öğesini seçip V düğmesiyle ...

Page 102: ...anal Düzenleyici menüsünde favori liste sine eklemek istediğiniz kanal veya kanalları V Λ veya düğmesiyle seçip OK düğmesine basarak televizyon kanalını vurgulayın Kanal ile işaretlenir 2 yyy sarı düğmesiyle Araçlar menüsünü onaylayın 3 V veya Λ ile Favori Ekle satırını seçin ve OK düğmesiyle onaylayın Favori Ekle menüsü görüntülenir 4 V veya Λ düğmesiyle seçili kanallara eklemek istediğini favori...

Page 103: ...layın 5 V veya Λ ile Sinyal Bilgileri satırını seçin ve OK düğmesiyle onaylayın Sinyal Bilgileri menüsü görüntülenir Notlar 7 Bulunduğunuz kaynağa göre sinyal bilgileri değişmektedir 7 Menünün sol kısmında sinyal özellikleri görüntülenir Kalite ve Sinyal Gücü çubuğu sağa doğru ne kadar uzarsa alınan sinyali de o kadar iyidir 7 Sinyal düzeyi yalnızca alıcı sisteminizde değil halihazırda aktif olan ...

Page 104: ...şiklik regülas yonu 2017 1369 EU Enerji İle İlgili Ürünlerin Enerji Etiketlemesi direktifi ve aşağıdaki alt direktifler 1062 2010 Televizyonların enerji etiketlemesi ne dair regülasyon 2011 65 EU Elektrik elektronik ev ve ofis ekipmanları belirli tehlikeli maddelerin kullanıl masının kısıtlanması direktifi Uygunluk beyanının DoC bir kopyasını elde etmek için http www beko com tr adresini ziyaret e...

Page 105: ...n ve doğal kaynakların korunmasına yardımcı olun Ürünü atmadan önce çocukların güvenliği için elektrik fişini kesin PCB Uygunluğu PCB Poliklorlubifenil içermez Türkiye deki müşteriler için Bu Cihazın WLAN Wifi özelliği sadece bina içersinde kullanılır Türkiye de bina dışında kul lanımı yasaktır Bina dışı kullanımında WLAN Wifi özelliğinin kapalı olduğundan emin olunuz Rusya daki müşteriler için FH...

Page 106: ... ayarı ayar seçeneği varsa Doğru renk standardını seçin Kanalda sorun var Başka bir kanalla test edin Görüntü var ses yok Ses minimuma ayarlanmıştır Sesi açın Teletekst yok veya hatalı Kanalda sorun var Başka bir kanalla test edin Televizyon istasyonu teletekst yok veya anten sistemi ince ayar ve gölgeler için başka bir kanalı test edin İstasyon sinyali çok zayıf Anten sistemini kontrol edin Uzakt...

Page 107: ...ernet Bağlantı hızı düşük İnternet Bağlantı hızı düşüklüğü abone olduğunuz paketteki hızı nızla ya da internet altyapısındaki bir sorunla ilgilidir Servis sağlayı cınızla İSS ile iletişime geçin Kablolu bağlantıda video uygulamalarında videolar takılıyor Internet Bağlantı hızı düşük İnternet Bağlantı hızı düşüklüğü abone olduğunuz paketteki hızı nızla ya da internet altyapısındaki bir sorunla ilgi...

Page 108: ... en uygun şekilde ayarlar Bir görüntüde çoğunlukla karan lık bölgeler varsa gösterilen siyah seviyesi arka ışıklandırmanın aşağı doğru ayarlanmasıyla bu durumda karanlık bölgelerin görüntüsü geliştiri lir ve bu bölgeleri daha parlak görüntüleyebil mek için aynı zamanda çoğunlukla parlak olan resim malzemesiyle arka ışıklandırma arttırılır DLNA Digital Living Network Alliance Sayısal Akışlı Ağ Uyuş...

Page 109: ...ılır Donanım versiyonu Bu bağlamda donanım cihazı ifade eder Buna işlemci ekran vs tüm parçalar dahildir HbbTV HbbTV video tekstin interaktif ardılı olup modern tasarımlı içeriğe yüksek çözünürlükte görüntü ye ve video dizini ile medya kütüphanelerine sahiptir HbbTV nin tam işlevsel olabilmesi için televiz yon İnternete bağlı olmalıdır HD Full HD UHD Yüksek Çözünürlüklü HD Televizyon Arttırılmış d...

Page 110: ... Adresleri İnternete bağlı olmayan özel IP adreslerine aittir LAN gibi özel ağlar için herkes tarafından kullanılabilir Çoğu bilgisayar ağı IP seviyesinde tam bağlantı ancak İnternete sınırlı bağlantı gerektirir Bu tür bir bilgisayar ağında özel IP Adresi dizisi varsa İnternet rou terları özel adres dizilerini yok saydığı için İnter netten erişilemeyen bir intranet ağı oluşturur Bu özel ağa bağlan...

Page 111: ... telefon çaldığında artık filmi kaçırmayacaksınız Program harici veri ortamının Zaman Kaydırma hafızasına kaydedilir Zaman Kaydırma hafızasına devam eden prog ramın maksimum 60 dakikası kaydedilebilir Transponder Bir frekansta çeşitli vericilerin toplanması USB kaydı Dijital televizyon programlarının kaydedilmesi ve oynatılmasını sağlar DVB S DVB T ve DVB C Bu özellik ilgili program sağlayıcısına ...

Page 112: ...kartlar için erişim kontro lü 81 Cevabı göster 39 Çevre uyarısı 105 Cihazı bekleme konumuna alma 75 Cihaz Kontrolü 75 Çoklu fonksiyon düğmesinin bloke edilme si 68 D Detaylı Kanal Ayarları 91 Diğer oynatma seçenekleri 55 DIGI LINK 74 Dijital çok kanallı amplifikatör AV alıcısı bağlama 78 Dijital kanallar için Kanal Düzenleyicinin değiş tirilmesi 24 Dijital kanalları alma 8 Dijital karasal TV kanal...

Page 113: ...37 HbbTV nin devre dışı bırakılması ve etkinleştiril mesi 38 HbbTV nin kullanımı 38 Hi fi sistemi 78 HiFi sistemi ile ses sinyalinin oynatılması 79 I İlave oynatma fonksiyonları 52 İleri geri görüntü arama 47 İleriye doğru arama 53 İlk kurulumun yapılması 20 İnternet uygulamalarını seçme 58 İstenilen süreye gitme 53 K Kablolu ağ 82 Kablolu ağ ayarları 83 Kablolu ağ bağlantısı 82 Kablolu dijital te...

Page 114: ...dekiler 9 PIN ile kablosuz WPS ağ bağlantısı 86 PIN kodunu değiştirme 68 PIN kodunun sıfırlanması 69 Programları Kaydetme 44 Program Tablosunu açma 24 R Resim görüntüsünü döndürme 53 S Sayfa durdurma 39 Seçilen şarkıları çalma 52 Ses ayarları 30 35 Ses dili 33 Ses dilinin değiştirilmesi 61 Sesi kapatma 32 Sesli anlatım sesli altyazılar 62 Ses Modu 30 Ses seviyesini ayarlama 32 Ses verileri 48 Sıfı...

Page 115: ...ital televizyon istasyonla rının otomatik olarak aranması 91 Uydu sinyali ile televizyon kanallarının aranması DVB S 22 Uyku zamanlayıcısı 33 65 Uzaktan kumanda ana fonksiyonlar 15 Uzaktan kumanda tüm fonksiyonlar 16 Uzaktan Kumandaya Pil Takma 12 V VESA montaj kitine montaj hazırlığı 11 Video dizinleri için ek fonksiyonlar 38 Video verileri 48 W WEB Tarayıcısı 60 Web tarayıcısı menüsü 60 Web tara...

Page 116: ...itial set up 23 Changing the Channel Editor for the digital channels 27 PICTURE SOUND SETTINGS 27 Picture settings 28 Restore default settings 28 Concluding the settings 29 Sound settings 30 Restore default settings 30 Concluding the settings 31 TV OPERATION BASIC FUNCTIONS 31 Switching on and off 31 Selecting channels 31 Selecting stations from lists 31 Selecting AV channels 31 Adjusting the volu...

Page 117: ...fidentiality content accepted by the user and removing the acceptance 56 SMART inter ctive TV 4 0 internet ap plications 56 USB keyboard and mouse 56 Getting Started with Smart Inter ctive TV 58 Navigation on the application portal main screen 58 Application Portal Main Screen 59 Web browser menu 59 Web browser applications 60 LANGUAGE SETTINGS 60 Changing the menu language 60 Changing the audio l...

Page 118: ...0 SETTING FURTHER CHANNELS 90 Searching for all digital channels from a satellite automatically 91 Searching for digital channels from a satellite manually on a transponder 92 Antenna settings and searching for digital channels from a satellite automatically 93 Antenna settings SCR system and search ing for digital channels from a satellite automatically 94 Antenna settings for DiSEqC 1 0 and sear...

Page 119: ...traces may remain on the screen for some time This is not a defect that can be used as the basis for a warranty claim Safety WARNING Risk of electrical accident 7 Do not open the TV set Safety risk may arise and also the guarantee of the product can be void if the television set is opened 7 The TV set can only be operated with the power cable or the AC DC adapter supplied with the product 7 Do not...

Page 120: ...ected to the product satellite receiver DVD player and etc or signal emitting devices router and etc close to the product may cause disturbance in the image and noise in the sound 7 Connection cables used on the product must be shorter than 3 m 7 If the product cannot perform its function due to electrostatic discharge the user may need to switch off and then switch on the product 7 A shielded HDM...

Page 121: ...ction you can eas ily stop and resume a programme with the remote control in a fast and simple way Programme is recorded to the external data medium GENERAL INFORMATION 7 You can record any digital TV channel you have chosen if no limitation has been im posed by the broadcaster TV channel is transformed by your television and saved to a USB external data medium You can recall and play saved progra...

Page 122: ...l screen to constantly stay on the screen if not streamed in full screen format by the broad caster you can convert the images to full screen by changing picture formats 7 Higher brightness and or contrast values will lead this impact to appear faster therefore you are recommended to watch your TV in the lowest brightness and contrast levels Receiving digital stations 7 To receive digital satellit...

Page 123: ...ndart accessory 1 TV 2 Remote control 3 Batteries for remote controls 4 Screws and mounting instructions for stand 5 Brief Instruction Optional accessory Easy Use Remote Control Batteries for Easy Use remote controls Cleaning cloth User Manual 1 3 5 4 2 ...

Page 124: ...l cable channels DVB C connect the cable for the rooftop antenna to the antenna socket ANT IN on the televi sion set or 2c To receive analogue TV channels connect the cable for the rooftop antenna to the antenna socket ANT IN on the television set Note 7 When connecting an indoor antenna you may have to try it out at different positions until you get the best reception 3 Plug the power cord into t...

Page 125: ...ill need 7 A pair of scissors 7 A crosstip screwdriver Follow the installation instructions for the VESA bracket Place the television set in the film on a smooth surface with the screen facing down 1 Cut open the film on the back side using the scissors 2 Connect the required cables to the connec tors on the television set See the Connec tion Preparation section in this manual 3 Tie the cables so ...

Page 126: ...rtment 7 The manufacturer accepts no liability for damage resulting from used batteries Environmental note 7 This symbol on the battery or on the packaging indicates that the battery provided with this product shall not be treated as household waste On certain batteries this symbol might be used in combination with a chemical symbol The chemical symbols for mercury Hg or lead Pb are added if the b...

Page 127: ...Television User Manual 13 115 TR OVERVIEW Connections on the television set ...

Page 128: ...eo signal input HDMI SATELLITE Satellite antenna socket ANT IN Antenna socket U Headphone connection 3 5 mm jack external audio output with headphone RCA con verter USB1 USB socket for external data medium HDMI1 HDMI socket audio video signal input HDMI CI Common interface slot Control buttons on the TV Control elements Turning the TV to standby 1 8 8 I Switches the television on and back into sta...

Page 129: ...ext and TV modes Opens MyApps menu Switches on from standby selects stations step by step Adjusts the volume Displays information Exits menu and applica tions Opens the channel list Opens the electronic TV guide Switches on from standby mode selects channels directly Selects the channel list ALL FAV 1 to FAV 4 Record playback pause or stop only digital televi sion channels teletext on half screen ...

Page 130: ...al data media 8 Starts playback in the external data media Starts playback in the DLNA menu Time shift during live signal in digi tal TV operation only via external data media pauses the file executed on the external data media pauses the file executed on the DLNA menu 7 Selects the split screen function in teletext mode ends playback in the file browser ends recording or playback in the PVR mode ...

Page 131: ...ing connection settings IP Ad dress Netmask Gateway and DNS must be configured manually There are various options when using WLAN Automatic connection all data regarding connection settings IP Ad dress Netmask Gateway and DNS are obtained from modem automatically Depending on the router you can use the fol lowing options Option WPS PBC Push Button Configura tion Connecting with a WPS PIN Connectin...

Page 132: ...uto page 20 step 17 Manually Chapter page 87 Button Chapter page 85 PIN Chapter page 85 Channel Editor page 23 Setting TV channels page 21 step 26 DVB T page 22 step 34 DVB C page 21 step 29 DVB S page 21 step 25 Auto page 21 step 29 Manually chapter page 97 Auto page 22 step 25 Manually chapter page 91 Auto page 21 step 34 Manually chapter page 97 Select country page 19 step 5 Select mode page 19...

Page 133: ...ed 5 Confirm the option Home Mode with OK or select the option Enhanced with V or Λ and press OK to confirm Home Mode contains preconfigured TV settings that provide energy savings conforming EUP Enhanced if you will use the television for a demo presentation increased image and volume settings are used in this mode Increased mode consumes more energy INITIAL SET UP 6 Select the required option St...

Page 134: ...sage Do you want to turn on Wi Fi select Yes with or and press OK to confirm 19 Select the line Select Access Point with V or Λ and press OK to confirm Select Access Point menu appears and available wireless networks are scanned and displayed in the menu 20 Select the network that you want to con nect with V or Λ and press OK to confirm Wireless connection password screen is displayed 21 Select th...

Page 135: ...uning cable digital television channels DVB C 29 Select the option Cable DVB C with V or Λ and press OK to confirm 30 Select the line Scan Type with V or Λ Select the option Quick or Full with or Quick scanning function sets the chan nels according to the cable operator information in the broadcasting signal Full scan function scans the entire fre quency range selected With this search option sear...

Page 136: ... or Λ to select whether you want to search for only digital channels Digital only Analog channels Analog or both Digital Analog and press OK to se lect and mark or unmark the Digital and Analog items 35 Press y red to start searching The Digital or Analog Searching menu appears and the search for TV channels begins The scan is complete as soon as the Search is completed appears 36 Select the Chann...

Page 137: ... with V Λ or and press OK to confirm 3 Select the option Source with or and press V to confirm 4 Select the line Channel Editor with V and press OK to confirm Channel Editor menu is displayed Important 7 Programme table and favourite lists are stored separately for all sources satellite cable and air 7 Programme table of the current source will be displayed when you select programme table Notes 7 ...

Page 138: ...firm deletion process select the op tion OK with or or to cancel deletion process select the option No with or and press OK to confirm 5 To exit the Channel Editor menu press EXIT Moving the channels in the channel or ganizer to different channel positions 1 In the Channel Editor menu select the channel s you want to move with V Λ or and highlight the televi sion channel by pressing OK Channel is ...

Page 139: ...ted channels with V or Λ and store with OK The channels are marked in the Channel Editor with or You can add the same channel in more than one favourites list Each favourite list can contain maximum 250 channels INITIAL SET UP Notes 7 You can delete channels from the favourites list Press yyy yellow select the favorites list the channel is in with V or Λ and press OK to confirm Select the channel ...

Page 140: ...ress EXIT to end the setting Renaming AV channels You can rename AV channels according to the device you have connected For example for a PC which you have connected to HDMI1 source of TV with HDMI cable you can name the source as PC 1 Open Input Source menu with 2 Select the AV source you will rename with or and press yyyy blue Rename menu is displayed 3 Press OK and delete the old name step by s...

Page 141: ... picture quality are excellent 7 Backlight Manual setting for back light ing only active if dynamic back lighting is switched to OFF This setting also directly impacts power consumption 7 Vibrant Colour Increases the colour contrast and the contrast adjustment This setting is mostly too strong for use with nor mal pictures and should only be used where necessary low or off otherwise nuances in the...

Page 142: ...e be used minimally with good picture material 7 Block Noise Reduction This function can only be selected with digital reception sources and AV presets It reduces any in terference from artefacts pixel blocks from digital programmes due to MPEG compres sion such as from DVB T receivers and lower transmission rates or DVD players Restore default settings 1 In the menu Picture select the line Restor...

Page 143: ...al Speech or Music with or Night Mode Night Mode prevents sound fluctuations and volume increases 1 Select the line Advanced from the Sound menu with V or Λ and press OK to confirm 2 Select the line Night Mode with V or Λ 3 Activate On or deactivate the night mode by pressing or Notes 7 Other settings are available under Ad vanced Select the line Advanced with V or Λ and press OK to confirm Locati...

Page 144: ...ncy band Adjust the preferred value by using or 4 Select the next frequency band with V or Λ to repeat the adjustment procedure 5 To save adjustment press BACK Automatic volume The television channels broadcast at different volumes The automatic volume limiting AVL function means the volume is kept the same when you switch between channels 1 Select the line Advanced from the Sound menu with V or Λ...

Page 145: ... energy you can turn off the screen in Radio mode see ADVANCED SET TINGS on page 70 Selecting stations from lists You can select stations from various lists e g ALL FAV1 FAV4 1 Press FAV to recall the favorite list menu Favorite menu is displayed 2 Select the favorite list with V or Λ and open it with OK 3 Select the channel with or and press OK to confirm 4 Press EXIT to exit the channel list Sel...

Page 146: ...st 1 Press to open the selection menu 2 Select the language with V or Λ and press OK to confirm 3 Press EXIT to end the settings Zap function This function allows you to save the television channel which you are currently watching and switch to other channels zapping 1 Select the channel you want to save in the zap memory with 1 0 or P P for example channel 1 BBC 1 and save with BACK 2 Change chan...

Page 147: ...e picture format 1 Open the Tools menu with TOOLS 2 Select the line Picture Format with V or Λ 3 Select the picture format with or and press OK to confirm 4 Press EXIT to end the settings Notes 7 You can choose between the following picture formats Auto format The picture format is automatically switched to 16 9 for 16 9 programmes The picture format is automatically switched to 4 3 for 4 3 progra...

Page 148: ...rscan format When this mode is selected high defined picture from HDMI and Component inputs is not cropped and it is displayed in its original size This is only active in HDMI mode and for resolu tions at or above 720p Audio settings 1 Open the Tools menu with TOOLS 2 Select the line Sound Preset with V or Λ 3 Select the audio setting by pressing or You can change the User audio setting see Equali...

Page 149: ...e actuel programme is displayed in the selected television chan nel Note 7 Press P or P to switch between the channels in increments of 7n 3 Switch to the information about the current programme using OK Notes 7 The programme selected can be recorded if an external data medium is connected To do this select the push button Record with and confirm with OK Confirm the display with OK 7 To add the pr...

Page 150: ...oadcast with its modern structure content and high definition HD image and videos To receive HbbTV broadcast your television must be connected to the Internet This feature is only available in countries where the service is provided After you switch to a TV station that offers HbbTV a corresponding message appears ...

Page 151: ...back with 7 HBBTV MODE Deactivate and activate HbbTV This option allows turning off Hbb TV feature thus warnings shall not be displayed on chan nels with Hbb TV feature 1 Open the menu with MENU 2 Select menu item Settings with V Λ or and press OK to confirm 3 Select the menu item Source with or and press V to confirm Source menu is active 4 Select the line Advanced with V or Λ and press OK to con...

Page 152: ...ng searched for you can switch to the television channel 1 Enter the teletext page number with 1 0 and then press 6 As soon as the page is found the page number is displayed 2 Press 6 to switch to the teletext page Increasing character size 1 To enlarge the character size of a teletext page press 5 repeatedly Page stop A multiple page may contain several sub pages which are automatically scrolled ...

Page 153: ...ngs again on the repaired television 7 Beko isn t responsible for any loss of data stored on any external storage device 7 It is recommended to play the files saved on DTV by PVR player Possible limitations when using an external data medium Depending on the broadcasting station you may experience various restrictions on some functions from some television stations Beko has no influence on these r...

Page 154: ...e external hard disk to the USB HDD USB interface of the television or plug the memory stick in the USB1 socket of the television Notes 7 The socket USB1 of the television supports 500 mA current according to the USB standard Devices such as external hard disk and etc that consume more power can only be connected to the USB HDD USB interface of the television 7 If you are using a power cable for t...

Page 155: ...edia connected to the television then select one of them 1 In the Disk Management menu select the line Disk with V or Λ and press OK to confirm 2 Select the external data media with V or Λ 3 Switch back with BACK or press EXIT to end the setting Selecting a partition on the external media If there are more than one partitions on the external data media select one of them 1 In the Disk Management m...

Page 156: ...Time shift Pausing programmes You can pause any program you are watch ing This is a useful function For instance if the phone rings when you are watching a movie you can pause the movie and resume it after the call without missing nothing The last scene that was frozen is displayed and time shift is recorded into the external data media In Time Shift mode you can only record as much as the free me...

Page 157: ...ton Yes with or to confirm the security query or select push button No with or to to continue the recording Notes 7 When recording is complete it will auto matically be stored on the external data media 7 If you remove the external data media during recording then the recording is cancelled automatically and no data is recorded onto the external data media Recording a programme from the channel li...

Page 158: ... the channel At the end of 10 seconds the channel to be recorded appears automatically 7 If the timer recording starts during play back playback stops If you do not select Yes in the warning prompt recording will start automatically at the end of the countdown 7 Only for UPC customers Note Parts of previous or next files can be included into the record while the programme is being recorded resulti...

Page 159: ...utes 11 Press yyyy blue to save the settings 12 Press EXIT to exit the menu Notes 7 A warning is displayed before the timer recording starts and counts down for 10 seconds to allow you to switch to the chan nel Channel to be recorded is automatically opened after 10 seconds USB RECORDING Editing the timer 1 Open the menu with MENU 2 Select the menu item Schedule List with V Λ or and press OK to co...

Page 160: ...ng recorded or a previously recorded programme while recording takes place 1 Select the channel with 1 0 or P P and press to start the record ing 2 To display PVR content press yy red button 3 Select the programme you want to watch with V or Λ and start playback with 8 4 Press 7 to stop playback 5 Press 7 to stop recording 6 Select push button OK with or to confirm the security query or select pus...

Page 161: ...ed to compress picture files PNG and BMP standards are intended to com press picture data without loss Picture files can be saved in a data storage medium together with other file types Such files can be organized as folders and subfolders Audio data Your television can play audio data coded with MP3 AAC standards MP3 stands for MPEG 1 Volume Level 3 and is based on the MPEG 1 standard developed b...

Page 162: ...file on the USB Device is being read by the TV 7 A bi directional data transfer as defined for ITE Information Technology Equipment devices in EN 55022 EN 55024 is not possible 7 USB transfer is not an operating mode in itself It is only an additional function 1 Connect the USB HDD USB interface on the television and the related data output on the external device external hard disk digital camera ...

Page 163: ...he data medium 4 Folders on the data medium 5 Menu navigation USB OPERATION Settings in the USB setup menu Selecting the menu 1 Open the menu with MENU 2 Select the menu item Media Center with V Λ or and press OK to confirm 3 Select the name of the data medium with V or Λ and press OK to confirm 4 Select the Media Options with TOOLS Note 7 Additional operations are explained in the following secti...

Page 164: ...ia Player menu is displayed Note 7 If the content of the external data medium is not displayed press yyy yellow to refresh 3 Select the name of the data medium V or Λ and press OK to confirm Media Player menu of the selected exter nal data medium is displayed 4 Select the desired type All Movie Music or Photo with or and press OK to confirm 5 Select the folder with V or Λ and press OK to open it A...

Page 165: ... formats used the follow ing additional functions are possible Selecting partition on HD files only supported video files 1 During playback select the next chapter with 2 During playback select the previous chap ter with Selecting titles on HD files only supported video files 1 During playback select the next title with Λ 2 During playback select the previous title with V Playing selected tracks O...

Page 166: ...To resume playback press 8 Turn the picture display only picture files The pictures can be rotated by 90 1 During playback switch on the control panel with OK 2 Use or to select and press OK The picture rotates 90 clockwise Repeat functions Options One the selected track is repeated once Sequence selected tracks are repeated consecutively Random selected tracks are repeated in a mixed order None r...

Page 167: ...listed in the window from Media Sharing menu s Settings option you can select the option Allow new devices and computers automatically in the pop up menu After completing these processes the television can only view the supported file formats in the Library In order not to encounter any problems with media sharing check the Firewall settings of your modem and computer Selecting the digital media s...

Page 168: ...Select the desired title with V or Λ 3 Press 8 to start playback Other playback options 1 Press to pause playback 2 To resume playback press 8 3 Press 5 or 6 until you reach the desired file 4 Press 7 to stop playback 5 Switch back to the content with BACK 6 To exit DLNA feature press EXIT 7 Select push button Yes with or to confirm the security query or select push button No with or to cancel del...

Page 169: ...he content of Terms Conditions and Confidentiality There are two options for both contents Accept and Decline You cannot accept or decline indi vidually 7 If you select Accept you can continue to use the TV 7 If you select Decline 7 The Information Page will be displayed again when the TV is turned on and con nected to the internet the next time and the same steps will apply If the content of the ...

Page 170: ... cannot be held responsible for such changes 7 Beko reserves the right to make all changes such as modifications restrictions exten sions transfers and removals on internet applications provided through your SMART inter ctive TV 4 0 7 In Login process of some applications it may be required to connect to the web page of the related application Subject web pages may contain links not related to Log...

Page 171: ...e internet access or cannot obtain IP even if your cable is connected to TV or you are connected to a wireless network In this case check Network connection settings See page 87 or 90 Displaying all applications Applications displayed on SMART inter ctive TV 4 0 home page are just a few of the ap plication that can run on the television You can display and select other applications in All Applicat...

Page 172: ...tion will be displayed after a short while 2 Usage of application mostly depends on application s own structure Follow the notes on the screen Note 7 On the Settings menu you can change the country of the application portal and make the applications of the selected country ap pear on All Applications page Smart Inter ctive TV Navigation Select Settings Exit Featured Most Popular New Applications a...

Page 173: ...rowser applications Web browser allows you to navigate in the Internet 1 Open the menu with MENU 2 Select the menu item Web Browser with V Λ or and press OK to confirm Web Browser is displayed 3 Select URL entry area with Λ or V and press OK to confirm Virtual keyboard will be displayed 4 Enter the address and confirm with OK Notes 7 Other functions are explained on the screen 7 You may connect a ...

Page 174: ...anguage with V or Λ and press y red to set it as the primary audio language or yy green to set it as the secondary audio language Primary and secondary languages ap pear on the upper of the menu 4 Press BACK to go back one menu level or press EXIT to end the setting Changing the subtitle language only for digital television channels You can disable subtitles select subtitle language and assign a s...

Page 175: ... 1 From the Accessibility Settings menu use V or Λ to select the line Subtitle Mode 2 Set the preferred option Off Hard of Hearing or Basic with or 3 Press BACK to go back one menu level or press EXIT to end the setting Audio description audio sub titles Audio description is an additional audio chan nel for people who are visually handicapped The activities surroundings scene changes or the appear...

Page 176: ... according to European regulations the remote remains untouched for 5 minutes 1 From the Advanced menu use V or Λ to select the line Auto Sleep 2 Select the switch off time with or Note 7 Set the function to Off with or to switch off 3 Press BACK to go back one menu level or press EXIT to end the setting Store logo view This function is intended for feature introduction at stores When On is select...

Page 177: ...ening to music in USB mode press MENU and select Off with or to close the feature Switching on off weather infor mation If this function is activated a weather logo and the local temperature is displayed 1 From the Advanced menu use V or Λ to select the line Weather Widget 2 Press or to turn to On position 3 Press EXIT to end the setting Switching on off help informa tion Help information about th...

Page 178: ...er Auto On In the On Timer menu you can enter a switch on time for the television The television switches on with the preset volume and the desired channel after the set time in stand by mode has elapsed 1 Select the line Auto On with V or Λ and press OK to confirm 2 Select the line Mode with V or Λ and use or to select when the television should switch on 3 Select the line Input Source with V or ...

Page 179: ...ntered time has elapsed 1 Select the line Auto Off with V or Λ and press OK to confirm 2 Select the line Mode with V or Λ and use or to select when the television should switch off 3 Select the line Set Hour with V or Λ and enter the time with 1 0 4 Press yyyy blue to save the setting 5 Press BACK to go back one menu level or press EXIT to end the setting TIMER FUNCTIONS ...

Page 180: ...l with or 4 Press BACK to go back one menu level or press EXIT to end the setting Note 7 When the TV is in review buffer mode the parental rating of the program in the live broadcast is applied on the content being watched rather than the actual parental rating of the content being watched As a result a parental rated content being watched in the review buffer mode will not necessarily show as par...

Page 181: ...our personal PIN code with 1 0 5 Press BACK to go back one menu level or press EXIT to end the setting Blocking a television channel You can block individual television channels which are not suitable for children using a personal PIN code 1 Open menu with MENU button 2 Select menu item Settings with V Λ or and press OK to confirm 3 Select the menu item Source with or and press OK to confirm 4 Sel...

Page 182: ... the password prompt Blocked channel can be viewed Note 7 Channel will be blocked again when you change the channel Resetting PIN code Use this function if you forget the PIN code 1 From the Parental menu use V or Λ to select the line Change PIN and press OK to confirm 2 Enter the PIN code 2 3 5 6 with 1 0 3 Enter your new four digit personal PIN code with 1 0 4 Reenter your personal PIN code with...

Page 183: ...re automatically updated 3 Press BACK to go back one menu level or press EXIT to end the setting Manual tuning You can set the local time difference yourself if the time is not detected or is not the same as your local time 1 From the Advanced menu use V or Λ to select the line Time Adjustment 2 Select the option Manual with or Time Zone and Daylight Saving are active 3 Select the line Time Zone w...

Page 184: ...ar ried out Note 7 If no new software is available the menu automatically switches off 3 If new software is available press yy green to install the software The new software will be loaded Warning 7 Television will restart after update Do not turn your television s power off during updates Note 7 For automatic checking of software update select from Source menu Advanced the line OAD with V or Λ Us...

Page 185: ...K to confirm 3 Select the menu item TV with or and press V to confirm 4 Select the line Accessories with V or Λ and press OK to confirm 5 Select the needful line with V or Λ and press OK to confirm Select the needful function with or 6 Press BACK to go back one menu level or press EXIT to end the setting Notes 7 Accessories are sold individually They are not provided with your TV Please contact yo...

Page 186: ...onfirm the security query or select push button No with or to cancel deletion process In a short while Installation Guide is displayed 3 Continue the settings as described in the chapter on first installation and searching for channels on page 20 Deleting channel history This function allows you to delete channel his tory stored in the Main menu 1 From the About menu use V or Λ to select the line ...

Page 187: ...g DVD player your television will switch to the HDMI source that the external device is con nected to your TV should be open Selecting the menu language When you select menu language on your TV menu language of the external device will change as well if your DVD player supports USING EXTERNAL DEVICES Switching off the external device from standby mode After switching your television to standby you...

Page 188: ...h or Notes 7 Pass Through is included in the menu as an option that can be selected in every device type Deck Control and Tuner Control options change depending on the external device connected 7 Apply trial and error method to determine the functions of the remote control buttons for the selected control type 7 Refer to the user manual of the DIGILINK compatible device for its functions 7 Press E...

Page 189: ...t s you connect your external devices to depends on the sockets the external device is equipped with and the signals which are available 7 Note that with many external devices the resolution of the video signal must be adapted to the input sockets on the televi sion check the external device s instruction manual You can find out which values you need to set by referring to the guidelines in the se...

Page 190: ...layer video recorder or set top box 1 Switch on the video recorder DVD player or set top box and select the function you wish to use 2 Press and use or to select input signal HDMI1 HDMI2 HDMI3 ARC and press OK to confirm USING EXTERNAL DEVICES Headphones Connecting headphones 1 Plug the headphone jack 3 5 mm ø jack plug into the headphone socket of the television Selecting the volume for the head ...

Page 191: ...Audio device connected to the HDMI3 ARC source shall be displayed in the list 5 Select the device with V or Λ and press OK to confirm Notes 7 If the audio system also has a playing func tion e g Home theater system including DVD player function two devices will be listed on the HDMI CEC list The first one is the player and the second one is the audio playback 7 If a Blu ray Player is connected to ...

Page 192: ...em Settings with V Λ or and press OK to confirm 4 Select the menu item Sound with or and press OK to confirm Sound menu is displayed 5 Select the line Advanced with V or Λ and press OK to confirm 6 Select the line Audio Out with V or Λ 7 Select the option Fixed or Adjustable with or Notes 7 If you select Adjustable the volume can be changed in the menu option Audio Out Volume 7 If you want to obta...

Page 193: ...from your TV Wireless screen share Liveshare 3 Using your laptop or mobile device launch the Miracast application and select your TV Select Receive Screen and press OK to confirm Using your laptop or mobile device launch the Miracast application and select your TV or Select Share Screen and press OK to confirm Miracast supported devices on the network that can receive screen will be searched and t...

Page 194: ...television Notes 7 To see which CA module is in the Common Interface slot go to the CA Module submenu 7 When you insert a CA module into the CI slot on the television for the first time wait a few moments until the television has regis tered the CA module Access control for CA module and smart cards 1 Open the menu with MENU 2 Select menu item Settings with V Λ or and press OK to confirm 3 Select ...

Page 195: ...your TV by your phone after down loading the free Beko TV Remote application from Apple App Store or Google Play Android Market Network connection You can establish a wired or wireless connection between your television and the local network If you want to use a wired network connection please start with the instructions here If you use a wireless network connection please follow the instructions ...

Page 196: ...ctive Picture Tuesday xx xxx xxxx Source Timer Sound Network TV Parental Settings Network Change Area Connect Test Connection Select Zurück BACK Change Connection Type Wired Network Configuration AUTO Wake on LAN Off Advanced 4 Select the line Change Connection Type V or Λ and press OK to confirm 5 Select the option Wired with V or Λ and press OK to confirm NETWORK SETUP 6 Select the line Network ...

Page 197: ...al Wake on LAN Off IP Address 192 168 000 200 DNS 192 168 000 254 Netmask 250 250 250 200 Picture Tuesday xx xxx xxxx Source Timer Sound Network TV Settings Network Change Area Connect Test Connection Input Mode Exit Back EXIT BACK 7 Select the line IP Address with V Enter IP address with 1 0 8 Select the line DNS with V Enter IP address with 1 0 9 Select the line Netmask with V Enter Netmask addr...

Page 198: ... on the network as it is the case in every wireless network 7 It is recommended to switch off the equip ment that are not in use in home network in order to avoid unnecessary network traffic 7 Placing the modem or wireless network sharer on an elevated location will increase the wireless connection reception strength 7 Wireless connection reception strength may vary depending on the type of the mo...

Page 199: ...K 8 With y red select Connect to establish modem connection Push the WPS button on your Access Point message is displayed 9 Press the WPS button on the router 10 To continue after pressing the WPS button on the access point select the option Con tinue with or and press OK to confirm The Connection to Gateway Success message will be displayed 11 Press yy green to make sure that the network connecti...

Page 200: ...ill be displayed 13 Press EXIT to end the setting Connecting automatically by entering the network password Use this method for establishing a connection if your router does not support WPS PBC or WPS PIN entry 1 Open the menu with MENU 2 Select menu item Settings with V Λ or and press OK to confirm 3 Select the menu item Network with or and press V to confirm Network menu is active Change Connect...

Page 201: ...ic IP address If your network requires a Static IP address you must enter the IP Address Netmask Gate way and DNS values manually You can get IP Address Netmask Gateway and DNS values IPS from your Internet Service Provider 1 Open the menu with MENU 2 Select menu item Settings with V Λ or and press OK to confirm 3 Select the menu item Network with or and press V to confirm Network menu is active 4...

Page 202: ...the line Select Access Point with Λ or V and press OK to confirm Select Access Point menu is displayed by scanning available wireless networks 13 Select the network that you want to connect with V or Λ and confirm with OK Wireless connection password screen is displayed Note 7 For device to discover the wireless modem on the network the network name should support ASCII characters 14 Select the re...

Page 203: ...h between uppercase letters numbers and lowercase letters special characters Select Del to delete the character entered and press OK to confirm 8 Confirm the SSID by pressing yy green 9 Select the line Security Type with V or Λ and select the required option WPA2 with or 10 Confirm the setting with y red The network is now in the Select Access Point menu 11 Select the network with V or Λ and press...

Page 204: ...he Channel Type Press V or Λ to select whether you want to search for only digital channels Digital or only radio channels Radio or both Digital Radio and press OK to select and mark or unmark the Digital and or Radio items 8 Select Scan Mode To select whether you want to search for only free digital television channels Free only scrambled digital television channels Scrambled or both Free Scrambl...

Page 205: ...quired option for manually adjusting with V or Λ Service Type Press or to select whether you want to search for only television channels DTV only radio channels Radio or both Radio TV Scan Type Press or to select whether you want to search for only free digital television channels Free only scrambled digital television channels Scrambled or both Free Scrambled Transponder Enter the transponder fre...

Page 206: ...0 see chapter Searching for antenna settings for DiSEqC 1 0 and digital channels from a satellite automatically 8 Exit the antenna settings with yyyy blue SETTING FURTHER CHANNELS 9 Select the Channel Type Press V or Λ to select whether you want to search for only digital channels Digital or only radio channels Radio or both Digital Radio and press OK to select and mark or unmark the Digital and o...

Page 207: ...e SCR option with or Select the LNB Frequency High line with V and enter the frequency with 1 0 in five digits Select the LNB Frequency Low line with V and enter the frequency with 1 0 in five digits Confirm the settings with yy green LNB Selection Depending on the number of LNBs select the option with or 1 2 if only 1 LNB is used if two LNBs are used select the required LNB 1 2 or 2 2 User Band S...

Page 208: ... end the setting Antenna settings for DiSEqC 1 0 and searching digital channels from a satellite automatically Note 7 The following description about the LNB set tings premise a substantial expertise about the satellite systems Ask your specialist dealer 1 Open the menu with MENU 2 Select menu item Settings with V Λ or and press OK to confirm 3 Select the menu item Source with or and press V to co...

Page 209: ...ee only scrambled digital television channels Scrambled or both Free Scrambled press V or Λ and press OK to select and mark or unmark the Free and or Scrambled items 11 Press y red to start searching Notes 7 When updating via the same satellites a security query is displayed at the start of a search 7 If the previously stored channels should be retained in the channel list and the new channels fou...

Page 210: ...twork ID If scanning cannot be performed with Quick option select Full All current channels are tuned and stored in Full scanning This scanning process can take a long time This option is recommended if your cable operator does not support quick scanning function Note 7 You can speed up the search To do this frequency and network ID information are required You may get this data from your cable op...

Page 211: ...ttings with V Λ or and press OK to confirm 3 Select the menu item Source with or and press V to confirm Source menu is active 4 Press BACK to go back one menu level 5 Select the line Automatic Channel Search with Λ or V and press OK to confirm 6 Select the option Air DVB T T2 with Λ or V and press OK to confirm 7 Select whether to search for digital or ana logue TV channels To to this press Λ oder...

Page 212: ...ion Digital or Analogue and confirm with OK 8 Enter frequency 3 digit directly with 1 0 Search will start The search is finished when the channels found appear in the list 9 Press EXIT to end the setting Automatic service update If this function is activated possible changes of network operators are updated automatically The unit must be located in stand by mode This updating affects all types of ...

Page 213: ...elect the line Automatic Channel Search with V or Λ and press OK to confirm 5 Select the option Air DVB T T2 or Cable DVB C with V or Λ and confirm the source you are receiving analog broadcast from by pressing OK 6 Select the option Digital with V or Λ and press OK to remove the small tick 7 Press y red to start searching SETTING FURTHER CHANNELS Notes 7 After starting the scan a security query w...

Page 214: ...Fine Tuning with V or Λ and tune with or 10 To save the setting press yyyy blue Note 7 To set other television channels repeat steps from 7 to 10 11 Press EXIT to end the setting Changing stored analogue channels If channels were stored with the automatic chan nel search during the tuning of the television channels you can delete them You can also change or enter the name of a channel and skip a c...

Page 215: ...nnel Editor menu select the channel s you want to add in the favor ites list with V Λ or and highlight the television channel by pressing OK Channel is marked with 2 Activade the Tools menu with yyy yel low 3 Select the line Add To Fav with V or Λ and press OK to confirm Add to Fav menu is displayed 4 Select the favorite list you want to add the selected channels with V or Λ and store with OK The ...

Page 216: ... OK to confirm 5 Select the line Signal Information with V or Λ and press OK to confirm Signal Information menu is displayed Notes 7 Signal information changes depending on the current source 7 Signal information is shown at the top of the menu The more Frequency and Signal Strength bar stretches to the right the more signal you have 7 The signal level not only depends on your receiver system but ...

Page 217: ...Television User Manual 103 115 TR SETTING FURTHER CHANNELS ...

Page 218: ...lation regarding energy label ling of televisions 2011 65 EU Directive on limitations on use of certain hazardous materials on electric electronic domestic and office equipment To receive a copy of declaration of compliance DoC visit http www beko com tr You can access the declaration of compliance by running your televi sion model on the product model search section by entering the model number o...

Page 219: ... works only with AC line volt age in your household electric ity Direct current The set works only with AC DC adapter For the customers in Russia Short Range Device with FHSS Modulation Applications Maximum 2 5 mW e i r p for collecting telemetry information for auto matic tracking and source calculation systems 100mW e i r p is the maximum allowed short range device density value permitted for us...

Page 220: ...ng if setting op tion is available Select the correct colour standard Problem at station Test with an another channel Picture but no sound Volume set to minimum Turn up or switch on the volume Teletext missing or faulty Problem at station Test with an another channel Television station has no tele text or antenna system Test another channel for fine tun ing and ghosts Station signal too weak Check ...

Page 221: ... sure that your modem has Internet connection Videos in video applica tions are lagging during playback in wireless con nection Internet connection speed is low Low Internet speed is a problem that is related with the speed of your subscription or a failure in the Internet infrastructure Contact with your service provided ISP Videos in video applica tions are lagging during playback in cable con n...

Page 222: ...sary if two or more satellite posi tions need to be controlled Dynamic Backlight Here the device optimally adjusts the back lighting for the picture content by regulating the back lighting depending on the average pic ture brightness If a picture has predominately dark areas then the black level displayed is improved by downward adjustment of the back lighting in this case the display of the dark ...

Page 223: ...s the device This includes all components such as processor display etc GLOSSARY HbbTV HbbTV is the interactive successor of video text which has content with a modern design high resolution images and video sequences For full functionality of HbbTV the TV must be connected to the internet HD High Definition Television is a general term for a range of television standards which feature increased v...

Page 224: ... as LANs Many computer networks require complete connectivity at IP level but only limited access to the Internet If such a com puter network has a private IP address range it forms an intranet which cannot be accessed from the Internet as the Internet routers ignore private address ranges A gateway or router that is placed in this private network and which has a public address in the Internet as ...

Page 225: ...ixels UHD 2 USB Recording Enables recording and playback of television programmes with digital television channels DVB S DVB T and DVB C This depends on the broadcaster Recording and playback of programmes can only be carried out using an external data me dium hard drive or USB stick Vibrant Colour Increases the colour contrast and the contrast adjustment This setting is mostly too strong for use ...

Page 226: ...Connecting automatically by entering the net work password 20 86 Connecting digital multi channel amplifier AV receiver 77 Connecting external data media 40 48 Connecting headphones 76 Connecting the antenna and power cord 10 Connecting the TV to a hidden network 89 Connecting to a home network with a LAN cable 20 Connection options 75 Connections on the television set 13 Control buttons on the TV...

Page 227: ...eption 104 Notes on still images 8 O Off timer Auto Off 65 One touch programme recording 43 On timer Auto On 64 Opening the Programme Table 23 Operation with common interface 80 Overview 13 P Packing contents 9 Page stop 38 Parental Guidance 66 Parental Settings 66 Picture settings 27 34 Playback 46 Playback basic functions 50 Playback during a recording 46 Playing selected tracks 51 Playing the a...

Page 228: ...menu 41 49 Selecting the menu language 73 Selecting the volume for the headphones 76 Selecting titles on HD files 51 Sequencing channels in the Channel Edi tor 25 INDEX Service information for dealers 104 Set the lead follow up time 44 Setting all analogue television channels 99 Setting further channels 90 Settings for connecting to the home net work 17 Settings in the USB setup menu 49 Settings r...

Page 229: ...USB keyboard and mouse 56 USB Opertion 47 USB Recording 39 USB recording settings 41 Using a DVD recorder DVD player video recorder or set top box 76 Using external devices 73 Using HbbTV 37 V Video data 47 W Watching a blocked television channel 68 WEB Browser 59 Web browser applications 59 Web browser menu 59 What is common interface 80 What is HbbTV 36 What is LIVESHARE 79 Wired network 81 Wire...

Page 230: ...ühren 23 Programmtabelle für die digitalen Programme ändern 27 Bildeinstellungen 27 Erweiterte Bildeinstellungen 28 Zurück zu den Standardwerten 29 Toneinstellungen 30 Zurück zu den Standardwerten 30 Einstellungen beenden 31 FERNSEH BETRIEB GRUNDFUNKTIONEN 31 Ein und Ausschalten 31 Programme wählen 31 Programme aus Listen wählen 31 AV Programmplätze wählen 31 Lautstärke ändern 31 Ton aus und einsc...

Page 231: ...gen und Zustimmung widerrufen 56 Anwendungen zu SMART Inter ctive TV 4 0 56 USB Tastatur und Maus 56 Erste Schritte mit Smart Inter ctive TV 58 Anwendungsportal Hauptbildschirm 58 Navigation am Anwendungsportal Haupt bildschirm 59 WEB BROWSER 59 Hauptmenü des WEB Browsers 59 WebBrowser Applikation 60 SPRACHEINSTELLUNGEN 60 Menüsprache ändern 60 Audiosprache ändern 60 Untertitelsprache ändern 60 Ta...

Page 232: ... am Router für den WLAN Betrieb 88 Name des Fernsehgerätes ändern 89 Fernsehgerät bei einem versteckten Netzwerk anmelden 90 WEITERE PROGRAMME EINSTELLEN 90 Digitale Programme eines Satelliten auto matisch aktualisieren 91 Digitale Programme eines Satelliten auf einem Transponter manuell suchen 92 Antenneneinstellungen und digitale Programme eines Satelliten automatisch suchen 93 Antenneneinstellu...

Page 233: ...r ein nicht formatfüllendes Bild angezeigt wird können für einige Zeit auf dem Bildschirm sichtbare Spuren davon zurückbleiben Dies ist kein Mangel der einen Anspruch auf Gewährleis tung begründet Sicherheit WARNUNG Gefahr eines Stromunfalls 7 Öffnen Sie nicht das Fernsehgerät Bei Schä den die durch unsachgemäße Eingriffe entste hen geht der Anspruch auf Gewährleistung verloren 7 Das Fernsehgerät ...

Page 234: ...tsorgen Sie die Batterien nicht im Hausmüll Verbrauchte Batte rien müssen im Handel oder in öffentlichen Sammelstellen abgegeben wer den Damit schonen Sie die Umwelt 7 Achten Sie darauf Verpackungsmaterialien Ihres Produkts separat entsprechend den Richtlinien örtlicher Behörden zu entsorgen damit sie umweltfreundlichen Recyclingverfah ren zugeführt werden können 7 Wenn Sie Ihr Fernsehgerät kurzze...

Page 235: ...meShift Zeitversetztes Fernsehen können Sie die Wiedergabe einer Sendung mit einem Tastendruck einfach und schnell anhalten und zu einem späteren Zeit punkt fortsetzen Die Sendung wird auf einem externen Datenträger aufgezeichnet 7 Sie können digitale Fernsehprogramme ihrer Wahl aufnehmen Die Fernsehprogramme werden vom Fernseh gerät konvertiert und auf einem externen Da tenträger angeschlossen an...

Page 236: ...enanlage angeschlossen sind die Fernsehprogramme unabhängig voneinan der empfangen Wichtige Hinweise zum Umwelt schutz Die folgenden Hinweise helfen Ihnen natürliche Ressourcen zu schonen und Kosten zu sparen 7 Wenn Sie ihr Fernsehgerät mehrere Tage lang nicht nutzen sollten Sie aus Umweltschutz und Sicherheitsgründen das Fernsehgerät mit dem Netzschalter ausschalten So verbraucht das Fernsehgerät...

Page 237: ...ehör 1 Fernsehgerät 2 Standfüße 3 Fernbedienung 4 Batterien für Fernbedienung 5 Schrauben und Montageanleitung für Standfuß 6 Kurzanleitung Optionales Zubehör Komfortfernbedienung Easy Use Remote Control Reinigungstuch Schrauben für VESA Halterung User Manual 1 3 5 4 2 ...

Page 238: ...r Hausantenne an die Antennenbuchse ANT IN des Fernseh gerätes anschließen oder 2c Zum Empfang analoger Fernsehprogramme das Kabel der Hausantenne an die Anten nenbuchse ANT IN des Fernsehgerätes anschließen Hinweis 7 Beim Anschluss einer Zimmerantenne muss diese evtl abwechselnd an verschiedenen Orten platziert werden um einen optimalen Empfang zu erhalten 3 Stecker des Netzkabels in eine Steckdo...

Page 239: ...age an VESA Halterung vor bereiten Sie benötigen 7 eine Schere 7 einen Kreuzschlitz Schraubendreher Beachten Sie die Montageanleitung der VESA Halterung 1 Fernsehgerät in der Folie mit dem Bildschirm nach unten auf eine glatte Fläche legen 2 Folie mit einer Schere auf der Rückseite aufschneiden 3 Benötigte Kabel mit den Anschlüssen des Fernsehgeräts verbinden Siehe Kapitel Anschlüsse in dieser Anl...

Page 240: ... gehaftet werden Umwelthinweis 7 Dieses Symbol auf Akkus Batterien oder an der Verpackung weist darauf hin dass der Akku die Batterie nicht mit dem regulären Hausmüll entsorgt werden darf Bei bestimmten Akku Batterien kann dieses Symbol durch ein chemisches Symbol ergänzt werden Symbole für Quecksilber Hg oder Blei Pb werden angegeben wenn Akkus Batterien mehr als 0 0005 Quecksilber oder mehr als ...

Page 241: ...Fernseher Bedienungsanleitung 13 116 TR AUF EINEN BLICK Anschlüsse des Fernsehgerätes ...

Page 242: ...ut optischer Tonausgang 7 USB HDD hier Datenträger zum Aufzeich nen von Sendungen anschließen z B exter r ne Festplatte 7 HDMI3 ARC Eingang für digitale Ton und Bilddaten mit Ton Rückkanal AV Receiver hier anschließen 7 HDMI2 Eingang für digitale Ton und Bild daten 7 SATELLITE für Satellitenantenne Geeignet für GSCR Einkabelsystem 7 ANT IN für Antennenkabel terrestrische Antenne oder Kabelanschlus...

Page 243: ...ten Hauptmenü Werkzeuge Funktionen und Einstellungen Videotext aufrufen aus schalten Meine Apps Menü Einschalten aus Stand by nächstes vorheriges Programm Lautstärke Informationen anzeigen Menüs und Applikationen beenden Programmliste Programmführer Einschalten aus Stand by Programm Direktwahl Favoritenlisten Aufnehmen Abspielen Pause Stopp nur digitale Fernseh Programme Videotext auf halbem Bilds...

Page 244: ...gabe einer Sen dung vom externen Datenträger startet die Wiedergabe einer Datei vom Medienserver Timeshift Betrieb nur bei digitalen Fernsehprogrammen und wenn ein externer Datenträger angeschlossen ist Pause bei der Wiedergabe einer Sendung vom externen Datenträger oder vom Medienplayer Pause beim Abspielen einer Datei vom Medienserver 7 Teilt die Bildanzeige im Videotext beendet die Wiedergabe e...

Page 245: ...ellungen IP Adresse DNS Netzmaske und Gateway von Hand eingegeben werden Bei der WLAN Verbindung gibt es verschiede ne Möglichkeiten Automatische Anmeldung dabei werden alle notwendigen Einstellungen IP Adresse DNS Netzmaske und Gateway vom Router automatisch verge ben Abhängig vom Router verwenden Sie die Option PBC Push Button Configurati on die Anmeldung mittels PIN die Anmeldung mit Eingabe de...

Page 246: ...kt 17 Kabellos WPS Kapitel S 85 Autom S 21 Pkt 12 Manuell Kapitel S 83 Autom S 20 Pkt 17 Manuell Kapitel S 87 Taste Kapitel S 85 PIN Kapitel S 85 Programmtabelle S 23 Fernsehprogramme einstellen S 21 Pkt 26 DVB T S 22 Pkt 35 DVB C S 22 Pkt 30 DVB S S 22 Pkt 25 Komplett S 22 Pkt 30 Manuell Kapitel S 97 Astra S 22 Pkt 25 Sky Kapitel S 90 Manuell Kapitel S 91 Autom S 22 Pkt 35 Manuell Kapitel S 98 Po...

Page 247: ...rilliant mit V oder Λ wählen und mit OK bestätigen Die bei der Option Home Modus verwendeten Einstellungen sparen Energie Die Option Brilliant dient zu Demon strationszwecken der Gerätefunktionen im Fachhandel und bietet optimale Bild und Tonqualität verbraucht jedoch mehr Leistung 6 Die benötigte Option Standfuß oder Wandmontage mit V oder Λ wäh len und mit OK bestätigen Hinweis 7 Die Toneinstell...

Page 248: ...g Möchten Sie WLAN ein schalten bestätigen dazu mit oder die Schaltfläche Ja anwählen und mit OK bestätigen 19 Zeile Netzwerk wählen mit V oder Λ wählen und mit OK bestätigen Das Menü Netzwerk wählen wird ein geblendet die vorhandenen Netzwerke werden gesucht und angezeigt 20 Das gewünschte Netzwerk mit V oder Λ wählen und mit OK bestätigen Das Kennwort Menü wird eingeblendet 21 Das erste Zeichen ...

Page 249: ...weiz 25 Die Option Satellit DVB S S2 mit V oder Λ wählen und mit OK bestätigen 26 Die Option Astra Schnell mit V oder Λ wählen und mit OK bestätigen Der Satellit Astra 19 2 Ost ist vor eingestellt 27 Die Schaltfläche Weiter mit yyyy blau bestätigen Hinweise 7 Auswahl treffen ob nur nach Fernsehpro grammen TV nur nach Radioprogrammen Radio oder nach beidem Radio TV ge sucht werden soll Dazu mit V o...

Page 250: ...rogrammen gesucht werden soll Dazu mit V oder Λ die Option Digital oder Analog anwählen und mit OK das Häkchen entfernen oder setzen 33 Suchlauf mit y rot starten Das Menü Digital Suche wird ein geblendet die Suche nach Programmen beginnt Der Suchlauf ist beendet wenn die Mel dung Suche ist abgeschlossen erscheint 34 Zur Programmtabelle mit OK schalten ERSTINSTALLATION Programme DVB T einstellen 3...

Page 251: ...ogrammtabelle für die digitalen Programme ändern Programme die über den Suchlauf gefunden wurden werden in der Programmtabelle ge speichert In der Programmtabelle können Sie nicht benö tigte Programme löschen die Reihenfolge der Programme innerhalb der Programmtabelle ändern und einzelne Programmplätze sperren Kindersicherung Sie können Programme auch zu Favoritenlisten hinzufügen zusätzlich könne...

Page 252: ... oder die Schaltfläche OK anwählen und mit OK bestätigen oder Löschvorgang abbrechen dazu mit oder die Schaltfläche Nein anwählen und mit OK bestätigen 5 Programmtabelle mit EXIT abschalten Reihenfolge der Programme in der Programmtabelle ändern 1 Im Menü Programmtabelle die Program me die verschoben werden sollen mit V Λ oder wählen und mit OK markieren Die Programme werden mit markiert 2 Den Bea...

Page 253: ...rogrammta belle mit oder mar kiert Sie können das gleiche Programm in mehrere Favoritenlisten aufnehmen In jede Favoritenliste können bis zu 250 Programme gespeichert werden Hinweise 7 Programme können wieder aus Favoriten listen gelöscht werden Dazu den Bearbeitungsmodus mit yyy gelb aktivieren Die benötigte Favoritenliste mit V oder Λ wählen und mit OK bestätigen Das zu löschende Programm mit V ...

Page 254: ...mit yy grün bestätigen 7 Favoritenliste mit EXIT abschalten Eigene Namen für die AV Programm plätze vergeben Sie können für alle AV Programmplätze eigene Namen vergeben 1 Die Übersicht der AV Programmplätze mit aufrufen 2 Gewünschten AV Programmplatz mit oder wählen 3 Den Bearbeitungsmodus mit yyyy blau aktivieren Ein Menü wird eingeblendet 4 OK drücken und den alten Namen mit y rot schrittweise l...

Page 255: ...agung dosiert eingesetzt werden sollten Sie können zwar bei schlechtem Material die Ansicht ver bessern aber bei hervorragender Übertragung und Bildmaterial diese beeinträchtigen 7 Hintergrundbeleuchtung Manuelle Einstellung der Hintergrundbe leuchtung ist nur aktiv wenn die dynami sche Hintergrundbeleuchtung auf AUS geschaltet ist Diese Einstellung wirkt sich auch direkt auf den Stromverbrauch au...

Page 256: ...es Bildes defekte Untertitel oder feine Linien im Bild auftreten 7 Rauschreduktion Vermindert das sichtbare Rauschen indem das Bild ein wenig unschärfer dargestellt und ein leichtes Nachziehen erzeugt wird Sollte bei einem guten Bildmaterial deshalb minimiert eingesetzt werden 7 Blockartefaktreduktion Diese Funktion kann nur bei digitalen Emp fangsquellen und AV Programmplätzen aus gewählt werden ...

Page 257: ... Modus Der Nacht Modus verhindert sowohl Schwan kungen der Lautstärke als auch einen plötzlichen Anstieg der Lautstärke 1 Zeile Nacht Modus mit V oder Λ wählen 2 Nacht Modus mit oder ein oder ausschalten Hinweise 7 Im Menü Toneinstellungen finden Sie weitere zusätzliche Einstellungen Zeile Erweitert mit V oder Λ wählen und mit OK bestätigen Standfuß oder Wandmontage Die Toneinstellungen werden je ...

Page 258: ...peichern Automatische Lautstärke Fernsehsender senden meist in unterschiedlichen Lautstärken Die Funktion AVL Automatic Volu me Limiting gewährleistet eine einheitliche Laut stärke wenn Sie von einem Fernsehprogramm auf ein anderes umschalten 1 Zeile Erweitert mit V oder Λ wählen und mit OK bestätigen 2 Zeile AVL mit V oder Λ wählen und mit oder die Option Ein wählen Hinweis 7 Wurde in der Zeile T...

Page 259: ...Radio Betrieb das Bild abschalten siehe Kapitel ERWEITERTE EINSTELLUNGEN auf Seite 68 Programme aus Listen wählen Sie können Programme aus verschiedenen Listen z B ALLE S FAV 1 bis FAV 4 wählen 1 Übersicht der Programmlisten mit FAV aufrufen Die Übersicht wird angezeigt 2 Gewünschte Programmliste mit V oder Λ wählen und mit OK aufrufen 3 Gewünschtes Fernsehprogramm mit oder wählen und mit OK bestä...

Page 260: ...n Sendung 1 Auswahlmenü mit aufrufen 2 Gewünschten Untertitel mit V oder Λ wählen und mit OK bestätigen 3 Menü mit EXIT abschalten Zapp Funktion Mit dieser Funktion können Sie das Fernsehpro gramm das Sie im Moment ansehen speichern und zu anderen Fernsehprogrammen schalten zappen 1 Mit 1 0 oder P P das Fern sehprogramm wählen das in den Zapp speicher abgelegt werden soll und mit BACK bestätigen 2...

Page 261: ...dformat umschalten 1 Menü mit TOOLS aufrufen 2 Zeile Bildformat mit V oder Λ wählen 3 Bildformat mit oder wählen und mit OK bestätigen 4 Menü mit EXIT abschalten Hinweise 7 Sie können zwischen folgenden Bildfor maten wählen Format Auto Bei 16 9 Sendungen wird automatisch auf das Bildformat 16 9 umgeschaltet Bei 4 3 Sendungen wird automatisch auf das Bildformat 4 3 umgeschaltet Formate 16 9 und 14 ...

Page 262: ...l ERWEITERTE EINSTELLUNGEN auf Seite 70 Nach der Anwahl des Menüs oder der Funkti onszeile werden diese Information eingeblen det Die Information kann mit abgeschaltet wer den FERNSEH BETRIEB WEITERE FUNKTIONEN Format Untertitel Wenn Sie den Untertitel der am unteren Bild rand gezeigt wird nicht erkennen dann wählen Sie Untertitel Format Panorama Diese Einstellung eignet sich für Filme im be sonde...

Page 263: ... P können die Programme in 7 Schritten umgeschaltet werden 3 Zu den Informationen der aktuellen Sen dung mit OK schalten Hinweise 7 Die gewählte Sendung kann aufgezeichnet werden wenn ein externen Datenträger angeschlossen ist Dazu die Schaltfläche Aufnehmen mit wählen und mit OK bestätigen Einblendung mit OK bestätigen 7 Die gewählte Sendung kann in den Erin nerungstimer übernommen werden Dazu di...

Page 264: ...modern gestalteten Inhalten hochauflösenden Bildern und Videosequenzen Voraussetzung für die vollständige Funktionalität von HbbTV ist dass das Fernsehgerät mit dem Internet verbunden ist Nach dem Umschalten auf ein Fernsehpro gramm das HbbTV anbietet wird eine entspre chende Information eingeblendet HBBTV BETRIEB ...

Page 265: ...mit 8 fortsetzen 4 Zurückspulen mit 3 oder vorspulen mit 4 5 Wiedergabe mit 7 beenden HbbTV aus einschalten Wenn Sie den interaktiven Dienst HbbTV aus schalten ist dieser Dienst nicht mehr verfügbar 1 Menü mit MENU aufrufen 2 Menüpunkt Einstellungen mit V Λ oder wählen und mit OK bestätigen 3 Menüpunkt Quelle mit oder wählen und mit V bestätigen 4 Zeile Erweitert mit V oder Λ wählen und mit OK bes...

Page 266: ...n Wartezeit überbrücken Während eine Seite gesucht wird können Sie zum Fernsehprogramm umschalten 1 Nummer der Videotextseite mit 1 0 eingeben und danach 6 drücken Sobald die Seite gefunden wurde wird die Seitennummer angezeigt 2 Auf die Videotextseite mit 6 umschalten Zeichenhöhe vergrößern 1 Zeichenhöhe einer Videotextseite vergrö ßern dazu 5 wiederholt drücken Seitenstopp Unter einer Mehrfachse...

Page 267: ... möglich 7 Beko übernimmt keine Haftung für den even tuellen Verlust gespeicherter Daten auf dem externen Datenträger 7 Da der USB Multimedia Player verschiedene aufgenommene Sendungen nicht unterstützen kann verwenden Sie zur Wiedergabe der aufgenommenen Sendungen die Funktion PVR Archiv Mögliche Einschränkungen bei dem Betrieb mit externen Daten träger Abhängig vom jeweiligen Programmanbieter ka...

Page 268: ...wei se externe Festplatten 1 Buchse USB HDD des Fernsehgerätes und entsprechende Buchse des Datenträgers externe Festplatte mit einem USB Kabel verbinden oder USB Stecker des USB Memory Sticks in Buchse USB1 des Fernsehgerätes stecken Hinweise 7 Die Buchse USB1 des Fernsehgerätes liefert gemäß USB Spezifikationen maximal 500 mA Strom Externe Festplatten die mehr Strom benötigen dürfen daher nur an...

Page 269: ...n 1 Im Menü Datenträgerverwaltung die Zeile Datenträger mit V oder Λ wählen und mit OK bestätigen 2 Gewünschten Datenträger mit V oder Λ wählen 3 Eine Menüebene zurückschalten mit BACK oder Einstellung mit EXIT beenden Partition des externen Datenträgers wählen Wenn der externe Datenträger über mehrere Partitionen verfügt wählen Sie die gewünschte aus 1 Im Menü Datenträgerverwaltung die Zeile Part...

Page 270: ... wählen 6 Funktion mit oder einschalten Ein 7 Einstellung mit EXIT beenden Timeshift Sendungen anhalten Die aktuelle Sendung kann angehalten wer den Dies ist eine nützliche Funktion wenn z B während eines Spielfilmes das Telefon läutet und Sie die Fortsetzung des Films nicht verpas sen möchten Am Bildschirm erscheint ein Standbild der letzten Szene die Sendung wird im TimeShift Speicher des extern...

Page 271: ... 3 Sicherheitsabfrage bestätigen dazu mit oder die Schaltfläche Ja anwählen und mit OK bestätigen oder Vorgang abbrechen dazu mit oder die Schaltfläche Nein anwählen und mit OK bestätigen Hinweise 7 Nach Abschluss der Aufnahme wird die Aufzeichnung automatisch auf dem exter nen Datenträger gespeichert 7 Wird der externe Datenträger während der Aufnahme von der USB Buchse getrennt wird die Aufnahme...

Page 272: ...it einem 10 Sekunden Countdown Sie können auf das programmierte Fernsehprogramm um schalten 7 Sollte der Beginn der Timeraufnahme bei laufender Wiedergabe erreicht werden wird die Wiedergabe unterbrochen Die Aufnahme erfolgt automatisch im Hinter grund sofern Sie bei der Meldung des Timercountdowns nicht Ja wählen 7 Hinweis für UPC Benutzer Bei der Aufnah me einer Sendung kann es vorkommen dass ei...

Page 273: ...wird ein Countdown eingeblendet so erhalten Sie Gelegenheit bei Bedarf noch schnell den Kanal umzuschalten Der zum Aufzeichnen vorgesehene Kanal wird nach 10 Sekunden automatisch eingestellt USB RECORDING Aufnahmedaten im Timermenü ändern 1 Menü mit MENU aufrufen 2 Menüpunkt Timerliste mit V Λ oder wählen und mit OK aktivieren Das Menü Timerliste wird eingeblendet 3 Titel der Sendung die geändert ...

Page 274: ...en anwäh len und mit OK bestätigen Hinweis 7 Sendungen im Menü Aufgenommene Sendungen die gerade aufgenommen oder wiedergegeben werden können nicht gelöscht werden 7 Menü mit EXIT abschalten USB RECORDING oder wählen und mit OK akti vieren Das Menü Medienplayer wird einge blendet 3 Die Option PVR mit V oder Λ wäh len und mit OK aktivieren Die aufgezeichneten Sendungen werden angezeigt 4 Gewünschte...

Page 275: ...ahren zum Speichern von Bilddaten mit keinen oder nur geringen Verlusten Bilddateien können gemeinsam mit Dateien anderer Typen auf einem Medium gespeichert werden Diese Dateien lassen sich in Ordnern und Unter ordnern organisieren Audiodaten Ihr Fernsehgerät spielt Audiodaten in den For maten MP3 AAC WMA und M4A ab MP3 ist eine Abkürzung für MPEG 1 Level 3 und basiert auf dem MPEG 1 Standard der ...

Page 276: ...hgerät getrennt werden während auf Dateien des Datenträgers zugegriffen wird 7 Ein bidirektionaler Datenaustausch im Sinne eines ITE Gerätes Information Technology Equipment gemäß EN 55022 EN 55024 ist nicht möglich 7 Die USB Übertragung stellt keine eigene Betriebsart dar sondern ist lediglich eine Zusatzfunktion 1 Buchse USB HDD des Fernsehgerätes und entsprechende Buchse des Datengerätes extern...

Page 277: ...ung Menü anwählen 1 Menü mit MENU aufrufen 2 Menüpunkt Medienplayer mit V Λ oder wählen und mit OK akti vieren Das Menü Medienplayer wird einge blendet 3 Den Namen des externen Datenträgers mit V oder Λ wählen und mit OK bestätigen Der Inhalt wird angezeigt 4 Die Option Mediaoptionen mit TOOLS aufrufen Hinweis 7 Die weitere Bedienung entnehmen Sie bitte den folgenden Abschnitten Anzeigemodus wähle...

Page 278: ...eis 7 Wenn der Datenträger noch nicht ange zeigt wird mit yyy gelb die Übersicht aktualisieren 3 Den Namen des externen Datenträgers mit V oder Λ wählen und mit OK bestätigen Der Inhalt wird angezeigt 4 Gewünschten Dateityp Alle s Spielfilm Musik Foto mit oder wählen und mit OK bestätigen 5 Gewünschten Ordner oder gewünschte Datei mit V oder Λ wählen und mit OK öffnen Eine Liste der Unterordner Su...

Page 279: ...nen zur Verfügung Kapitel einer Datei wählen nur bei Videodateien 1 Während der Wiedergabe das nächste Kapitel mit wählen 2 Während der Wiedergabe das vorherige Kapitel mit wählen Titel einer Datei wählen nur bei Videodateien 1 Während der Wiedergabe den nächsten Titel mit Λ wählen 2 Während der Wiedergabe den vorherigen Titel mit V wählen Ausgewählte Titel wiedergeben Nur die markierten Titel wer...

Page 280: ...r 4 wählen 2 Wiedergabe mit 8 fortsetzen Bilder drehen nur bei Bilddateien Sie können die Bildanzeige um 90 drehen 1 Während der Wiedergabe das Bedienfeld mit OK einblenden 2 Die Taste mit oder wäh lenund mit OK das Bild um jeweils 90 drehen Wiederhol Funktionen Die Möglichkeiten Diese Der ausgewählte Titel wird wieder holt Alles Alle Titel werden wiederholt wieder gegeben Zufällig Alle Titel werd...

Page 281: ...dia Server verwendet werden kann ab Version 11 Die notwendigen Einstellungen sind abhän gig von der jeweiligen Softwareversion Digitalen Medien Server anwählen 1 Menü mit MENU aufrufen 2 Menüpunkt Medienplayer mit oder wählen und mit OK aktivieren Das Menü Medienplayer wird einge blendet Die vorhandenen Digitale Media Server werden angezeigt Hinweis 7 Wenn kein Digitaler Media Server an gezeigt wi...

Page 282: ...tel werden angezeigt 2 Gewünschten Titel mit V oder Λ wählen 3 Wiedergabe mit 8 starten Weitere Wiedergabefunktionen 1 Wiedergabe Pause mit wählen 2 Wiedergabe mit 8 fortsetzen 3 Vorhergehenden Titel mit 5 anwählen nächsten Titel mit 6 anwählen 4 Wiedergabe mit 7 beenden 5 Zurückschalten zur Übersicht mit BACK 6 Medienplayer mit EXIT beenden 7 Sicherheitsabfrage bestätigen dazu mit oder die Schalt...

Page 283: ... der Vereinbarungen zu Vertragsbedingungen und Vertraulichkeit lesen können 7 Umgang mit den Vereinbarungen zu Vertrags bedingungen und Vertraulichkeit Es gibt zwei Optionen für beide Vereinbarungen zusam men Zustimmen oder Ablehnen Sie kön nen nicht individuell zustimmen oder ablehnen 7 Wenn Sie Zustimmen betätigen können Sie mit der Benutzung Ihres Fernsehers fortfahren 7 Wenn Sie Ablehnen betät...

Page 284: ...Erweitern und Entfernen der über SMART Inter ctive TV 4 0 bereitge stellten Internetanwendungen vor 7 Bei der Anmeldung zu einigen Anwen dungen müssen Sie möglicherweise eine Verbindung zu der Webseite der entspre chenden Anwendung herstellen Betreffen de Webseiten können Links enthalten die nicht mit der Anmeldung in Verbindung stehen Bei Verbindung mit solchen Links greift der Fernseher mögliche...

Page 285: ...n zufügen möchten und drücken Sie yy grün Die von Ihnen ausgewählte Anwendung wird Ihren Favoriten zugefügt Hinweis 7 Drücken Sie zum Entfernen einer Anwen dung aus den Favoriten yy grün SMART INTER CTIVE TV 4 0 Internetanwendungen auswählen 1 Wählen Sie Anwendungsstore aus dem Menü oder drücken Sie Das Anwendungsportal wird angezeigt 2 Wählen Sie mit V Λ und die erforderliche Anwendung drücken Si...

Page 286: ...e des Anwen dungsportals mit V Λ und die erforderliche Anwendung drücken Sie zum Bestätigen OK Das Hauptmenü der Anwendung wird kurz darauf angezeigt 2 Die Nutzung der Anwendung hängt primär von ihrem Aufbau ab Befolgen Sie die Bildschirmhinweise Hinweis 7 Im Einstellungen Menü können Sie das Land des Anwendungsportals ändern und dafür sorgen dass Anwendungen des ausgewähl ten Landes auf der Seite...

Page 287: ... oder wählen und mit OK bestätigen Der Webbrowser wird eingeblendet 3 Adressfeld mit Λ oder V anwählen und mit OK bestätigen Eine virtuelle Tastatur wird eingeblendet 4 Suchbegriff Adresse eingeben und mit OK bestätigen Hinweise 7 Weitere Funktionen und Bedienmöglichkei ten werden unten am Bildschirm angezeigt 7 Wir empfehlen für das einfache Navigie ren im WebBrowser den Gebrauch einer Tastatur u...

Page 288: ...he mit V oder Λ wählen und mit OK bestätigen 3 Gewünschte Audiosprache mit V oder Λ wählen danach mit y rot als pri märe Audiosprache oder mit yy grün als sekundäre Audiosprache festlegen Primäre und sekundäre Sprache werden oben im Menü angezeigt 4 Eine Menüebene zurückschalten mit BACK oder Einstellung mit EXIT beenden Untertitelsprache ändern nur bei digitalen Fernsehprogrammen Sie können die U...

Page 289: ...chwer hörige ein und ausschalten 1 Im Menü Audio Deskription die Zeile Un tertitelmodus mit V oder Λ wählen 2 Die Option Hörgeschädigte mit oder wählen 3 Eine Menüebene zurückschalten mit BACK oder Einstellung mit EXIT beenden Audiodeskription Audiodeskription ist ein zusätzlicher Audiokanal für sehbehinderte Menschen Unter anderem werden Aktivitäten Umgebungen Szenen änderungen Gesten und Gesicht...

Page 290: ...halb der ein gestellten Zeit keine Taste an der Fernbedienung oder am Fernsehgerät betätigt wird Gefordert durch Europäische Richtlinie 1 Im Menü Erweitert die Zeile Autom Abschaltung mit V oder Λ wählen 2 Gewünschte Ausschaltzeit 4 6 oder 8 Stunden mit oder eingeben Hinweis 7 Funktion abschalten dazu mit oder die Option Aus wählen 3 Eine Menüebene zurückschalten mit BACK oder Einstellung mit EXIT...

Page 291: ...ufen und mit oder die Funktion abschalten Aus Wetterinformationen ein aus schalten Wenn diese Funktion aktiviert ist wird ein Wet terlogo und die Temperatur vom Standort des Gerätes eingeblendet 1 Im Menü Erweitert die Zeile Wetterlage mit V oder Λ wählen 2 Funktion mit oder einschalten Ein 3 Einstellung mit EXIT beenden Hilfe Zusatzinformationen über die entsprechende Funktion werden angezeigt we...

Page 292: ...ung mit EXIT beenden Einschalttimer Im Menü Einschalttimer kann für das Fernseh gerät eine Einschaltzeit eingegeben werden Das Fernsehgerät schaltet nach Ablauf der eingestellten Zeit aus Bereitschaft mit der vorgewählten Lautstärke und dem gewünschten Fernsehprogramm ein 1 Zeile Einschalttimer mit V oder Λ wählen und mit OK bestätigen 2 Zeile Modus mit V oder Λ wählen und mit oder wählen wann das...

Page 293: ... der eingestellten Zeit in Bereitschaft Stand by 1 Zeile Ausschalttimer mit V oder Λ wählen und mit OK bestätigen 2 Zeile Modus mit V oder Λ wählen und den gewünschten Modus mit oder einstellen 3 Zeile Zeit einstellen mit V oder Λ wählen und die Zeit mit 1 0 eingeben 4 Daten mit yyyy blau speichern 5 Eine Menüebene zurückschalten mit BACK oder Einstellung mit EXIT beenden TIMERFUNKTIONEN ...

Page 294: ...er wählen 4 Eine Menüebene zurückschalten mit BACK oder Einstellung mit EXIT beenden Hinweis 7 Bei der Wiedergabe einer Time Shift Auf nahme kann es vorkommen dass ein Zu gangslevel eingegeben werden muss Der Grund hierfür ist die aktuell aufgezeichnete Sendung im Time Shift Speicher ist jugend geschützt Menüs sperren Mit dieser Funktion können Sie folgende Me nüs des Fernsehgerätes sperren Automa...

Page 295: ...hen PIN Code sperren zum Beispiel Programme die sich nicht für Kinder eignen 1 Menü mit MENU aufrufen 2 Menüpunkt Einstellungen mit V Λ oder wählen und mit OK bestä tigen 3 Die Option Quelle mit oder wählen und mit V bestätigen 4 Die Zeile Programmtabelle mit V oder Λ wählen und mit OK bestätigen 5 Das zu sperrende Programm mit V Λ oder markieren Das Programm wird mit markiert 6 Den Bearbeitungsmo...

Page 296: ...s Fernsehprogramm wird nach einem Wechsel des Programmplatzes wieder gesperrt PIN Code zurückstellen Diese Funktion benutzen Sie wenn Sie den PIN Code vergessen haben 1 Im Menü Jugendschutz die Zeile PIN ändern mit V oder Λ wählen und mit OK bestätigen 2 PIN Code 2 3 5 6 mit 1 0 eingeben 3 Persönlichen neuen PIN Code mit 1 0 vierstellig eingeben 4 Persönlichen neuen PIN Code mit 1 0 noch einmal ei...

Page 297: ...ebene zurückschalten mit BACK oder Einstellung mit EXIT beenden Manuelle Einstellung Sie können die zeitliche Differenz auch manuell einstellen zum Beispiel dann wenn die rich tige Zeit nicht automatisch erkannt wurde oder aus anderen Gründen nicht mit Ihrer Ortszeit übereinstimmt 1 Im Menü Erweitert die Zeile Zeitanpas sung mit V oder Λ wählen und mit OK bestätigen 2 Die Option Manuell mit oder w...

Page 298: ...sch abgeschaltet 3 Ist eine neue Software vorhanden die Soft ware mit yy grün installieren Die neue Software wird geladen Achtung 7 Während des Updates das Fernsehgerät nicht ausschalten Nach erfolgreichen Up date schaltet sich das Fernsehgerät automa tisch aus und wieder ein Hinweis 7 Wenn automatisch nach Softwareaktuali sierungen gesucht werden soll im Menü Quelle Erweitert die Zeile OAD mit V ...

Page 299: ...stä tigen 3 Die Option TV mit oder wählen und mit V bestätigen Das Menü TV ist aktiv 4 Die Zeile Zubehör mit V oder Λ wählen und mit OK bestätigen 5 Die benötigte Zeile mit V oder Λ wählen und mit OK bestätigen Die gewünschte Funktion mit oder wählen 6 Eine Menüebene zurückschalten mit BACK oder Einstellung mit EXIT beenden Hinweise 7 Das Zubehör ist nicht im Lieferumfang des Fernsehgerätes enthal...

Page 300: ...n und mit OK bestätigen Das Menü TV wird kurz eingeblendet 3 Einstellungen mit Kapitel Erstinstallation und Fernsehprogramme einstellen auf Seite 19 fortsetzen Kanalverlauf zurücksetzen Mit dieser Funktion löschen Sie die zuletzt gese henen Programme im Hauptmenü 1 Im Menü Info die Zeile Kanalverlauf rücksetzen mit V oder Λ wählen und mit OK bestätigen Eine Warnung wird eingeblendet 2 Sicherheitsa...

Page 301: ...mmplatzes am Fernsehgerät Wenn Ihr Fernsehgerät eingeschaltet ist und Sie schalten danach das externe Geräte z B einen DVD Player ein wird der passende HDMI Programmplatz am Fernsehgerät gewählt Menüsprache wählen Am externen Gerät z B DVD Player wird auto matisch die Menüsprache des Fernsehgerätes eingestellt Das externe Gerät muss diese Funktion unter stützen BETRIEB MIT EXTERNEN GERÄTEN Automat...

Page 302: ...ie Steuerungsart Durchleitung Deck oder Tuner mit oder wählen Hinweise 7 Durchleitung kann für sämtliche Geräte eingesetzt werden Deck und Tuner können je nach ange schlossenem externem Gerät ausgewählt werden 7 Probieren Sie aus bei welcher Steuerungs art das externe Gerät am besten auf die Fernbedienung reagiert 7 Den Funktionsumfang des DIGILINK kompa tiblen Gerätes finden Sie in der Bedienungs...

Page 303: ... mit welchen Anschlüssen das externe Gerät ausgestattet ist und welche Signale zur Verfügung stehen 7 Beachten Sie Bei vielen externen Geräten muss die Auflösung des Videosignals an die Eingänge des Fernsehgerätes ange passt werden siehe Bedienungsanleitung des externen Gerätes Welchen Wert Sie einstellen müssen entnehmen Sie bitte den angegebenen Richtwerten in den Kapiteln über die verschiedenen...

Page 304: ...eorecorder oder Set Top Box 1 Externes Gerät einschalten und die ge wünschte Funktion wählen 2 drücken mit oder den Programmplatz des gewünschten Eingangs signals HDMI1 HDMI2 HDMI3 wählen und mit OK bestätigen BETRIEB MIT EXTERNEN GERÄTEN Kopfhörer Kopfhörer anschließen 1 Kopfhörer Stecker 3 5 mm ø Klinke in die Kopfhörer Buchse des Fernsehgerätes stecken Kopfhörer Lautstärke ändern 1 Menü mit MEN...

Page 305: ...t 4 Gerätesuche mit yyyy blau starten Das an Buchse HDMI3 ARC ange schlossene Gerät wird im Menü ange zeigt 5 Das zu steuernde Gerät mit V oder Λ wählen und mit OK bestätigen Hinweise 7 Wenn der AV Receiver auch mit einer Wiedergabefunktion ausgestattet ist z B bei einem Home Theater System dann werden in der HDMI Geräteliste zwei Geräte dargestellt Der erste Eintrag ist z B der DVD Player der zwe...

Page 306: ...OK bestä tigen 4 Die Option Ton mit oder wählen und mit V bestätigen Das Menü Ton ist aktiv 5 Die Zeile Erweitert mit V oder Λ wählen und mit OK bestätigen 6 Die Zeile Audio Ausgang mit V oder Λ wählen 7 Die Option Kopfhörer oder Regelbar mit oder wählen Hinweise 7 Wenn Sie Regelbar wählen kann die Lautstärke in der Menüoption Lautstärke verändert werden 7 Soll der Ton ausschließlich über die HiFi...

Page 307: ...er sehen möchten Liveshare Funktion 3 Starten Sie die Miracast Anwendung mit Ih rem Notebook oder Mobilgerät und wählen Sie Ihren Fernseher Wählen Sie Bildschirm empfangen und drücken Sie zum Bestätigen OK Starten Sie die Miracast Anwendung mit Ihrem Notebook oder Mobilgerät und wählen Sie Ihren Fernseher oder Wählen Sie Bildschirm freigeben und drücken Sie zum Bestätigen OK Im Netz werk wird nach...

Page 308: ...ätes stecken Hinweise 7 Das CA Modul Untermenü informiert Sie welches CA Modul im CI Steckplatz einge setzt ist 7 Wenn Sie ein CA Modul zum ersten Mal in den CI Steckplatz des Fernsehgerätes ein setzen müssen Sie einen Moment warten bis das CA Modul erkannt wurde Zugriffskontrolle für CA Modul und Smartcard 1 Menü mit MENU aufrufen 2 Menüpunkt Einstellungen mit V Λ oder wählen und mit OK bestätige...

Page 309: ...o TV Remote aus dem Apple App Store oder Google Play Android Markt übe Ihr Telefon steuern Fernsehgerät am Heimnetzwerk anschließen und anmelden Sie können Ihr Fernsehgerät über eine LAN Verbindung oder ohne Kabel über WLAN mit dem Heimnetzwerk verbinden Wenn Sie eine LAN Verbindung verwenden lesen Sie im Kapitel LAN Verbindung zum Heimnetzwerk auf dieser Seite weiter wenn Sie WLAN benutzen wollen...

Page 310: ... oder wählen und mit OK bestä tigen 3 Die Option Netzwerk mit oder wählen und mit V bestätigen Das Menü Netzwerk ist aktiv Bild Dienstag xx xxx xxxx Quelle Timerliste Ton Netzwerk TV Jugendschutz Einstellungen Netzwerk Wählen Verbinden Testen Bestätigen Zurück BACK Verbindungstyp ändern Kabel Netzwerkkonfiguration Auto Wake on LAN Aus Erweitert Aus 4 Zeile Verbindungstyp ändern mit V oder Λ wählen...

Page 311: ...resse DNS Netzmaske und Gateway sind aktiv Verbindungstyp ändern Kabel Netzwerkkonfiguration Manuell Wake on LAN Aus IP Adresse 192 168 000 200 DNS 192 168 000 254 Netzmaske 250 250 250 200 Bild Dienstag xx xxx xxxx Quelle Timerliste Ton Netzwerk TV Jugendschutz Einstellungen Netzwerk Wählen Verbinden Testen Eingabemodus Beenden Erw Einst schl EXIT BACK 7 Zeile IP Adresse mit V wählen IP Adresse m...

Page 312: ... wieviele Benutzer das kabellose Heimnetz gleichzeitig nutzen 7 Wir empfehlen während des Betriebes mit der SMART Inter ctive TV 4 0 Funktion andere Geräte im Heimnetzwerk abzu schalten um unnötigen Datenverkehr zu vermeiden 7 Stellen Sie den Router an einer erhöhten Position auf um die Empfangsqualität des WLAN Moduls zu verbessern 7 Die Empfangsqualität beim drahtlosen Betrieb ist abhängig vom R...

Page 313: ...Dienstag xx xxx xxxx Quelle Timerliste Ton Netzwerk TV Jugendschutz Einstellungen Netzwerk Wählen Verbinden Testen Beenden Zurück EXIT BACK Modus ändern 8 Anmeldung an das Heimnetzwerk mit y rot starten Die Meldung WPS Taste an wird eingeblendet 9 Am Router die WPS Taste drücken 10 Die Schaltfläche Weiter mit oder wählen und mit OK bestätigen Die Meldung Verbindung mit Gateway Erfolgreich wird ein...

Page 314: ... warten nach erfolgreicher Anmeldung Verbindung mit Gateway Erfolgreich und Internetver bindung Erfolgreich 13 Einstellung mit EXIT beenden Automatische Anmeldung mit Eingabe des Netzwerk Kennwortes Verwenden Sie diese Art der Anmeldung wenn Ihr Router WPS PBC oder die WPS PIN Einga be nicht unterstützt 1 Menü mit MENU aufrufen 2 Menüpunkt Einstellungen mit V Λ oder wählen und mit OK bestä tigen 3...

Page 315: ...sse vorhanden ist müssen Sie die Zugangsdaten für IP Adres se DNS Netzmaske und Gateway von Hand eingeben Diese Zugangsdaten erhalten Sie vom Administrator Ihres Netzwerkes 1 Menü mit MENU aufrufen 2 Menüpunkt Einstellungen mit V Λ oder wählen und mit OK bestä tigen 3 Die Option Netzwerk mit oder wählen und mit V bestätigen Das Menü Netzwerk ist aktiv 4 Zeile Verbindungstyp ändern mit V oder Λ wäh...

Page 316: ...yy grün bestätigen Die Meldung Verbinde Bitte warten wird eingeblendet 16 Wenn die Meldung erlischt mit yy grün die Verbindung zum Netzwerk prüfen Anzeige Testen Bitte warten nach erfolgreicher Anmeldung Verbindung mit Gateway Erfolgreich und Internetver bindung Erfolgreich 17 Einstellung mit EXIT beenden Name des Fernsehgerätes ändern Um Ihr Fernsehgerät im Netzwerk identifizieren zu können ist a...

Page 317: ...mit OK zur nächsten Eingabestelle schalten Mit Shift OK kann zwischen Großbuchstaben Nummern und Klein buchstaben Sonderzeichen umgeschaltet werden Zum Löschen von Zeichen Ziffern die Schaltfläche Del wählen und mit OK bestätigen 8 SSID mit yy grün bestätigen 9 Zeile Sicherheitstyp mit V oder Λ wählen und mit oder die benötigte Option WPA2 wählen 10 Einstellung mit y rot bestätigen Das Netzwerk wi...

Page 318: ...eter Sky sind oder Komplett wählen und mit OK bestätigen Hinweis 7 Die Option Sky wird in Österreich und der Schweiz nicht angeboten 7 Die Schaltfläche Weiter mit yyyy blau bestätigen 8 Gewünschten Programmtypen wählen Die Optionen TV Digital und Radio Digi tal sind vorgewählt Nicht benötigte Option mit V or Λ wählen und mit OK abwählen das Häkchen erlischt 9 V drücken und Suchlaufmodus wählen Die...

Page 319: ...tellen Programmtyp Mit oder wählen ob nur nach Fernsehprogrammen TV nur nach Radio Programmen Radio oder nach beidem Radio TV gesucht werden soll Suchlauf nach Mit oder wählen ob nur nach unverschlüsselten Frei nur nach verschlüs selten Verschlüsselt Programmen oder nach beidem Frei Verschlüsselt gesucht werden soll Transponder Frequenz des Transponders mit 1 0 fünfstellig eingeben Symbolrate Symb...

Page 320: ...estätigen LNB Stromversorgung Benötigte LNB Stromversorgung je nach LNB Typ mit oder auf Aus 13 18 V oder 14 19 V einstellen LNB Auswahl Nur bei DiSEqC 1 0 notwendig siehe Kapitel Antenneneinstellungen für DiSEqC 1 0 9 Antenneneinstellungen mit yyyy blau beenden 10 Gewünschten Programmtypen wählen Die Optionen TV Digital und Radio Digi tal sind vorgewählt Nicht benötigte Option mit V or Λ wählen u...

Page 321: ...einstellen Satellit OK drücken gewünschten Satelliten mit V oder Λ wählen und mit OK be stätigen LNB Typ Ist Ihre Antennenanlage mit einem Einkabel system Multiswitch ausgerüstet verwenden Sie die Einstellung SCR OK drücken und die Option SCR mit oder wählen Zeile LNB Frequenz Hoch mit V an wählen und Frequenz mit 1 0 fünfstellig eingeben Zeile LNB Frequenz Niedrig mit V an wählen und Frequenz mit...

Page 322: ... Suche kann mit EXIT vorzeitig abge brochen werden 13 Mit yyy gelb zur Programmtabelle schalten oder Einstellung mit EXIT beenden Antenneneinstellungen für DiSEqC 1 0 und digitale Pro gramme von mehreren Satelli ten automatisch suchen Hinweis 7 Die im Kapitel beschriebenen LNB Einstel lungen erfordern umfangreiches Fachwis sen auch über die Antennenanlage Lassen Sie sich von einem Fachmann beraten...

Page 323: ...hlen und mit OK abwäh len das Häkchen erlischt 12 Suchlauf für den ersten Satelliten mit y rot starten Hinweise 7 Bei einer Aktualisierung über den gleichen Satelliten wird beim Start des Suchlaufes eine Sicherheitsabfrage eingeblendet 7 Sollen die vorher gespeicherten Programme in der Programmliste beibehalten und die neu gefundenen hinzugefügt werden dann yy grün drücken 7 Wird y rot gedrückt we...

Page 324: ... den Suchtyp Schnell nicht unterstützt Hinweis 7 Sie können den Suchlauf beschleunigen Dazu benötigen Sie Informationen über die Frequenz und die Netzwerk ID Diese Daten bekommen Sie in der Regel von Ihrem Kabelnetzbetreiber oder Sie finden sie in Foren im Internet Für Deutschland kann zum Beispiel die Frequenz 402MHz und die Netzwerk ID 61441 eingegeben werden 7 Den nächsten Bedienschritt mit yyy...

Page 325: ... len und mit V bestätigen Das Menü Quelle ist aktiv 4 Die Zeile Erweitert mit V oder Λ wählen und mit OK bestätigen 5 Die Zeile Automatischer Suchlauf mit Λ oder V wählen und mit OK bestätigen 6 Die Option Terrestrisch DVB T T2 mit Λ oder V wählen und mit OK be stätigen 7 Auswahl treffen ob nach digitalen oder nach analogen Fernsehprogrammen ge sucht werden soll Dazu mit Λ oder V die Option Digi t...

Page 326: ...Λ wählen und mit oder ein schalten Ein 6 Einstellung mit EXIT beenden Digitale terrestrische Fernseh programme manuell suchen 1 Menü mit MENU aufrufen 2 Menüpunkt Einstellungen mit V Λ oder wählen und mit OK bestä tigen 3 Die Option Quelle mit oder wäh len und mit V bestätigen Das Menü Quelle ist aktiv 4 Die Zeile Erweitert mit V oder Λ wählen und mit OK bestätigen 5 Die Zeile Manuelle Abstimmung ...

Page 327: ... erforderlich wenn Sie keine digitalen Programme empfangen können und bei der ersten Installation noch nicht nach analogen Programmen gesucht haben Fernsehprogramme können direkt oder über den Suchlauf eingestellt werden Alle analogen Fernsehprogramme ein stellen Analoge Programme werden in der Programm liste im Anschluss an die digitalen Programme angezeigt Hinweis 7 Antennenkabel der Hausantenne...

Page 328: ... Die Option Quelle mit oder wäh len und mit V bestätigen Das Menü Quelle ist aktiv 4 Die Zeile Manuelle Abstimmung mit V oder Λ wählen und mit OK bestätigen 5 Die Option Terrestrisch DVB T T2 oder Kabel DVB C mit V oder Λ wäh len und mit OK bestätigen 6 Die Option Analog mit V oder Λ anwählen und mit OK bestätigen 7 Zeile Prog Nummer mit V oder Λ wählen und mit oder den ge wünschten Programmplatz ...

Page 329: ...nd mit OK bestätigen 5 Programmtabelle mit EXIT abschalten Programmnamen eingeben maximal 8 Zeichen 1 Im Menü Programmtabelle das gewünsch te Fernsehprogramm mit V Λ oder wählen 2 Den Bearbeitungsmodus mit yyy gelb aktivieren 3 Die Zeile Umbenennen mit V oder Λ wählen und mit OK bestätigen 4 Den aktuellen Programmnamen mit y rot schrittweise löschen 5 Gewünschten Buchstaben oder Ziffer mit V Λ und...

Page 330: ...oritenlisten erstellen Ihre Lieblingsprogramme können Sie in bis zu vier Favoritenlisten speichern FAV 1 bis FAV 4 1 Im Menü Programmtabelle die gewünsch ten Programme mit V Λ oder wählen und mit OK markieren Die Programme werden mit markiert 2 Den Bearbeitungsmodus mit yyy gelb aktivieren 3 Die Zeile FAV setzen mit V oder Λ wählen und mit OK bestätigen 4 Gewünschte Favoritenliste mit V oder Λ wäh...

Page 331: ...hränkung der Verwendung bestimmter gefährlicher Stoffe in Elektro und Elektronikgeräten Den genauen Wortlaut der Konformitätserklä rung DOC finden Sie auf der Homepage http www beko com tr Fernseher Bedienungsanleitung Hinweise für die WLAN Funktion Folgende Informationen beziehen sich nur auf Geräte die in Ländern verkauft werden in de nen EU Regularien gelten Die WLAN Funktion des Fernsehgerätes...

Page 332: ... nicht überschreiten 7 Maximum 100 mW EIRP im Innenbereich 2 SRD mit DSSS und anderen Breitband Modu lationssystemen als FHSS 7 Maximaler Mittelwert EIRP Signaldichte bei 2 mW MHz Maximum 100 mW EIRP 7 Maximum 100 mW EIRP Erlaubt für die Benutzung im Aussenbereich ohne Einschrän kungen an den Aufstellort Höhe des Ge rätes zum Sammeln und Überwachen von Telemetriedaten Berechnungssysteme und Sicher...

Page 333: ...sondern muss an einem Sam melpunkt zum Recycling von elektrischen und elektronischen Geräten abgegeben werden Lassen Sie das Altgerät über eine Sammelstelle für elektrische und elektronische Geräte entsor gen Nebenstehendes Symbol am Produkt in der Bedienungsanleitung oder auf der Verpa ckung weist darauf hin Informationen zu Sammelstellen erhalten Sie bei Ihrer Stadtverwaltung Mit der Verwertung ...

Page 334: ...ung Feinab stimmung Antenne Antennenkabel oder anlage überprüfen lassen Keine Farbe Farbintensität auf Minimum Farbe hochregeln TV Norm anpassen wenn Einstellmöglichkeit vor handen Richtige Farbnorm wählen Problem liegt am Programm Mit anderem Programm testen Bild vorhanden aber kein Ton Lautstärke minimal eingestellt Lautstärke hochregeln einschal ten Kein oder gestörter Video text Problem liegt ...

Page 335: ...en Medien Server näher am Router platzieren Hinweis über Verbindungs problem wird angezeigt Das LAN Kabel ist nicht richtig angeschlossen oder die Ve bindung zum WLAN Router ist gestört LAN Kabel oder WLAN Router überprüfen Der WLAN Router ist nicht mit dem Internet verbunden oder die Verbindung ist gestört Überprüfen Sie ob der WLAN Router mit dem Internet verbun den ist Schlechte Bildqualität Ru...

Page 336: ...n digitales System zur Ansteuerung komplexer Satellitenanlagen mit Motor oder mehreren LNBs DiSEqC wird benötigt wenn zwei oder mehr Satelliten Positionen angesteuert werden sollen DLNA Digital Living Network Alliance ist eine inter nationale Vereinigung von Herstellern der Unterhaltungselektronik von IT Hardware und von Mobiltelefonen Ziel der Vereinigung ist es die reibungslose Kommunikation von...

Page 337: ...oadcasting Terrest rial bezeichnet eine Variante von DVB die für die Funkübertragung von digitalen Hörfunk und Fernsehsignalen über terrestrische erdgebunde ne Wege verwendet wird Dynamische Hintergrundbeleuchtung Hier stellt das Gerät die Hintergrundbeleuch tung optimal auf die Bildinhalte ein indem er abhängig von der durchschnittlichen Bildhel ligkeit die Hintergrundbeleuchtung regelt Sind bei ...

Page 338: ... über WiFi gestreamt werden Auch HD Inhalte können Sie problemlos auf den Fern seher streamen und umgekehrt natürlich auch TV Inhalte auf Mobilgeräte PC übertragen LNB Rauscharmer Signalumsetzer Low Noise Block der sich im Zentrum einer Parabolantenne be findet Er setzt die Satellitenfrequenz von beispielswei se 10 7 11 75 oder 11 8 12 75 GHz auf den Bereich 950 2150 MHz um und ermöglicht da durch...

Page 339: ...er digitalen Übertragungstechnik Perfect Clear Verbessert allgemein das Bild durch eine leichte Blautönung erzeugt scheinbar mehr Schärfe und verbessert den Schwarzwert indem ab einem gewissen dunklen Graupegel dieser vollständig auf Schwarz gestellt wird Verringert dabei aber in dunklen Bildbereichen die sichtba ren Grauwerte Private IP Adresse Private IP Adressen gehören zu bestimmten IP Adressb...

Page 340: ... einer Frequenz USB Recording Ermöglicht die Aufnahme und die Wiedergabe von Fernsehsendungen von digitalen Fernseh programmen DVB S DVB T und DVB C Dies ist vom jeweiligen Programmanbieter abhängig Die Aufnahme und die Wiedergabe von Sen dungen können nur mit einem externen Daten träger Festplatte oder USB Stick durchgeführt werden Wi Fi Kabellose Übertragung von Internet und Intranet Paketen WMA...

Page 341: ...ng mit Eingabe des Netzwerk Kennwortes 86 Automatische Anmeldung mit WPS PBC Push Button Configuration 85 Automatische Anmeldung mit WPS PIN Einga be 85 Automatische Einstellung 69 Automatische Lautstärke 29 30 Automatisches Abschalten des externen Gerä tes 73 Automatisches Einschalten des Fernsehgerätes aus Stand by 73 Automatische Vorschau einschalten 49 Automatische Wahl des HDMI Programmplatze...

Page 342: ...cht 18 Erweiterte Bildeinstellungen 27 Erweiterte Einstellungen 62 Externe Datenmedien auswählen 41 Externe Datenträger anschließen 40 48 Externe Datenträger entfernen 48 Externe Datenträger prüfen 41 Externe Geräte anschließen 76 Externe Geräte suchen und aktivieren 73 F Favoritenlisten erstellen 25 102 Fernbedienung alle Funktionen 16 Fernseh Betrieb Grundfunktionen 31 Fernseh Betrien weitere Fu...

Page 343: ...rnen Datenträgers wäh len 41 PIN Code ändern 67 PIN Code zurückstellen 68 Problemlösung 106 Programmbelegung der analogen Programme ändern 100 Programme aus Listen wählen 31 Programme in der Favoritenliste sortieren 25 Programme in der Programmtabelle lö schen 24 Programme in der Programmtabelle nach Krite rien sortieren 25 Programme in der Programmtabelle su chen 24 Programme löschen 101 Programm...

Page 344: ...b 47 USB Rcording 39 USB Tastatur und Maus 56 V Videodaten 47 Videotext Betrieb 38 Vorlauf Nachlaufzeit einstellen 44 W Wartezeit überbrücken 38 Was ist ein Common Interface 80 Was ist HbbTV 36 Was ist LIVESHARE 79 WEB Browser 59 WebBrowser Applikation 59 Weitere Programme einstellen 90 Weitere Wiedergabefunktionen 54 Wichtige Hinweise zum Umweltschutz 8 Wiedergabe 45 Wiedergabe Grundfunktionen 50...

Reviews: