932 655 638
2014-02-14
|
Beissbarth GmbH
46 | MT 788 | Maintenance
en
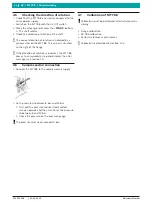
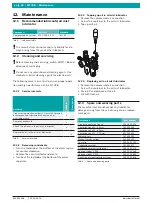
12.4.4 Reference measurement
i
Exact centering of the wheel is a basic prerequisite
for this reference measurement and for all balan-
cing operations. The reference measurement can be
performed with a passenger vehicle or a commer-
cial vehicle wheel.
i
Sound and automatic start are active in the following
description (refer to Section 10).
i
Calibration is performed with a wheel in very good
condition: Passenger vehicle wheel: Width 5.5",
diameter 14", balance weight 60 g, wheel type pas-
senger vehicle.Commercial vehicle wheel: Width 9",
diameter 22.5", balance weight 350 g, wheel type
commercial vehicle
1.
Attach a motor vehicle wheel of medium size (e. g.
width 5.5", diameter 14") and in very good condition
to the flange.
2.
Wheel type selection.
3.
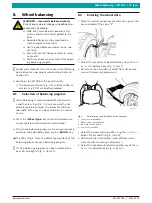
Enter the rim data (refer to Section 8.2).
4.
Close the wheel guard.
Measurement commences.
5.
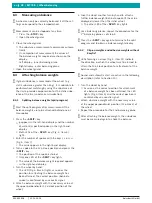
Create artificial unbalance by attaching a test weight
of 60 g (passenger vehicle wheel) or 350 g (commer-
cial vehicle wheel) to one of the two sides.
6.
Close the wheel guard.
Measurement commences.
The MT 788 must display precisely this unbalance
(value and position) on this side. The value indica-
ted for the other side must not exceed 5 g.
i
To check the position of the unbalance, turn the
wheel until the position recommended for attach-
ment of the balance weights is attained. The test
weight attached must be vertically beneath the axis
of rotation (6 o'clock position).
!
Calibration must be repeated in the following cases:
$
Deviation from specified unbalance value
(greater than 1 g on test weight side, more than
5 g on other side).
$
Deviation from specified unbalance position (test
weight not between 5:30 and 6:30 position).
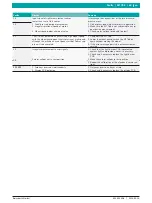
7.
Remove the test weight.
8.
Release the wheel and turn it through approx. 35°.
9.
Re-attach the wheel.
10.
Close the wheel guard.
"
Measurement commences.
12.5 Self-diagnosis
1.
Press and hold the <MENU> key.
2.
As soon as
t5t
appears in the left-hand display,
release the <MENU> key.
3.
Press the <mm/inch> key within 1.5 seconds.
i
Press the <MENU> key to switch from one function
to the other.
"
The following information is displayed:
R
Pick-up voltage
$
The display shows
M5r
R
Angular position of shaft
$
The display shows
EnC
R
Shaft speed
$
The display shows
5P
R
Character readout
R
Wheel guard microswitch input readout
$
The display shows
InP
R
Start counter
$
The display shows
Cnt
R
Display test
$
The display shows
LEd
R
Calibration data
$
The display shows
tAA
R
Instantaneous wheel balancing
$
The display shows
rEL
Proceed as follows to check correct operation of the
pick-ups:
1.
Clamp a balanced test wheel in position.
2.
Attach a test weight (e.g. 100 g Pb or 60 g Zn).
3.
Perform reference measurement.
On completion of the reference measurement
R
The voltage value of the inner pick-up must be lower
than that of the outer pick-up.
R
The ratio between the outer and inner pick-up value
must be between 1.2 and 1.8.
R
The phase difference must be 180° ± 1°.
!
After this reference measurement the unbalance
displayed for each side must not exceed 10 g (pas-
senger vehicle wheel) or 100 g (commercial vehicle
wheel).
i
This error may be caused by the rim centering to-
lerances. If this reference measurement indicates
greater unbalance, the components used for cente-
ring the wheel must be checked for wear, play and
contamination.
Summary of Contents for MT 788
Page 2: ......
Page 135: ...932 655 638 2014 02 14 Beissbarth GmbH Tekniska data MT 788 135 sv ...
Page 157: ...932 655 638 2014 02 14 Beissbarth GmbH Technische gegevens MT 788 157 nl ...
Page 179: ...932 655 638 2014 02 14 Beissbarth GmbH Dados técnicos MT 788 179 pt ...
Page 201: ...932 655 638 2014 02 14 Beissbarth GmbH Dane techniczne MT 788 201 pl ...
Page 223: ...932 655 638 2014 02 14 Beissbarth GmbH Technické údaje MT 788 223 cs ...
Page 245: ...932 655 638 2014 02 14 Beissbarth GmbH Teknik veriler MT 788 245 tr ...
Page 271: ...932 655 638 2014 02 14 Beissbarth GmbH Технические данные MT 788 271 ru ...

