background image

90

>>>

TELEPHONE MODE

> D

> GB

> F

> I

> E

> P

> NL

> DK

> S

> N

> FIN

> TR

> GR

> PL

> CZ

> H

> SK

Activating/deactivating automatic con-
nection

Here you can specify whether, after the
Traffic Assist Pro is switched on, a con-
nection should automatically be estab-
lished with the last mobile phone connect-
ed.

>

Press the Automatic connection button
in the telephone/Bluetooth settings to
activate 

 or deactivate 

 automatic

connection. 

Refreshing the phonebook

You can instruct your Traffic Assist Pro to
transfer the phonebook data from the mo-
bile phone again. The phonebook is then
refreshed accordingly.

>

Press the Reload Phonebook button in
the telephone/Bluetooth settings.

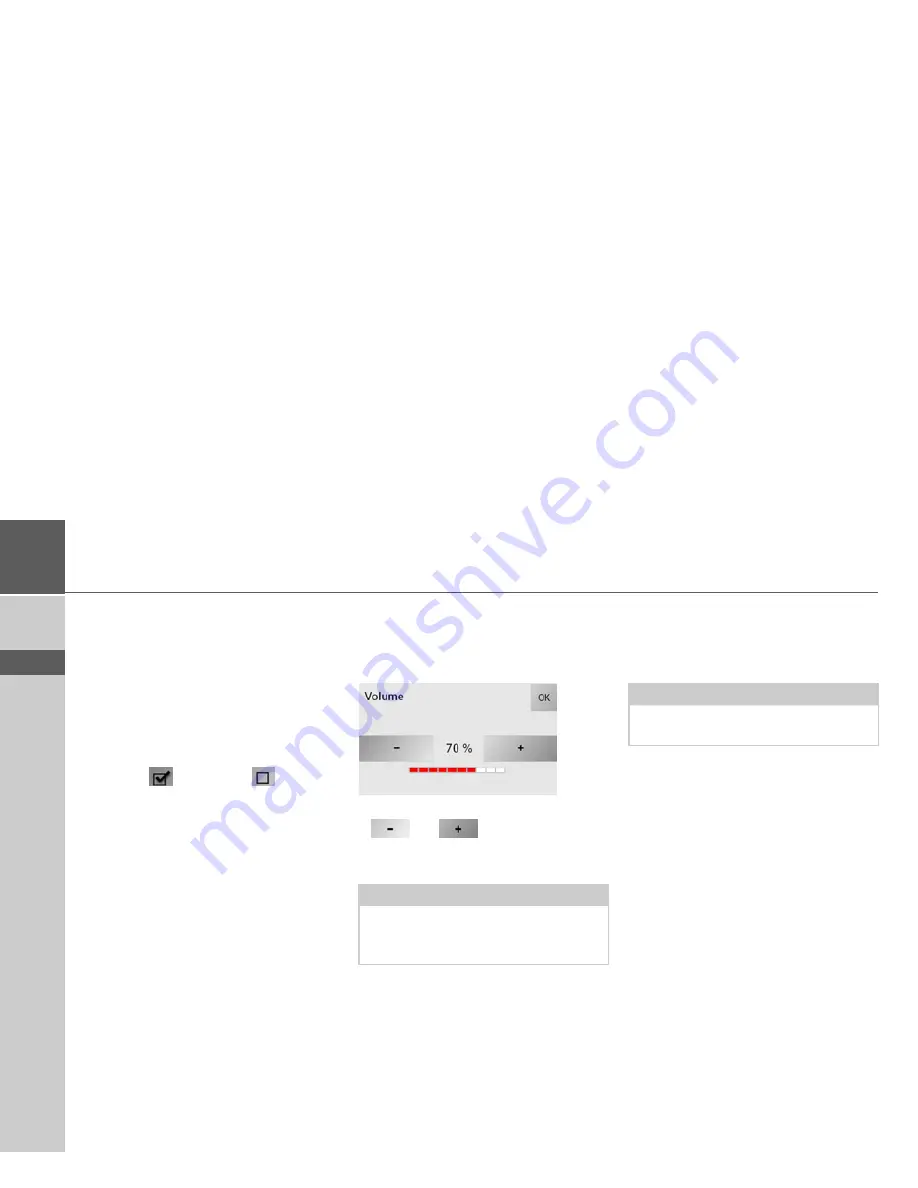
Setting the telephone volume

You can set the volume of the telephone.

>

Press the 

Volume

 button in the tele-

phone/Bluetooth settings.

>

Select the desired volume using the

 and 

 buttons. 

>

Confirm your settings by pressing the

OK

 button.

Device name

You can give your Traffic Assist Pro a
name. This name will be displayed by oth-
er Bluetooth devices.

>

Press the 

Change device name

 button

in the telephone/Bluetooth settings.

An input menu opens.

>

Enter the desired name.

Note: 

The volume can also be changed using
the volume control located on the side.
See "Volume control" on page 34..

Note: 

The current name is shown in brackets
on the 

Change device name

 button.

Summary of Contents for Traffic Assist Pro Z 250

Page 1: ...Operating instructions ...

Page 2: ...rting memory card 21 Ejecting memory card 21 Power supply 22 Using the battery 22 Connecting to socket 22 Connecting up to power supply 22 Removing power supply 23 Connecting to the cigarette lighter 23 TMC antenna 23 TMC antenna optional 24 Installation of the TMC antenna 24 GPS antenna 24 Unit antenna 24 Connecting up external antenna 25 Connecting USB storage media 25 Docking station optional 2...

Page 3: ...9 Point of interest Near GPS position 49 Point of interest nationwide 50 Navigation menu Select on map 52 Navigation menu Route planning 53 Route list 53 Using a route 54 The New button 54 The Edit key 55 The Calculate key 55 The Start key 56 Navigation menu Enter coordinates 56 Navigation menu Settings 57 The Routing options key 57 The Auto mode key 58 The Format key 59 The Map info key 59 The Ro...

Page 4: ...8 Disconnecting a mobile phone 89 Telephone Bluetooth settings 89 Switching Bluetooth on off 89 Visibility of the Traffic Assist Pro 89 Activating deactivating automatic connection 90 Refreshing the phonebook 90 Setting the telephone volume 90 Device name 90 Telephone calls 91 Establishing a call 91 Answering a call 91 Ending a call 92 When route guidance is active 92 Without route guidance 92 Mus...

Page 5: ... 106 Factory settings 106 Car integration 106 PIN protection 107 Activating PIN protection 107 Deactivating changing PIN protection 107 Specialist words 108 Keywords 110 Technical Data 113 NOTICE 114 EU Declaration of Conformity 114 Disposal of the unit 115 Disposal of the battery 116 Duty to supply information according to battery legislation BattV 116 Removing the battery 116 The information and...

Page 6: ...hether to follow the details given or not We accept no liability for the navigational system issuing incorrect details As a result of traffic routing changes and deviating data inaccurate or incorrect instructions may be given Drivers should always pay attention to the actual road signs and traffic control In particular the navigational system cannot be used as a means of orientation in cases of p...

Page 7: ... the rechargeable battery Never open the unit or the rechargeable battery Any modification to the unit is also impermissible and renders the type approval invalid Use only genuine BECKER original accessories This will ensure that all the relevant regulations are complied with and damage to health and property is avoided Dispose of defective units and the rechargeable battery according to the appli...

Page 8: ...he Traffic Assist Pro is installed In such cas es you will have to connect up an external antenna does not fall within the scope of supply The Traffic Assist Pro is equipped with TMC which gives you the option of re ceiving traffic announcements via the TMC antenna provided Traffic an nouncements are transmitted when the TMC is active The system plans an alter native route automatically or on requ...

Page 9: ...tenna 6 USB cable 7 DVD with installer for map data ac tual map data and operating instruc tions not illustrated Complaints procedure Please contact your local stockist if you have any complaints The unit can also be sent directly to Harman Becker in its orig inal packaging Handling the packaging Keep the original packaging in a dry place at least for the warranty period Note Your Traffic Assist P...

Page 10: ...unit under See Technical Data on page 113 Cable for power supply from cigarette lighter This cable allows the unit to be connected up to the car s cigarette lighter The power supply must satisfy the follow ing requirements DC current 12 24 volts 0 5 amps Battery When depleted the integrated rechargea ble battery can be recharged by connect ing the Traffic Assist Pro to the power supply For this pu...

Page 11: ...d more details about the mem ory card under Technical Data on page 113 USB connection cable The USB connection cable can be used to connect the unit to a standard personal computer by means of the USB port However to use the data on the PC you will first have to install the free Active Sync software from Microsoft Unit bracket The Traffic Assist Pro can be mounted in the vehicle using the unit bra...

Page 12: ...S reception is available not in cluded in the scope of supply Please con tact your local stockist for more informa tion Details of the connection can be found under Connecting up external antenna on page 25 Docking station The optionally available docking station replaces the carrier plate of the Traffic As sist Pro included in the scope of delivery There are various connections on the docking sta...

Page 13: ...our product using our software service we will then inform you of any new updates and other news You can register online on the Becker homepage www mybecker com The Software update menu item is lo cated under SERVICE SUPPORT Repairs The unit must not be opened if damaged Please contact your local stockist Emissions and disposal Information on emissions electromagnet ic compatibility and disposal c...

Page 14: ... H SK Overview Traffic Assist Pro Scope of supply 1 Traffic Assist Pro PND Personal Navigation Device 2 Memory card containing navigational data 3 USB connection cable 4 Cable for power supply from car s cigarette lighter 12 volts 5 Unit bracket 6 TMC antenna 1 2 3 6 4 5 ...

Page 15: ...isplays 1 Touch screen showing the main menu selected 2 Touch screen key Press activates the corresponding key command 3 Microphone with flashing activity indicator for Bluetooth 4 On key Press returns to numerous applications Press for longer switches the Traffic Assist Pro on and off 5 Mood light 2 4 5 1 3 ...

Page 16: ... I E P NL DK S N FIN TR GR PL CZ H SK Rear of unit 1 Point for connecting up an external antenna external antenna not included in the scope of supply 2 Interface for docking station docking station not included in the scope of delivery 2 1 ...

Page 17: ...tton 3 ON OFF switch Right side of unit 4 Volume control Move upwards increase volume Move downwards decrease volume Press mute 5 3 5 mm connection for headset Connection socket for TMC antenna headset not included in scope of supply 6 USB port for data carrier containing MP3 or image files 7 Mini USB connection 1 2 4 5 3 6 7 ...

Page 18: ...TR GR PL CZ H SK Left docking station 1 Connection for telephone mute cable accessory 2 Connection for audio signal cable accessory external micro phone accessory Right docking station 3 Connection for TMC antenna 4 Connection for external power supply 4 3 2 1 ...

Page 19: ...e life of electronic components in your unit damage the rechargeable batteries and cause certain plastics to warp or melt Do not store your mobile navigation system in cold environments During operation when the unit warms up to operating temperature moisture may form internally causing damage to elec tronic components Do not drop your mobile navigation system unit protect it from shocks and do no...

Page 20: ...righter or darker However such in stances do not represent a product flaw Start up Once the Traffic Assist Pro has been un packed and checked for damage the unit can be started up The individual start up stages are insert memory card connect to power supply Switching on the unit Ensuring antenna reception if naviga tion is desired Memory card The memory card provided has a storage capacity of 4 GB...

Page 21: ...ard so that you can pull it out with two fingers Use your finger to gently press the memory card against the spring force into the card slot and then release it The card is ejected Remove the memory card and place it in the packaging while ensuring not to touch contact bar Notes A small slider is located on one side of the card If this is pushed in the direction of the arrow the Memory Card is pro...

Page 22: ...stop without employing excessive force Note You can charge the Traffic Assist Pro via the car charger cable included in the sco pe of delivery or via the optionally avai lable mains power supply unit When the Traffic Assist Pro is connected to a PC it is supplied with power via the PC and does not consume battery power Note Note that if the battery is completely dis charged it may take up to a min...

Page 23: ...eive traffic announce ments Push the connector on the TMC anten na into the socket without employing excessive force Note Remove the mains section if you are not planning on using the Traffic Assist Pro for a long time Note If the cigarette lighter has just been used and is still warm wait until this has cooled down in its mounting Note If the engine is switched off using the vehicle s power suppl...

Page 24: ...le on the other side of the TMC antenna so that it is posi tioned over the screw hole for the fas tening screw Install the fastening screw again The antenna is now mounted GPS antenna Unit antenna The GPS antenna is integrated into the housing 1 2 3 4 1 4 3 2 3 1 Note The integrated GPS antenna is not suita ble for use in vehicles with anti glare win dows metalised thermo glass or metal foil indic...

Page 25: ...ptionally available docking station replaces the carrier plate of the Traffic As sist Pro included in the scope of delivery The connections on the docking station can be used to connect the Traffic Assist Pro to an audio system already installed in the vehicle Telephone muting You can connect your Traffic Assist Pro to your audio system using an optionally available cable for telephone muting If t...

Page 26: ...ur Traffic Assist Pro using an option ally available cable Switching the Traffic Assist Pro on off The unit is switched on and off using the key Switching on Set the On Off switch on the left side of the unit to On Press the key for a few seconds The unit is switched on The manufactur er s logo appears on the touch screen After you have activated PIN protection see page 107 the PIN number is then ...

Page 27: ...be attached di rectly to the windscreen with the unit holder Note Have you forgotten your PIN number Press the Forgotten PIN button and follow the instructions Note The Traffic Assist Pro may only be used in accordance with the applicable nation al road traffic act Note We recommend that you place the Traf fic Assist Pro in sleep mode in the event of short interruptions to operation up to a week T...

Page 28: ... the lever 3 downwards The bracket will have stuck firmly to the windscreen It can now be set precisely To remove actuate the lever 3 again 1 2 3 6 4 5 7 Note Fasten the unit holder such that your field of vision is not impaired when the Traffic Assist Pro is installed and ensure that the unit is outside the deployment area of the airbag Ensure that the electrical connection ca ble does not hamper...

Page 29: ... and swivel the carrier plate 6 to the desired position with the other hand Tighten the fastening screw 1 suffi ciently so that the Traffic Assist Pro is held securely in place when the vehicle is in motion Adding the Traffic Assist Pro The Traffic Assist Pro is equipped with four guides and the carrier plate 6 has corresponding retaining lugs Position the Traffic Assist Pro with the guides on the...

Page 30: ...m precisely and e g buttons have to be touched off centre in order to be actu ated calibration should be undertaken The calibration function is started from the Settings menu see also page 104 Basic information about the menus During operations you are assisted by various menus and entry windows The main menu The top menu level is the main menu The individual applications are started from the main...

Page 31: ...ic Assist Pro for processing Adopting suggestions When a navigation destination is entered the Traffic Assist Pro compares the entry with the set of data on the memory card The Traffic Assist Pro then only makes those letters which are possible available for selection and adds a sensible sugges tion to the letters already entered The suggestion and the non selectable characters are shown in a ligh...

Page 32: ... umlauts Special characters and umlauts do not have to used when entering the names of towns and streets The Traffic Assist Pro will change entries from AE OE and UE if necessary If for example you are looking for the location Würzburg then simply press WUERZBURG or WURZBURG Special characters can be useful when naming destinations and routes To change to the special character key pad press the ke...

Page 33: ...use the back key To delete the character to the left of the cursor press the key Inserting spaces If you have an entry with two words e g for names of towns the words should be separated by a space To enter a space press the key The On key The key is integrated in the bottom left hand corner of the casing It has various functions Pressing and holding this button switches the Traffic Assist Pro to ...

Page 34: ...stallation program There is a map installation program on the map DVD Once the DVD is inserted in a personal computer s DVD drive this program will usually start up automatical ly The program guides you through the installation process Otherwise you will have to start the pro gram manually Open Windows Explorer Select your DVD drive folder Double click on the Setup exe file Transferring files File...

Page 35: ...g stages switch off Traffic Assist Pro remove memory card and plug into an SD card reading device or the use the USB cable to connect the Traffic Assist Pro to the computer boot up the computer and insert the DVD use the installation program to transfer the map required slide the memory card back into the Traffic Assist Pro or correctly remove the USB cable switch the Traffic Assist Pro back on Th...

Page 36: ...started using the On Off switch or the reset button If the messages reappear or the unit does not function correctly for any other reason please contact your local stockist You can also try to find a solution to your problem in the FAQ in the Support area on the Becker homepage www mybeck er com Note Never attempt to open the unit yourself Please contact your authorised dealer if you are unable to...

Page 37: ...st three satellites are needed to establish position If four or more signals are available height above sea level can also be calculated Traffic Assist Pro determines the direction of and distance to the destination with the aid of a digital road atlas on the SD card and the navigation computer For safety directions to the designation are mainly provided verbally The direc tion display and map dia...

Page 38: ...vigation mode always starts with the fast access for immediate selection of al ready saved destinations Navigation menu If necessary the navigation menu can be called up from rapid access e g to enter a new destination not yet provided Map display The map display can also be called up This doesn t just display the current posi tion but also allows a new destination to be selected Rapid access Rapi...

Page 39: ...destination is named on the right hand key and its char acteristics shown in the left hand icon Icons used The following icons are used in the list of destinations Note The last 50 destinations are automatically stored in the destinations list Once the memory s capacity has been fully used up the oldest destination is automatically de leted whenever a new one is entered Im portant destinations can...

Page 40: ...ed A selection menu appears Selection Meaning Show details All the data relating to the destination is dis played On map The map display and toolbar are called up and the destination dis played Name this en try The destination can be renamed Delete this entry The destination is delet ed from the destination memory Protect this entry The destination is pro tected against automatic deletion This fun...

Page 41: ... position You can have your current position dis played in the map display In rapid access press the key featuring the map icon on the upper edge of the screen Calling up Navigation menu The extended options of the navigation menu are provided by pressing the Navi gation menu key See TheNavigation menu on page 42 Selection Meaning Show details Full home address data is displayed Set If no address ...

Page 42: ...such as airports and ferry ports restaurants hotels petrol stations or public buildings can be selected and route guidance started via the Point of in terest button See Navigation menu Point of inter est on page 49 Select on map With Select on map you can select a des tination directly on the map and start route guidance See Navigation menu Select on map on page 52 Enter coordinates The geographic...

Page 43: ...has al ready been entered it appears in the first line and is therefore active Press the destination Country key to ac cess the selection list of countries The selection list appears Press the key of the country you want If necessary press the arrow keys on the right hand edge of the screen to scroll through all the des tination countries available Select address and start You can enter the exact ...

Page 44: ...ll produce an existing town and or postcode Smart speller Select between town entry and post code entry Consecutively enter the letters for the destination town or the numbers of the post code The OK key The OK key can be used to transfer the destination selected into the route calcula tion menu If the destination required ap pears in the upper edge of the display once the first letters or numbers...

Page 45: ...et is displayed each time a new letter is entered Traffic Assist Pro rules out all impossible combinations of letters and only activates those letter boxes which will produce an existing street A building number can only be selected once the street has been selected and or if building numbers are also present in the data Press the letters of the destination street one another another The OK key Th...

Page 46: ...an also use the road list See Using the list of streets on page 46 Selecting a house number After entering the destination town and road you can enter a house number in order to further limit the choice Press No The input menu for the house number appears Enter the house number and then press OK The procedure is essentially the same as for entering a road See Selecting the street on page 45 When e...

Page 47: ...rney times and the length of the route Select the mode of travel by repeatedly pressing the field at the top left Select one of the following options by pressing the field on the right next to the Routing type display With the buttons next to the fields Motor way Ferries and Toll roads you can set one of the following options Setting Meaning optimum With this option the op timum route in terms of ...

Page 48: ... in the route calculation Press the Start key to start navigation The route is calculated The map display then appears and directions to the destina tion begin Setting Meaning Allowed With this option the corresponding road type is included in the route calculation Avoid With this option wher ever possible the corre sponding road type is avoided Not permitted With this option the corresponding roa...

Page 49: ...ination and a destination in a town Press the Point of interest key to display the points of interest The search area selection window appears You can now use the buttons to select the search area you want Point of interest Near GPS position Press the Nearby GPS position button The following specifications are possible for searches in this point of interest win dow In the top button enter the radi...

Page 50: ...menu on page 31 For information on scrolling in lists please refer to the section Scrolling through the lists on page 32 Point of interest nationwide Touch the Nationwide button Select the desired country Press the All categories button Select the desired category Touch the Point of interest key to go to the entry menu Select the point of interest you want from the entry menu Note If you do not se...

Page 51: ...nterest you want from the entry menu You will find information about working with the entry menu in the Entries made with the entry menu on page 31 chapter You will find information about scrolling in lists in the Scrolling through the lists on page 32 chapter Operating options in the POI input menu Following selection of a POI the follow ing options are available using the buttons on the right ha...

Page 52: ...ns memory the Select on map button allows you to select it directly No address details are asked for in this case Press the Select on map key to make a direct selection The map display appears Gently press the screen surface until a circle of dots is drawn around the des tination requested The destination is recorded Information on the point selected is loaded from the set of data and dis played T...

Page 53: ...menu The name of the last programmed route is displayed at the top left and the individual stages of this route appear underneath Route list Routes already stored in the system are se lected from the route list Press the button in the route menu The route list opens Scrolling through the list of routes Press the arrow keys on the right hand side of the screen to scroll through the list of routes D...

Page 54: ...window appears The Add button appears below this empty window Press the Add button Select a destination from the fast access list displayed or Key Meaning Shows all stages inside actual route in the map These keys can be used to scroll up and down through the lists New Opens the address win dow for entering a new destination address Edit Activates individual route points for process ing Calculate ...

Page 55: ... existing routes The route planning window appears The following functions are available The Calculate key A planned route can also be calculated without GPS reception so that you can get an overview of the journey When doing this the first route point specified is used as the starting point for the route Press the button Calculate to have the total distance and probable length of the journey calc...

Page 56: ... The route options are displayed again Press the key again to start naviga tion Navigation menu Enter coordinates You can also enter a destination via geographic coordinates Press Enter coordinates in the navigation menu Select the value you wish to change Then enter the desired values using the to buttons You can set the direction of the longitude and latitude via LON and LAT using the right hand...

Page 57: ... Routing options key You can set your drive profile in the Routing options settings window The settings made here have an effect on the route selection and on the calculation of the estimated journey times Press Routing options in the settings menu The Routing options settings menu ap pears Select the mode of travel by repeatedly pressing the Profile field Select one of the following options by pr...

Page 58: ...ting Meaning optimum With this option the op timum route in terms of travel time and mileage is calculated fast With this option the shortest route possible for the time required is calculated short With this option the shortest route is calculat ed in terms of kilometres travelled scenic With this option the most winding route is calculated Setting Meaning Allowed With this option the correspondi...

Page 59: ...w navigation select wheth er you would like the auto zoom low normal high or no auto zoom view as standard With the Autozoom op tion the zoom range var ies according to your speed When you drive slowly the scale is de creased When you drive faster the scale is in creased 2D View In the case of 2D view navigation select wheth er the map should be ori ented to the north or in the direction of travel...

Page 60: ...he speed and the sea level can only be selected if the option Full map was subsequently selected in Map mode Setting Meaning Map mode Select the map display option by pressing the button Full map the complete map is displayed Split screen a split screen appears with map and arrow display Arrow only only an ar row display appears Info final des tination Displays ETA distance remaining time until ar...

Page 61: ...certain settings in this menu and some of the settings described under The Map info key on page 59 can no longer be selected Note This information can only be displayed if it is contained in the map material Setting Meaning Show signs Select whether the speed limits should be dis played never always or only when the limit is ex ceeded In town Select the amount over the speed limit at which you wou...

Page 62: ...mation is secondary to the navigation system s main function which is traffic monitoring and sign posting Setting Meaning Automatic tuning Select whether to run an automatic search for the station with the best re ception function acti vated Press the arrow buttons to activate the automatic station search The cur rently received TMC sta tion is displayed in the adjacent field The set ting can only...

Page 63: ...e settings menu The Smart Speller settings menu appears Press on the button in order to activate or deactivate the function Confirm your entry by pressing OK The Junction Info button In the Junction Info settings window you can activate or deactivate the available aids for complex turning manoeuvres for ex ample at motorway junctions or certain multi lane roads Press Junction Info in the settings ...

Page 64: ...nter it as the home address or Press on the Other destination button in order to access the navigation menu In the navigation menu you can enter your home address in a different manner e g by entering the address details See Structure of the navigation menu on page 42 Changing an already entered home address Press Change The fast access function appears further operation is the same as for enterin...

Page 65: ... your current position and your current speed are displayed in the GPS information window It is also possible to save your current location Press GPS in the settings menu The GPS information window appears To save your current location press the Save current position button Save your location in the same way as de scribed under Saving destination on page 48 The button Load map The Traffic Assist P...

Page 66: ...ither or in order to acti vate or deactivate the offroad function Confirm your selection by pressing the OK button What is dynamic route guid ance Dynamic route guidance calculates the route while taking into account current traffic announcements Traffic announcements are transmitted by radio stations via the TMC Traffic Mes sage Channel in addition to the radio programme and are received and anal...

Page 67: ...rn ing sign is displayed on the stretch of road affected Using TMC Once you have connected the TMC an tenna your Traffic Assist Pro will receive current traffic announcements and dy namic route calculation will be enabled traffic jam diversion You can also view traffic announcements directly To preset the TMC See The button Load map on page 65 In the map display activate the see also page 74 toolb...

Page 68: ...age Press on the desired message in the list The message display appears If the message text is longer than the display space available the button appears at the bottom right Press this button in order to view the remaining message text Press the arrow buttons to scroll in the messages Press the key to return to the message list Display the relevant road in the map Press the button in the message ...

Page 69: ...iest possible con venience Manual recalculation If a traffic announcement affects your route a window with detailed informa tion on the traffic announcement appears If you wish to calculate a detour around the traffic problem press Evade or alter natively Ignore Changing status You can set the function to act upon or ig nore an announcement at any time Activate the toolbar in the map display see a...

Page 70: ...nu Select on map on page 52 After you have entered the destination and started route guidance the Traffic Assist Pro guides you directly to the digitised road nearest to the offroad destination When you have reached the calculated point on the digitised road grey destina tion flag the Traffic Assist Pro indicates the direction to the offroad destination via a direction arrow Starting point in the ...

Page 71: ...ated the map display will cover virtually all of the touchscreen An icon for switching to configuration mode with a toolbar is always displayed in the lower right hand corner of the map Entire map with route guidance 1 Road to which the next driving ma noeuvre leads 2 Vehicle speed and altitude above sea level 3 Route 4 Vehicle location 5 Speed limit on the road currently be ing driven on display ...

Page 72: ...The distance remaining is indicated by means of the number of kilometres or miles below an arrow If there are two im pending driving manoeuvres in quick suc cession a small arrow appears over the first manoeuvre to indicate that another one is coming up Depending upon the setting additional information may be shown in the map display See Additional information on page 75 Spilt screen with route gu...

Page 73: ...ce to the next driving manoeuvre 7 Vehicle speed and altitude above sea level 8 Estimated time of arrival remaining journey time and remaining distance to destination Map display with reality view At many motorway junctions a detailed and realistic display of the motorway junction can be shown For this purpose activate the function Re ality View in the settings under The Junction Info button on pa...

Page 74: ...ent can be repeated with updat ed information Press the preview area while route guid ance is active and the toolbar deactivat ed The last announcement is repeated with updated information The volume is also displayed Changing the announcement volume The volume of announcements can be adjusted Icon Meaning See Display route toolbar on page 78 See Displaying TMC mes sages toolbar on page 78 See Day...

Page 75: ...win dow shows the hidden information Position information If you require information regarding a cer tain point on the map display the infor mation window can be opened This dis plays information on the selected point if any is stored in the map data and pro vides various functions for further action Move or zoom the map until you see the desired point Press and hold on the desired point un til th...

Page 76: ...several destinations are entered the route is cal culated to the nearest destination only for ac tive route guidance Route options Allows you to change route options only if driving guidance is acti vated See Options for the drive profile on page 47 Selection Meaning Block road The driving directions planned by the Traffic Assist Pro may be hin dered by unanticipated road blocks Thisfunctionnotifi...

Page 77: ... You can return to route guidance without changes by pressing the Resume button Blocking a route section In order to block route sections press the button before the relevant section A blocked section is marked using the button The block can be cancelled by pressing this button After you have blocked the desired sec tion press the Recalculate button The route is recalculated and the route guidance...

Page 78: ... route has been selected for driving guidance Press the Route key The map is expanded and the specific route destinations are displayed Displaying TMC messages toolbar Press this button to display all TMC traf fic announcements received from the sta tion you are currently tuned in to You have the option of obtaining an over view of the current traffic situation and calculating an alternative route...

Page 79: ... return to the previous design Change display toolbar For the map display 2 D view or 3 D view are available Change the display using the 3D key Press the 3D key The display is changed Press the key again to return to the previous display Point northwards toolbar Use the compass key to orient the map on the touchscreen towards the north Press the compass key The map is pointed north on the touch s...

Page 80: ...nd the Traffic Assist Pro starts route calculation to the stopover To set a POI category You can set which categories the Traffic Assist Pro should take into account when displaying the POIs Press the button The current settings are displayed Press one of the categories set e g Petrol station The complete category list appears If necessary scroll in the list and press one of the categories which y...

Page 81: ...ed MP3 files can be played back while an active navigation is in progress Press The MP3 player opens You can now play back your music files refer to Playback on page 60 Calling up the telephone function tool bar It is possible to call up the telephone func tion while navigation is underway for ex ample to make a call Press the button The telephone menu opens You can now use the telephone function ...

Page 82: ...led answered or rejected will be displayed in chronolog ical order Fast access mode is shown be low with example telephone numbers and names Configuration of fast access mode In fast access mode the Phone menu but ton for opening the telephone menu is displayed in the top line IIn addition provided that a telephone has already been connected the name of the network oper ator and the strength of th...

Page 83: ...rent list page and the total number of pages appear between the buttons Notes The last 50 numbers names are auto matically stored in the number list If the storage capacity of 50 numbers is reached the oldest number is automat ically deleted to make room for a new number However important num bers can be protected Entries in fast access mode always only apply to the time during which the mobile ph...

Page 84: ... appears Option Description Show details The data for the entry is displayed number and name call time and call date if available Name this en try The entry can be re named Delete this entry The entry is deleted from the number list Protect this entry The entry is protected against automatic dele tion only available on unprotected devices Unprotect this entry Entry protection is disa bled only ava...

Page 85: ...the corresponding telephone number can be called In the telephone menu press the Phone book button If there are more than 30 entries in the tel ephone book an input menu appears If there are fewer than 30 entries a list of en tries is displayed directly Select the first letter of the desired entry in the input menu Press the OK button when the desired name is displayed in the top line Notes Please...

Page 86: ...lishing a connection are described below Opening the device list In the telephone menu press the Con nect phone button The device list is displayed You can search for a mobile phone or con nect a mobile phone from the device list The device list displays line by line all de vices available for selection Each line of the device list is divided into two fields Each list field is in the form of a but...

Page 87: ...ile phone is switched on and in range and Bluetooth is activated Option Description Show details The device data is dis played Protect this entry The device is protected against automatic dele tion only available on unprotected devices Unprotect this entry Device protection is disa bled only available on protected devices Move this en try up The device is moved for ward by one position only availa...

Page 88: ...ord is stipulated by the Traffic Assist Pro Enter the displayed password on the mobile phone The connection is established If the con nection is successfully established the tel ephone fast access function is displayed Connecting from the device list You can initiate a connection to a mobile phone from the device list If a mobile phone is already connected that connec tion will be terminated and a...

Page 89: ...one and ringtone vol ume In the telephone menu press the Pref erences button The telephone Bluetooth settings are dis played Switching Bluetooth on off Bluetooth must be switched on in order to enable automatic connection to a mobile phone after the Traffic Assist Pro is switched on see Connecting automati cally on page 87 Press the Bluetooth activated button in the telephone Bluetooth settings to...

Page 90: ...then refreshed accordingly Press the Reload Phonebook button in the telephone Bluetooth settings Setting the telephone volume You can set the volume of the telephone Press the Volume button in the tele phone Bluetooth settings Select the desired volume using the and buttons Confirm your settings by pressing the OK button Device name You can give your Traffic Assist Pro a name This name will be dis...

Page 91: ...ed The following display also ap pears If available the telephone number and name of the caller are displayed Notes The call can be returned to the mobile phone and the hands free function ter minated by pressing the Private mode button The connection with the mobile phone is automatically re established after the call is ended You can switch to the navigation dis play during an active call by pre...

Page 92: ...s on whether route guidance is active or not When route guidance is active In the toolbar press the button End the call by pressing the End call button The call is ended and the map display is shown Without route guidance Press the End call button The call is terminated The last active dis play is shown 1 1 ...

Page 93: ... is called up and appears with its main screen If playback of a music track was stopped previously that last music track is dis played If this is no longer available the first track on the memory card is displayed If the memory card contains no tracks the No music available message ap pears The MP3 player The MP3 files saved on a memory card can be called up and played using the MP3 player The MP3...

Page 94: ...key changes to display the pause icon Under the display of the current track you can see its length and below it the elapsed time in the form of a bar Pause Playback can be paused at any time and then continued Press the key featuring the pause icon Playback is interrupted The current track is still displayed in the track line The but ton display changes to the Playback icon Playback is continued ...

Page 95: ...of the current folder appears in the top line and underneath it the subfolders and then the tracks which it contains Press on a folder in order to display its contents Press on a track in order to play it Track repeat random play function It is possible to have a track continuously repeated or to have the tracks played in random order Press the button marked with the arrow repeatedly until the des...

Page 96: ... lower right hand edge of the screen for this purpose The map view is displayed while the music continues to play Shutting down the MP3 Player By pressing the key the MP3 player is terminated and the main menu is dis played or if route guidance is activated the map display appears Warning Always adjust the volume so that you can still hear any ambient noise while driving Note The volume can also b...

Page 97: ...yed is present on the memory card this will be displayed in the image area If it is no longer available the next pic ture in the same folder is displayed If there are no pictures in the correspond ing folder no pictures are displayed If the memory card contains no pic tures the No pictures available mes sage appears The Picture Viewer Using the picture viewer the images stored on the memory card o...

Page 98: ... wish to repeat the slide show press Yes If you wish to end the slide show press No The slide show will be repeated automati cally if no buttons are pressed Press the key to end the slide show Full screen In full screen mode the current picture is enlarged to fill the entire touch screen Full screen mode can be started using the following keys Press the key featuring the full screen icon The image...

Page 99: ...folders All folders containing image files are in cluded in the folder overview Scrolling You can use the keys to scroll through the list display in the direction in dicated by the arrow The current list page and the total number of its contents appear between the keys Selecting a picture You can load a picture from the list straight into the Picture Viewer Press the button of the picture you want...

Page 100: ...er The videos stored on the Memory Card can be played using the video player The Traffic Assist Pro supports the fol lowing video formats MPEG1 WMV The following is an example video player display with a video playing Operating the video player Opening and playing videos Press the folder button see arrow The contents of the current folder ap pears The folder name appears in the top line and below ...

Page 101: ... to show the button bar again Pausing and resuming playback The following buttons are used for this purpose Show the button bar Press to pause playback Depiction of the button changes to Press to resume playback Depiction of the button changes to Fast forward reverse The following buttons are used for this purpose Show the button bar Press for fast forward Press for fast reverse Press to end fast ...

Page 102: ... menu The various setting possibilities can be se lected from the setting menu Operation Selection possibilities The desired selection is chosen by pushing the desired button The funtionality of the buttons varies according to the selec tion and is described under The individ ual menu points on page 103 You can jump to the next or previous page of the settings by pressing the and buttons Closing t...

Page 103: ...has a charge of two thirds of its capacity The charging operation is indicated by the mains socket symbol in the status display Ending the status display By pushing the button OK the status dis play is ended and the setting menu ap pears Day night display Using the following button you can change between the day and night screen displays Push the button Brightness The brightness of the screen disp...

Page 104: ...ferent languages Push the button Language The language selection appears In the language selection the available languages are shown in a list which ex tends over several pages Each list area is a contact surface The individual contact surfaces are marked with the language des ignation and the associated national flag Turn the page These buttons allow page turning in the direction shown by the ar ...

Page 105: ...switch automatically to sleep mode when the vehicle ignition is switched off Prerequisite The Traffic Assist Pro must be connected to the vehicle cigarette lighter see also page 23 The cigarette lighter is de energized after the ignition is switched off The relevant function can be switched on at the Traffic Assist Pro Switching the function on off Press Automatic on off Depending on the previous ...

Page 106: ...Assist Pro to the factory settings This resets all settings that have been changed and deletes the stored destina tions stored routes number lists and Bluetooth device lists Press the Factory settings button Press the Yes button The Traffic Assist Pro is reset to the facto ry settings Car integration When using the optionally available cable for output of the audio signal connection of a microphon...

Page 107: ...r defined PIN using buttons to Repeat entry of the previously entered PIN Confirm your entry by pressing the OK button Your Traffic Assist Pro is now protected against unauthorised access and can only be activated with the previously entered PIN after switching on via the on off switch Deactivating changing PIN protection Open the PIN protection menu Enter the PIN number using buttons to Press the...

Page 108: ...ctual cur rent position in terms of geographical length and width In order to determine the position signals from at least three sat ellites are required and the fourth one al lows the height to be determined HDOP Horizontal Dilution Of Precision HDOP states the quality of the positional dtermination In theory values from 0 to 50 are possible whereby the following ap plies the smaller the value th...

Page 109: ...r with a softer plastic core The sleeve is hard and can be gripped and the softer core emerges at the tip and is de signed to touch the screen as softly as pos sible i e without the danger of scratching the screen The stylus is more accurate than operation using the fingers since only the thin tip touches the screen In addition dirty marks on the screen caused by finger prints are avoided TMC Traf...

Page 110: ...6 save 48 standard 39 86 Destinations memory 40 changing 40 scrolling 40 Dialling a number 85 Display 59 Display street names 60 Displaying current position 41 Distance to destination 60 Drive profile 47 E Entering destinations 42 Entering address 43 ETA 60 F Fast access mode Icons 83 Fast route 47 58 Ferry 47 57 58 File 109 Folder viewing mode 99 Full screen 98 G GMT 108 GPS 108 H HDOP 108 I ID3 ...

Page 111: ...Operating folder viewing mode 99 optimum route 47 58 P Part way destination 53 Pause 94 Phonebook 85 Picture Viewer 97 shutting down 98 Picture viewer 100 PIN 107 PIN forgotten 27 107 PIN protection 107 Play 94 Points of interest 49 display on the map 60 nearby 49 R Rapid access 40 Icons 39 Reality view 63 73 Repeat current track 95 Restrictions Ferry 47 58 Route deleting 53 fast 47 58 renaming 53...

Page 112: ... Speed limit 61 Stylus 109 Switching the Traffic Assist Pro on 26 T Telephone book 85 Telephone fast access mode 83 Telephone menu 82 84 Telephone mode 82 The 93 Time format 59 Time of arrival 60 Time zone 63 TMC 66 Display on the map 67 Recalculating routes 69 Settings 62 TMC antenna 23 Toll road 47 57 58 Travel time 60 Travel time remaining 60 Type of route 57 Type of routing 57 U Units of measu...

Page 113: ... Screen with 24 Bit colour depth 16 7 Mio Colours Low reflection values Storage 128 MB Flash Storage 64 MB SD RAM SD Card Reader Support up to 4 GB FAT 32 formatted USB Interface USB 1 1 USB Client 2 0 MINI USB Headphone output 3 5 mm Stereo Socket 1 Internal speakers 2 Watt max Power supply voltage 5 Volt DC via USB connection AC Adapter not included 100 240 Volt 0 2 Ampere 50 60 Hz Output Voltag...

Page 114: ...ely prevented The EC type approval mark E13 issued by Luxembourg s Road Traffic Registra tion Authority in accordance with European Directive ECE R10 governing the EMC of motor vehicles in its current version authorises installation and operation of the unit in motor vehicles classes L M N and O EU Declaration of Conformity Harman Becker Automotive Systems GmbH declares herewith that Traffic Assis...

Page 115: ...ease take these products to communal collecting points or recycling centres for processing and salvage of materials The units will be accepted there free of charge The proper disposal of this product helps protect the environment and prevents harmful ef fects on humans and the environment which could result from improper handling More detailed information on the nearest collecting point or the nea...

Page 116: ...f manufacturers to take back these batteries free of charge and to correctly recycle them or to dispose of them as hazardous waste statutory obligation to take back If you wish to return your batteries to us please send them with adequate postage to the following address Harman Becker Automotive Systems GmbH Battery recycling Becker Göring Straße 16 16 D 76307 Karlsbad Ittersbach The lithium ion b...

Page 117: ... holes Unscrew and remove the four housing screws using a small cross slot screwdriver Lever off the rear of the housing using a flat blade screwdriver levering at the slits at the side of the housing Lever off the battery bonded to the circuit board using a flat blade screwdriver Pull out the plug of the batttery connecting cable Note Do not reconnect a unit that you have opened to the power supp...

Reviews: