


75.5916.03 LZR-WIDESCAN 20180821
Page 9 of 16
75.5916.03 LZR-WIDESCAN 20180821
Page 9 of 16
1
2
3
A
4
5
6
B
7
8
9
C
F1
0
F2
D
1
2
3
A
4
5
6
B
7
8
9
C
F1
0
F2
D
1
2
3
A
4
5
6
B
7
8
9
C
F1
0
F2
D
5
OUT1
REL
OUT2
OUT1
OUT1
REL
REL
OUT2
OUT2
5 s
10 s
H
W
D
3
75.5916.03 LZR-WIDESCAN 20180821
Page 9 of 16
75.5916.03 LZR-WIDESCAN 20180821
Page 9 of 16
-
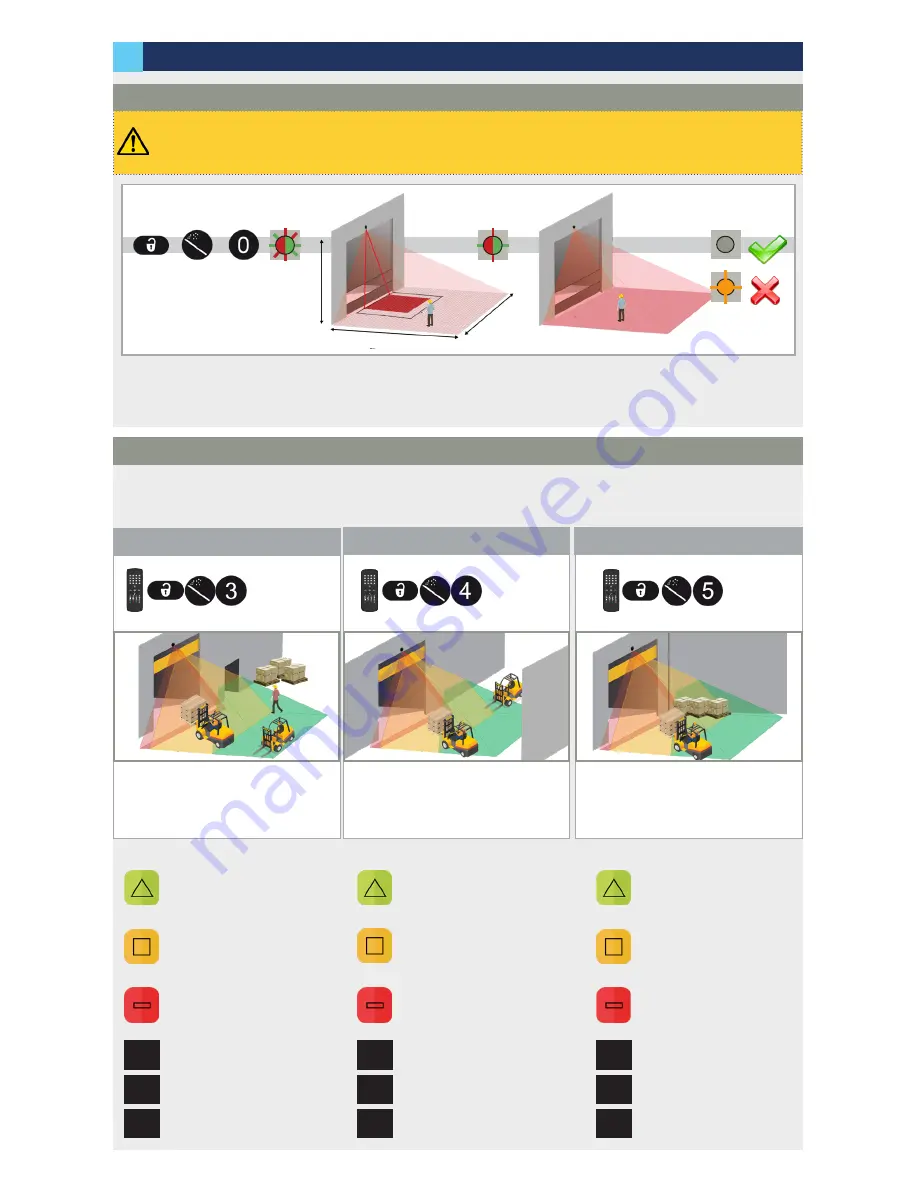
The teach-in zone (i.e. square in front of the 2 visible spots) must be completely clear.
-
This teach-in must be launched each time a sensor angle has been changed.
-
Make sure the blue protection film and cover are removed!
1. Launch a teach-in by remote control. It starts after 5 seconds.
2. Wait while the position, angle, and height are learned and the background is analyzed.
3. The teach-in ends successfully. If not, refer to Troubleshooting on page 15.
CORNER
CORRIDOR
- width:
max
, depth:
max
- object type:
vehicle
- direction:
uni 100%
- width:
max
, depth:
6’6
"
- object type:
vehicle
- max presence time:
infinite
- width:
max
, depth:
1’3
"
- max presence time:
10 min
- uncovered zone:
5
3
⁄
4
"
- interior, confined space
- traffic from and to all directions
- no storage near door
- width:
max
, depth:
max
- object type:
vehicle
- direction:
uni
- width:
max
, depth:
6’6
"
- object type:
vehicle
- max presence time:
30 min
- width:
max
, depth:
1’3
"
- max presence time:
10 min
- uncovered zone:
5
3
⁄
4
"
- interior or exterior
- no parallel traffic
- storage on one side of door
STANDARD
SETTINGS
SETTINGS
SETTINGS
- width:
max
, depth:
max
- object type:
vehicle
- direction:
uni 100%
- width:
max
, depth:
6’6
"
- object type:
vehicle
- max presence time:
30 min
- next to pedestrian door
- exterior, large space
- traffic from and to all directions
- storage right and/or left
- width:
max
, depth:
1’3
"
- max presence time:
infinite
- uncovered zone:
5
3
⁄
4
"
Choose one of the following presettings. They adjust parameters automatically according to your application.
If necessary, you can also adjust a parameter independently via remote control (see page 10).
- Motion / Pull-Cord
- Safety
- and Height Trigger
- Motion / Pull-Cord / Safety
- Safety
- and Speed Trigger
- Motion / Pull-Cord / Presence
- Safety
- and Height Trigger
TEACH-IN: INSTALL
PROGRAMMING THE SENSOR
PRESETTINGS


