background image

10  Maintenance


41


Swimming pool 
Oxidation on metallic parts of 
the swimming pool 

The oxidised elements and/or the swimming pool are not 
adequately earthed. 

Have the earthing checked by a specialist. 


The oxidised elements are not made from stainless steel 

of an appropriate quality. 

Use elements made from stainless steel of an appropriate quality. 

WIFI Modul 
The correct password has been 
entered for the WIFI network but 

both LEDs are not lighting. 

The module did not connect to the required network. 

Changing the channel (router settings) may solve the problem.  
Please consult an expert in the area of IT. 

10


Maintenance 

The  maintenance  schedule  lists  only  the  minimum  maintenance  requirement.  The  frequency  at  which  maintenance  is  required  depends  on  the 
intensity of use. 
The  maintenance  intervals  are  defined  by  the  relevant,  country-specific  regulations!  This  means  that  maintenance  intervals  may  be  considerably 
shorter than those given here. The relevant country-specific regulations and standards must be complied with. 


NOTE! 
Only the manufacturer's spare parts and sensors may be used. Failure to observe this will result in loss of warranty. 


10.1


Cell cleaning 

The Salt Relax POWER is equipped with a programmable automatic cell cleaning function. This function is based on cyclical reversal of the polarity of 
the  chlorine  production  cell.  Reversing  the  polarity  allows  limescale  crystals  deposited  on  one  side  of  the  cell  plates  in  operation  to  be  removed 
automatically. The procedure for setting this function is described in the menu "Service settings." 
You can shorten the polarity cycles if you find that limescale deposits tend to form in your chlorine production cell. However, please note that a setting 
of 200 minutes or less will greatly reduce the typical life of the chlorine production cell and void the warranty.   
If, on the other hand, you find that your chlorine production cell remains clean even after extended periods of operation, you can extend the polarity 
cycles, which increases the service life of the chlorine production cell. 
If limescale deposits nevertheless form on the cell blades, you can remove the cell from the cell holder (it is imperative to close the bypass valves 
before doing this. Caution! Water may emerge) and immerse it in a bath of BAYROL Decalcit. Clean the paddle flow switch at the same time, as it 
may also have limescale deposits or soiling. 


NOTE! 
It is imperative to remove the cell from the cleaning bath as soon as the deposits have been dissolved. Leaving the cell in the solution 
for longer will result in damage which is not covered by the warranty! 
Never try to remove the deposits mechanically (e.g. with a brush or metal instruments). This may result in irreparable damage to the 
cell.  


10.2


General maintenance 


Check the water values as listed in the table in the chapter Water chemistry. 


Perform  regular  backwashing  to  maintain  filter  performance.  Check  the  salt  content  after  adding  fresh  water.  If  necessary,  add  salt  to 
compensate for the loss due to backwashing. 


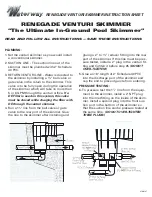
Clean the skimmer/overflow channel of your pool regularly. 


Use your floor cleaner as usual. 


From time to time, carry out a visual inspection of the system. In particular, examine all components for leakage and check the condition of 
the chlorine production cell. 


Replace the electrodes (pH and redox, if used) and the dosing hose of the pumps annually. 

10.3


Cleaning 

If  necessary,  clean  the  surface  of  the  device  with  a  soft,  lint-free  cloth.  You  can  moisten  it  with  a  little  water  if  required.  
Never use aggressive cleaning agents. 


Summary of Contents for NATURALLY SALT Salt Relax POWER

Page 1: ...Salt Relax POWER Version 2 9 EN Operating and installation manual...

Page 2: ......

Page 3: ...2 1 point pH calibration 31 6 Redox option 32 6 1 Scope of delivery redox option 32 6 2 Installing the Redox module 32 6 3 Installing the redox electrode 32 6 4 Redox setpoint 32 6 4 1 Determining the...

Page 4: ...ater In particular make sure that the filtration pump is resistant to salt water Note that even water with a low salt content can be corrosive and take this into account when selecting components for...

Page 5: ...ing by holding it up against the mounting location and marking the position of the drill holes on the wall 3 2 Electrical connection The Salt Relax POWER has been designed and constructed according to...

Page 6: ...evice is connected to a water protected mains socket with a 30 mA residual current circuit breaker See also the information in the chapters Filtration Configuration and Connecting terminals 3 3 Connec...

Page 7: ...on It is imperative to note that the chlorine production cell must always be the last element installed on the return line to the pool see sketch above To enable use of the integrated gas flow sensor...

Page 8: ...ecommends the installation of a sacrificial electrode in the pumping system of the pool Ask your specialist swimming pool dealer for details NOTE When selecting components e g steel ladders etc always...

Page 9: ...m3 Depth average depth of the water 3 8 4 Calculating the amount of salt to add The amount of salt to be added to a freshly filled pool salt free water is calculated with the following formula Desired...

Page 10: ...chlorine requirement If Salt Relax Pro is controlled via the external timer please ensure that the timer runs continuously for 24 hours Note If your pool needs a chlorine shock we recommend that you a...

Page 11: ...trol see below Automatic mode time controlled In this mode filtration can be activated via timers allowing you to enter starting and stopping times The timers run on a daily schedule Setting the daily...

Page 12: ...hen using a circulating pump with variable speed control Press the or keys to access and also change the setting Use or to switch between 1 2 and 3 Confirm your entry with The speed of the pump is set...

Page 13: ...vailable in all operating modes This menu is used to facilitate backwashing of the sand filter As soon as the menu is activated in one of the filtration modes Manual Automatic Heating Smart Intelligen...

Page 14: ...sing a suitable LED light control Next colour Confirm by pressing to manually activate the next colour on the connected LED control Switching interval Select the interval here in seconds at which the...

Page 15: ...ress to enter the minutes of the starting time and set using Confirm your entry with or reject it with The timer can also be set to switch at certain intervals daily every 2 days every 3 days every 4...

Page 16: ...er information 4 3 5 Temperature calibration In this menu the temperature sensor can be calibrated with the displayed temperature value If you control your pool heating with the Salt Relax POWER this...

Page 17: ...hether you wish to reduce the production capacity with the pool cover closed The precondition for use of this function is a closing signal when the cover is closed It is connected as described in the...

Page 18: ...confirm with Time Press or to activate entry of the time Use and to set the hour opens the input window for the minutes which you can set using and opens the input window for seconds which you can set...

Page 19: ...you can enter the code word for the selected network System settings The configuration settings are entered automatically by the system Please consult an IT expert if you are shown an error message S...

Page 20: ...er a 5 key password Enter a key combination of your choice You will be asked to enter this password each time you want to access the menu level from the main screen Remember your password To deactivat...

Page 21: ...function Electr circuitry ph PH Dosing pump pH Minus dosing pump pH Plus 230V 110V 50Hz Aux1 AUX1 Dosing pump pH Plus for pH Minus AND pH Plus dosing 230V 110V 50Hz Aux2 AUX2 Additional dosing pump f...

Page 22: ...nstalled The relay selected under Redox default Aux2 switches the additional dosing pump for disinfection if 0 is selected in parameter 4 Electrolysis mode in the Service Settings menu In this case th...

Page 23: ...olled functions e g Lighting are not switched off 0 1 2 1 Defines the reaction of the chlorine production cell and an additionally connected dosing pump for disinfection when the redox option is used...

Page 24: ...llowing can be checked should the system fail to reach the setpoint within the set time Redox electrode Setting for output of chlorine production cell Leakage in the dosing line of the additional disi...

Page 25: ...al is not envisaged for stopping the pump STOP signal Slow The circulating pump is switched to the status Slow when the heating is connected Medium The circulating pump is switched to the status Mediu...

Page 26: ...our pool Defines the maximum switch on time of the pH pump after which the pH alarm AL3 is activated This alarm indicates that although the dosing pump pH was active it was not possible to reach the p...

Page 27: ...ue 3 default setting Never set values greater than 3 in this menu If necessary change the setting with and confirm with 4 5 6 Reset settings In Reset settings all settings made can be reset to the as...

Page 28: ...he chapter Installing the pH and redox pH module Please note that installation must be performed by a specialist service technician installation engineer 5 3 Installing the pH electrode Install the pH...

Page 29: ...ect the pH option and display the associated menus at the corresponding points 5 5 Settings on the device 5 5 1 Set point pH Setpoint for unidirectional pH regulation Entry of the setpoint for unidire...

Page 30: ...7 and pH 10 in order to calculate the exact electrode slope For regular recalibration at least once a month a 1 point calibration will usually be enough If a photometer is available recalibration shou...

Page 31: ...th 1 point calibration To set select Offset 1pt with and confirm with Current measurement Shows the value measured with the current setting Target measurement Allows you to enter the actual pH value E...

Page 32: ...lectrode to the socket provided on the Salt Relax POWER 6 4 Redox setpoint For redox regulation it is not the calibration of the electrodes which plays a major role but the correct definition of the r...

Page 33: ...and confirm with Proceed as described in the previous chapter to determine the setpoint 6 4 3 1 point redox calibration 1 point calibration is carried out with the 465 mV buffer solution provided Alte...

Page 34: ...is not too long but is also not under tension Carefully feed the cable through the cable opening of the module and connect the individual cables as described to the screw terminals provided Make absol...

Page 35: ...switched on or switched over Contact with live components can lead to an electric shock This may result in serious or even fatal injury and damage to material assets and the following therefore apply...

Page 36: ...o upper clips upwards and remove them Carefully pull the housing front cover forwards until it is about 15 cm from the device Carefully pull the connecting cable between main board and display out of...

Page 37: ...e grommet Unscrew the nut of the cable gland until it is positioned on the very end of the thread Alternatively you can remove it completely Remove the plug leaving the seal in the screw fitting Feed...

Page 38: ...elf when working on the opened device Avoid touching the electronic components unnecessarily NOTE Observe the permissible maximum currents for the relays for switch outputs 1 to 3 in total not more th...

Page 39: ...he chlorine production cell is set too high Reduce the production intensity If the redox option is used redox setpoint faulty Check the redox setpoint and the correlation between redox setpoint and th...

Page 40: ...aution Leaking pH Minus pH Plus can cause chemical burns Wear gloves and safety goggles Dosing rate of the pH dosing pump is too low Increase the dosing rate by opening the red regulator of the dosing...

Page 41: ...ction cell However please note that a setting of 200 minutes or less will greatly reduce the typical life of the chlorine production cell and void the warranty If on the other hand you find that your...

Page 42: ...n over the winter activate the Antifreeze function However this may not prevent the water from freezing at exceptionally low temperatures If necessary remove the suction line from the canister and rin...

Page 43: ...e measurement Measurement via LM35 sensor stainless steel Measuring range 0 100 OC Resolution 1 OC Calibration 1 point calibration Measurement of the pH value optional Measurement via combination elec...

Page 44: ...ct model Salt Relax POWER Brand BAYROL Series no See type plate EC directives EC Low Voltage Directive 2006 95 EC EC EMC Directive 2004 108 EC Harmonizing standards used UNE EN 60335 1 2002 A1 2004 A1...

Reviews: