Configuring the Camera
Basler IP Camera
25
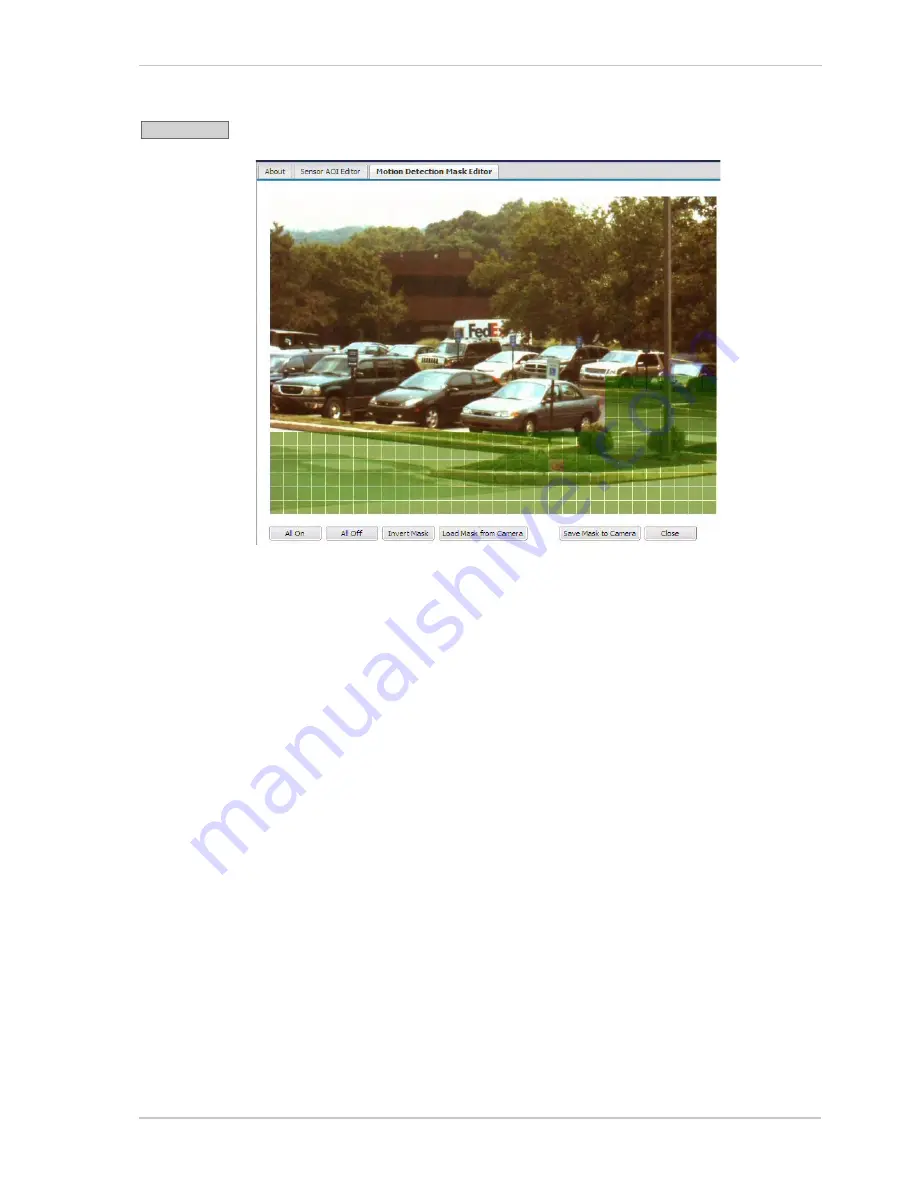
Click the
Motion Mask
button to open the
Motion Mask Editor
as shown below.
The motion mask defines the area(s) of the image that will be used for the camera’s
motion detection function (see Section 3.5 on
page 34
). Highlighted areas in the
editor will be included in the motion detection mask and used for motion detection.
Unhighlighted areas will not. To highlight an area within the editor, simply left click
your mouse and drag the cursor over the editor screen.
Note that you can set the mask so that it covers a single area as shown above or
so that it covers several different areas within the image.
You can use the
All On
button at the bottom of the screen to highlight all areas of
the editor and the
All Off
button to unhighlight all areas. Use the
Invert Mask
button
to swap the highlighted areas and the unhighlighted areas. Clicking the
Load Mask
From Camera
button will display the mask settings that are currently saved in the
camera.
Any changes you make using the mask editor will not be saved in the camera until
you click the
Save Mask To Camera
button. The
Close
button will close the editor.
Motion Mask
Summary of Contents for BIP-1000c
Page 4: ...Table of Contents ii Basler IP Camera...
Page 8: ...Introduction 4 Basler IP Camera...
Page 10: ...Accessing the Camera 6 Basler IP Camera...
Page 66: ...Configuring the Camera 62 Basler IP Camera...
Page 68: ...Reset Tool 64 Basler IP Camera...
Page 74: ...The Terminal Connector 70 Basler IP Camera...
Page 80: ...Day Night Functionality 76 Basler IP Camera...
Page 86: ...Technical Specifications 82 Basler IP Camera...
Page 92: ...Revision History 88 Basler IP Camera...
Page 94: ...Feedback 90 Basler IP Camera...
Page 98: ...Index 94 Basler IP Camera white balance mask 22 white balance mode parameter 15...


