Lindsay Transportation Solutions Sales and Services, Inc
(888) 800-3691 [U.S. toll free] or +1 (707) 374-6800
21
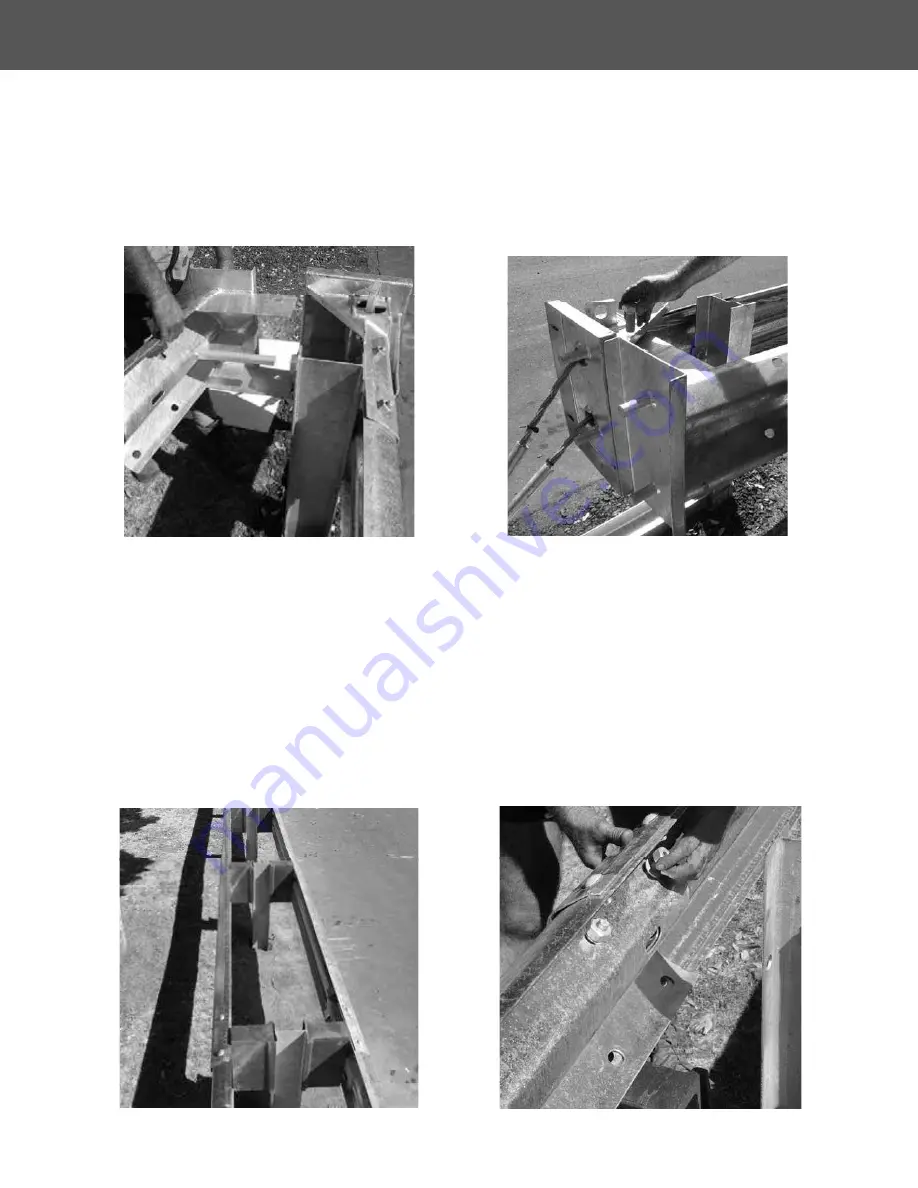
Figure 35. Fit secondary head to main head.
Figure 36. Fix secondary head into place.
Figure 37. Rails installed with blockouts.
Figure 38. Splice rail 2 to rail 3 with 8 special shear bolts.
Step 3 – Attach Secondary Impact Head
Fit secondary head to main head by pushing sideways onto the main head as shown below
(Figure 35), until the holes in the gussets line up. Fix into place with either the 25mm (1 in) pin
and pin lynch, or 2 M24 x 50mm (1 in X 2 in) bolts as shown (Figure 36).
Step 4 – Attach Backside Rail #3 and Rail #2
Rails 3 and 2 are installed like standard guardrail with blockouts between the rail and post (Figure
37).
Attach rails to post 2, 4, 5 and 6 with blockouts and post bolts supplied (do not bolt the rail to
post 3) and splice rail 3 to rail 4 with 8 standard splice bolts. At post 7 lap rail in the direction of
traffic as per standard median barrier.
Ensure that rail 2 is spliced to rail 3 using the special shear bolts (yellow head) supplied.
DO NOT use standard splice bolts at this joint (Figure 38). Be sure rail 2 is lapped outside
rail 3 in both directions.
DO NOT USE AN AIR-IMPACT WRENCH TO TIGHTEN SHEAR
BOLTS. SHEAR BOLTS WILL BREAK IF OVER-TIGHTEND.
X-MAS - Median Installation Instructions
X-TENSION
®
SYSTEM


