R5913197 /02 SP2K-S
96
8.2 Switching the projector ON
Possible ways to switch on
There are multiple ways to switch on the projector, depending on a few factors:
Current
Power Stage
How to power on
Notes
OFF
•
Locally, using the power button
•
Remotely, using GPI3
After the projector is powered, you can
further access the projector using either Web
Communicator or the optional touch display.
ECO mode
•
Locally, using the power button and touch
display
5
•
Remotely, using Web Communicator
•
Remotely, using GPI3
Take into account that the Web
Communicator method can only be used
when the projector is in ECO mode.
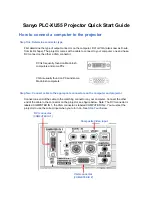
How to switch on locally, using the touch display?
1.
Ensure that the SP2K-S projector is installed onto a stable platform.
2.
Ensure the projector is correctly connected to the mains power.
3.
Ensure that the correct lens is installed for your application.
4.
Press the power button to switch the projector ON.
The projector will start up and the touch display will start its initialization procedure.
5.
Wait until the
Projector control
menu is fully accessible on the touch display.
Tip:
While the menu may become accessible early on, certain icons (e.g. the Light button) may
be greyed out until the projector is ready to play.
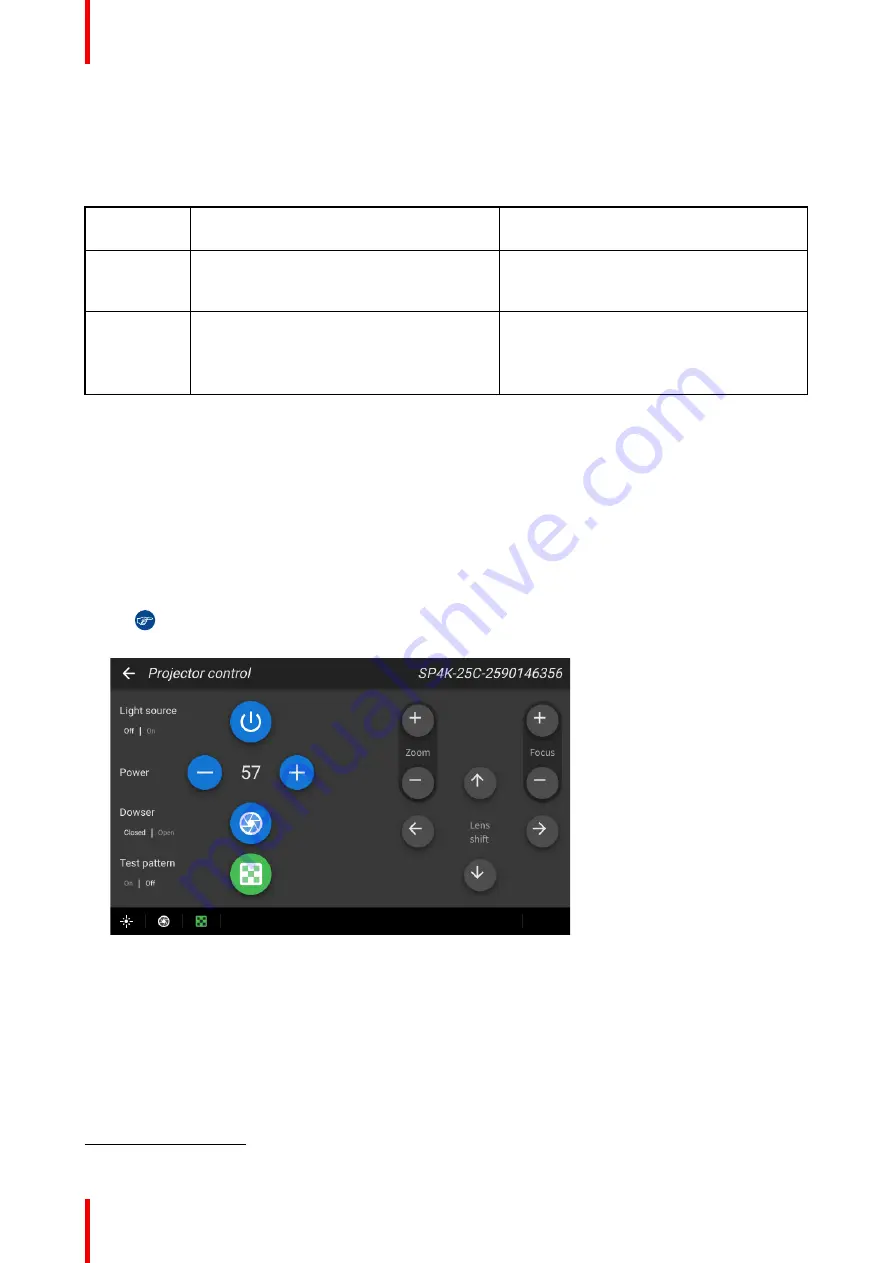
Image 8–4 Example of the Projector control menu on the touch display.
6.
Press the
Light
button to activate the light source. Use a press of >1 second.
The Light source will prepare itself for playing, by doing a laser self-test. This may take a while, depending
on your projector variant. While the light source is turning on, the Light button will blink green. Once
completed it will be full green.
7.
Press the
Dowser
button to open the dowser.
5.
Only possible if the Touch Display option has been chosen.
Summary of Contents for SP2K-S
Page 1: ...ENABLING BRIGHT OUTCOMES Installation manual SP2K S...
Page 4: ......
Page 8: ...R5913197 02 SP2K S 8...
Page 22: ...R5913197 02 SP2K S 22 Safety...
Page 64: ...R5913197 02 SP2K S 64 Lenses Lens holder...
Page 72: ...R5913197 02 SP2K S 72 ICMP X...
Page 92: ...R5913197 02 SP2K S 92 ICMP X...
Page 100: ...R5913197 02 SP2K S 100 Projector Power Cycle...
Page 106: ...R5913197 02 SP2K S 106 Connectivity...
Page 112: ...R5913197 02 SP2K S 112 1 Image 10 7 Sealed cover fixation Convergence...
Page 120: ...R5913197 02 SP2K S 120 Convergence...
Page 130: ...R5913197 02 SP2K S 130 3 Lift up the cover and remove it reference 2 Projector covers...
Page 144: ...R5913197 02 SP2K S 144 Projector covers...
Page 152: ...R5913197 02 SP2K S 152 List of tools...
Page 156: ...R5913197 02 SP2K S 156 Index...
Page 157: ......