


7. Random Access Adjustment Mode
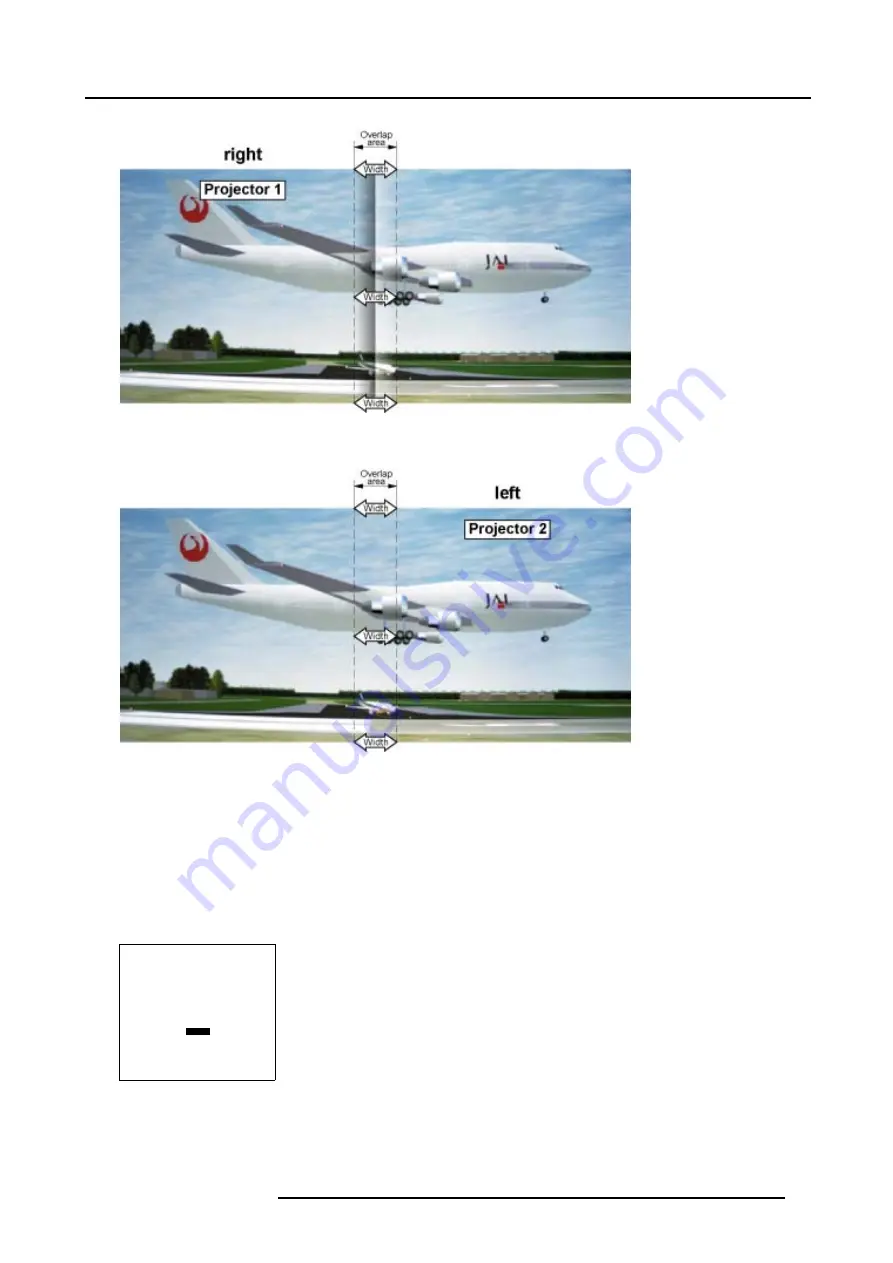
Image 7-13
Width set up for projector 1
Image 7-14
Width set up for projector 2
7.5.8
Adjusting the black level of the images
Why
For dark images, the overlap zone will be brighter then the rest of the images. Therefore we can rise the black level of the remaining
image (excluding the overlap zone).
How to adjust?
1. Push the cursor key
↑
or
↓
to highlight
Level
.
SCENERGIX
STATUS [ON]
- size -
TOP
BOTTOM
LEFT
RIGHT
- black level -
LEVEL
Select with
↑
or
↓
then <ENTER>
<EXIT> to return
Menu 7-52
2. Press
ENTER
to activate.
3. Adjust the black level of area A until the black level of area A, B and C are equal.
R5976654 SLM R12+ 27/01/2005
89
Summary of Contents for SLM R12
Page 1: ...SLM R12 Owner s manual R9010171 R5976654 05 27 01 2005...
Page 4: ......
Page 8: ...Table of contents 4 R5976654 SLM R12 27 01 2005...
Page 36: ...3 Installation Guidelines 32 R5976654 SLM R12 27 01 2005...
Page 62: ...5 Getting Started 58 R5976654 SLM R12 27 01 2005...
Page 98: ...7 Random Access Adjustment Mode 94 R5976654 SLM R12 27 01 2005...
Page 136: ...10 Programmable Function Keys 132 R5976654 SLM R12 27 01 2005...
Page 140: ...A Standard Source set up Files 136 R5976654 SLM R12 27 01 2005...
Page 154: ...Glossary 150 R5976654 SLM R12 27 01 2005...


