


6. Adjustments with the ADVANCED menu
14.Select a setting value by pressing the
◄
or
►
key.
15.Repeat step 13 and step 14, if necessary.
16.Press the
MENU
key once.
17.Select
BRIGHT UNIFORMITY CORRECTION
by pressing the
◄
or
►
key.
SETTING
BRIGHT UNIFORMITY
CORRECTION
Image 6-16
→
When EDGE BLENDING is ON, the brightness of the projected images is made even.
18.Press the
ENTER
key.
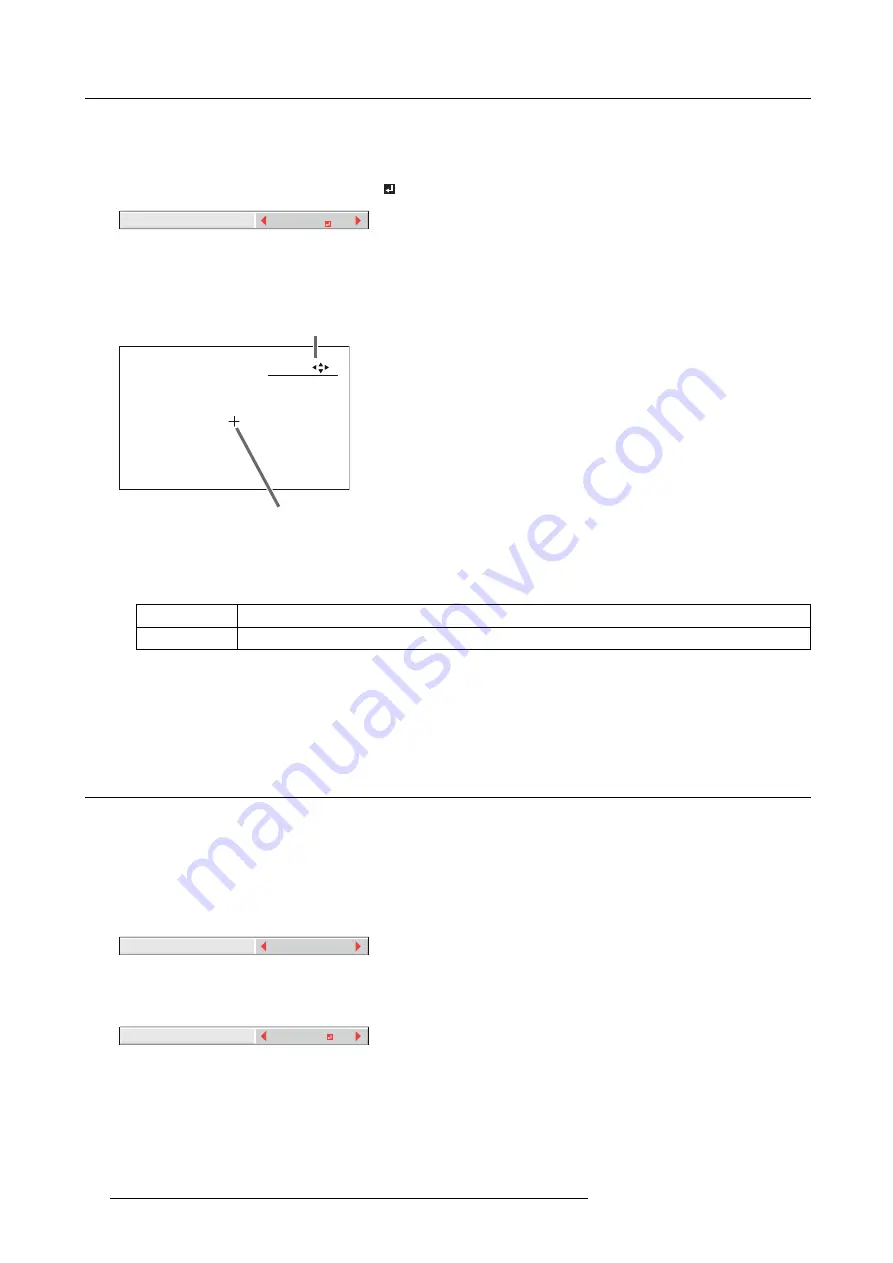
The BRIGHT UNIFORMITY CORRECTION dialog box and the correction position marker are displayed.
:
:
2
1
POSITION
SELECT
ENTER
Image 6-17
1
BRIGHT UNIFORMITY CORRECTION dialog box
2
Correction position marker
Every time you press the ENTER key, the BRIGHT UNIFORMITY CORRECTION dialog box shows POSITION and LEVEL al-
ternately.
POSITION
Press the
▲
,
▼
,
◄
, or
►
key to move the correction position marker.
LEVEL
Press the
◄
, or
►
key to adjust the correction amount.
19.Cancel the BRIGHT UNIFORMITY CORRECTION dialog box.
Press any key other than the
▲
,
▼
,
◄
, or
►
, and ENTER keys to clear the dialog box. Or, the dialog box disappears in 10
seconds after the last use.
20.To cancel the menu, press the
MENU
key.
6.17 Adjusting the color variations
How to adjust
You can adjust the variations in the colors of the images displayed on multiple projectors using the menu settings.
Adjustment while viewing the screen
1. Display the
MULTI-SCREEN
menu.
2. Select
COLOR MATCHING
by pressing the
▲
or
▼
key.
OFF
COLOR MATCHING
Image 6-18
3. Select
MANUAL
by pressing the
◄
or
►
key.
4. Select
MANUAL
by pressing the
▲
or
▼
key.
MANUAL
SETTING
Image 6-19
5. Select
SETTING
by pressing the
◄
or
►
key.
6. Press the
ENTER
key.
66
R5905597 PHXX SERIES 20/05/2014
Summary of Contents for PHWU-81B
Page 1: ...PHxx series User and Installation manual R5905597 02 20 05 2014...
Page 4: ......
Page 7: ...Table of contents Glossary 135 Index 137 R5905597 PHXX SERIES 20 05 2014 3...
Page 8: ...Table of contents 4 R5905597 PHXX SERIES 20 05 2014...
Page 32: ...3 Connections 28 R5905597 PHXX SERIES 20 05 2014...
Page 42: ...4 Getting started 38 R5905597 PHXX SERIES 20 05 2014...
Page 58: ...5 Advanced menu 54 R5905597 PHXX SERIES 20 05 2014...
Page 78: ...6 Adjustments with the ADVANCED menu 74 R5905597 PHXX SERIES 20 05 2014...
Page 102: ...10 Lamp replacement 98 R5905597 PHXX SERIES 20 05 2014...
Page 136: ...B Optional lens H LENS 1 3 1 8 132 R5905597 PHXX SERIES 20 05 2014...
Page 140: ...Glossary 136 R5905597 PHXX SERIES 20 05 2014...


