


6. Advanced
How to adjust
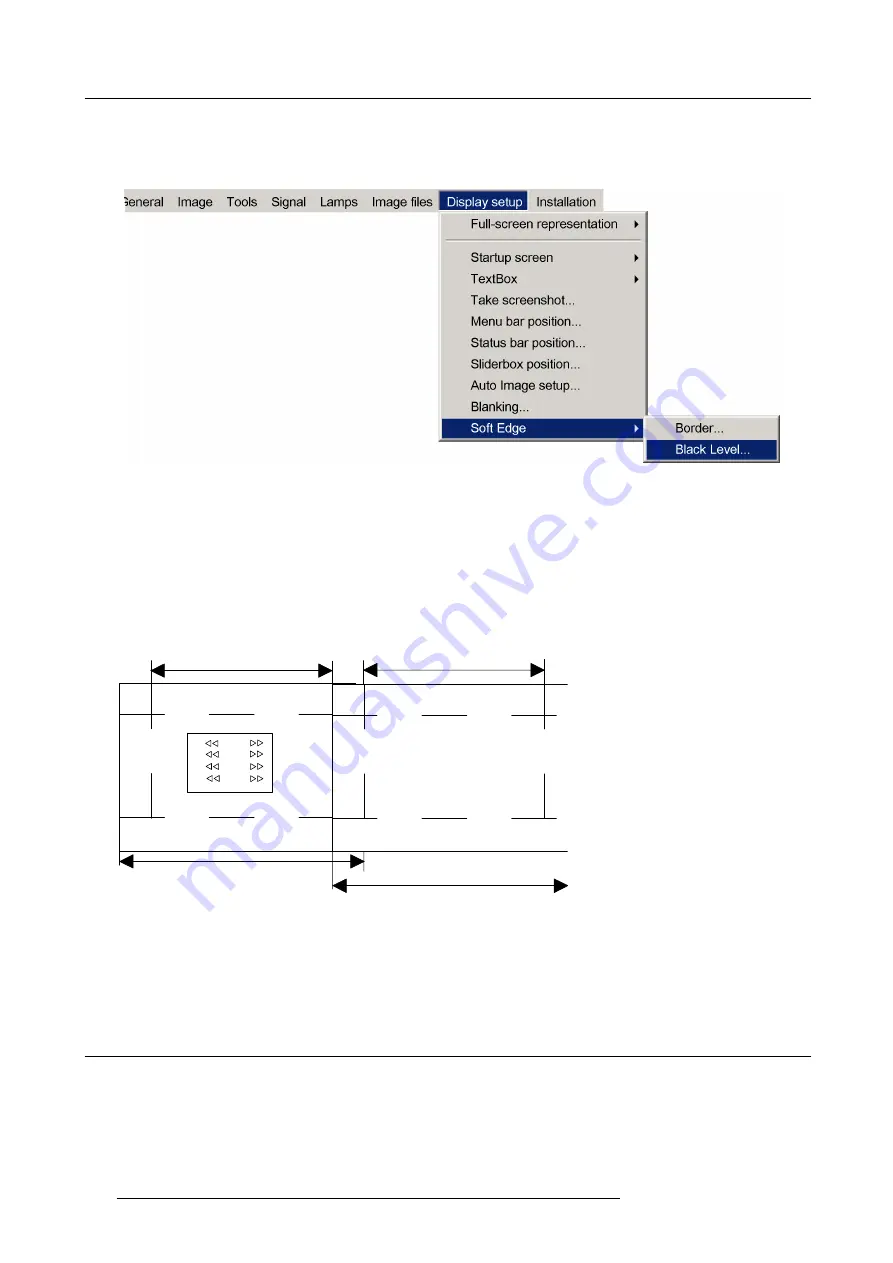
1. Press
MENU
to activate the menu bar.
2. Press
→
to select the
Display setup
item.
Image 6-121
3. Press
↓
to pull down the
Display setup
menu.
4. Use
↑
or
↓
to select
Soft Edge
.
5. Press
→
to select the
Soft Edge
item.
6. Use
↑
or
↓
to select
Black level
.
7. Press
ENTER
to select.
A dialog box will be displayed on a black level background.
Adjust the black level of area A until the black level of area A, B and C or equal (area C should be adjusted on the second
projector).
A
C
B
12
13
11
R
G
B
RGB
Image 1
Image 2
Image 6-122
Black level adjustment
Use the up or down arrow key to select the adjustment (All, Red, Green or Blue)
Use the left or right arrow key to select the adjustment direction and speed.
Press
ENTER
to increment or decrement the value.
6.10 Installation
Overview
•
•
•
106
R59770134 ID LR-6 27/05/2011
Summary of Contents for iD LR-6 R9010342
Page 1: ...iD LR 6 User Guide R9010342 R59770134 01 27 05 2011...
Page 7: ...Table of contents Glossary 125 Index 127 List of images 131 R59770134 ID LR 6 27 05 2011 3...
Page 8: ...Table of contents 4 R59770134 ID LR 6 27 05 2011...
Page 28: ...3 Installation 24 R59770134 ID LR 6 27 05 2011...
Page 40: ...4 Setup 36 R59770134 ID LR 6 27 05 2011...
Page 44: ...5 Getting started 40 R59770134 ID LR 6 27 05 2011...
Page 68: ...6 Advanced Image 6 45 64 R59770134 ID LR 6 27 05 2011...
Page 72: ...6 Advanced Image 6 48 68 R59770134 ID LR 6 27 05 2011...
Page 130: ...Glossary 126 R59770134 ID LR 6 27 05 2011...


