background image

Coronis 5MP

31

Bringing up the OSD menus

The OSD menu allows you to configure different settings to make your 
B

ARCO

 C

ORONIS

 Display fit your needs within your working environment. 

Also, you can retrieve general information about your display and its 
current configuration settings through the OSD menu. 

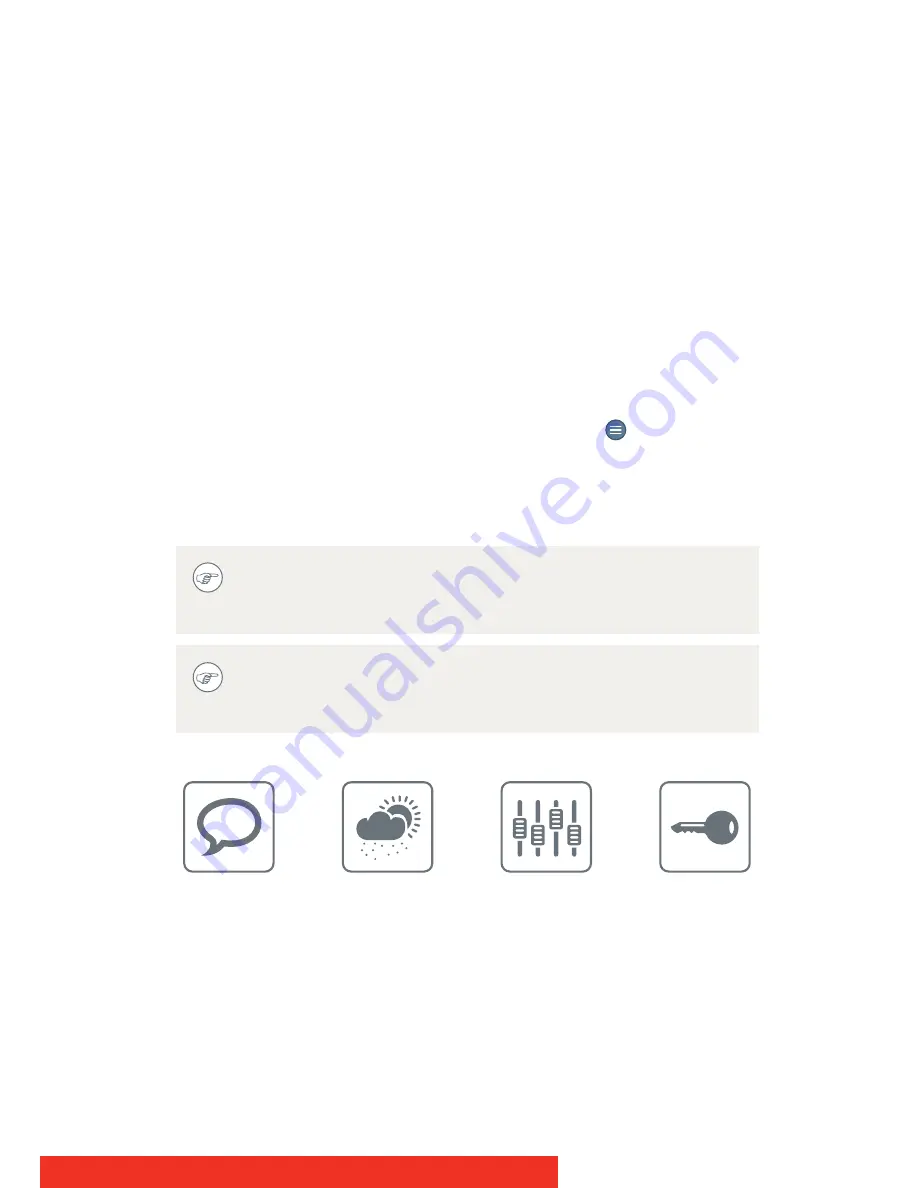
Bringing up the OSD menus can be done by:

1

If not already done so, switch on the display as previously 
described.

2

Illuminate the keys as previously described.

3

While the keys are illuminated, touch the 

 key.

As a result, the OSD main menu comes up in the center of the screen. 
However, if no further actions are taken within the following 90 seconds, 
the OSD will disappear again

The OSD menu auto-exit function can be disabled in the OSD 
menu. Please refer to 

“OSD menu automatic close function” 

on page 34 for detailed instructions on how to do this.

The OSD menu position can be modified in the OSD menu. 
Please refer to 

“OSD menu position” 

on page 33 for detailed 

instructions on how to do this.

Summary of Contents for Coronis 5MP Mammo

Page 1: ...User Guide Coronis 5MP...

Page 2: ...2 Coronis 5MP...

Page 3: ...ate precision and performance while maintaining the highest brightness and contrast The advanced 10 bit architecture ensures accurate image representations with 1024 simultaneous shades of gray out of...

Page 4: ...4 Coronis 5MP...

Page 5: ...vers 19 Connecting the display 22 Routing the cables 24 First time starting up 26 Daily operation 27 Recommendations for daily operation 27 Key indicator lights 29 Stand by switching 29 Bringing up th...

Page 6: ...Display orientation 46 Video input signals 47 Video encoding modes 48 Grayscale conversion modes 49 EDID timings 50 Display info 51 Display status 51 Cleaning your display 52 Front glass 52 Cabinet 53...

Page 7: ...a system CD a DisplayPort cable a DVI cable a USB cable an AC power cord an external power supply If you ordered a Barco display controller it s also in the box together with its accessories A dedica...

Page 8: ...Coronis 5MP Parts controls and connectors Front view Figure 1 Front view Left key Right key Menu key Power on off key Ambient light sensor Power LEDs Side downstream USB 2 3 7 1 2 3 4 5 6 1 2 3 4 5 6...

Page 9: ...ew CONNECTOR COMPARTMENT COVER CLOSED Figure 2 Rear view cover closed Connector compartment cover Display release button for portrait position Mounting anchor Display release button for landscape posi...

Page 10: ...4 VDC Power input 5 VDC 0 5 A power output Display Port video input DVI video input Ethernet connection see note below USB upstream USB downstream 1 The Ethernet connection is used for maintenance pur...

Page 11: ...Coronis 5MP 11 Single foot Figure 4 Tilt and swivel foot Tilt Swivel neck cover Cable duct covers 1 2 1 2...

Page 12: ...12 Coronis 5MP Dual foot Figure 5 Dual tilt and swivel foot Cable cover Left right arm cover Foot lock clip behind cable cover Display positioning sliders 1 2 3 4 2 1 2 3 4...

Page 13: ...the tilt swivel foot and place it on a solid surface 2 Unpack the display Figure 6 Attaching the panel to the display stand portrait Prior to installing your BARCO CORONIS Display and connecting all...

Page 14: ...he stand attachment plate 1 4 Push the bottom of the panel firmly towards the stand so that the bottom anchors clip in the bottom gaps 2 5 Check that the panel is firmly attached to the stand 6 Tilt a...

Page 15: ...rear of the panel The button is not visible on drawing because it is hidden by the display stand See figure 6 for portrait or figure 8 for landscape 3 Pull the bottom of the panel towards you and at...

Page 16: ...anchor at the back of the display perfectly aligned on the top of the mounting clamp of the foot 4 Push the downside of the display gently backwards until the mounting clamp locks into the mounting an...

Page 17: ...ou can adjust the position of the displays Figure 10 Adjust display position When both displays are not correctly aligned minor corrections are possible in relative height and relative angle by loosen...

Page 18: ...he display in portrait position Landscape position is not supported Use a mounting bracket that can support the weight of the display Refer to the technical specifications of this display for the appl...

Page 19: ...oved to get access to the connectors To remove the connector compartment cover proceed as follows 1 Gently push the two lips on top of the cover 2 Pull the top of the cover slightly away from the disp...

Page 20: ...be removed To remove them proceed as follows 1 Remove the tilt swivel neck cover 1 Therefore first tilt the display panel in upright position Then lift and pull backward the neck cover 2 Also to faci...

Page 21: ...emoved To remove this cover proceed as follows 1 Gently press and hold the lock clips at the inside of the top of the cover 2 Slide the cover upwards on the shaft while holding the clips pressed It ma...

Page 22: ...e DP connection The active input can be selected in the OSD menu 1 Connect the DVI or DP of the display controller to the DVI or DP connector of the display Figure 15 DVI connection Figure 16 DP conne...

Page 23: ...USB connection 3 If you have chosen to use the display s USB downstream connector connect a USB device to the downstream connector 4 Connect the supplied external DC power supply to the 24 VDC power i...

Page 24: ...Cable routing single foot 1 Route the cables alongside the neck and in the cable ducts in the tilt swivel foot See figure 19 above 2 Re attach the connector compartment cover and neck cover Close the...

Page 25: ...MP 25 If the display is mounted on the system dual tilt swivel foot cables are best routed behind the arms and through the cable channel in the foot shaft as shown in the pictures below Figure 20 Cabl...

Page 26: ...d display controller the Windows start up messages will appear once the boot procedure is finished Your BARCO CORONIS Display will be running in a basic video mode at a default refresh rate when first...

Page 27: ...void or significantly reduce the occurrence of this phenomenon by using a screen saver You can activate a screen saver in the Display properties window of your workstation In case you are working with...

Page 28: ...LCD technology and missing pixels consult the dedicated white papers available at www barco com medical Barco recommends keeping color matched displays together Furthermore it is important to use all...

Page 29: ...Switching on the display while it is in stand by mode or vice versa can both be done by 1 Illuminate the keys as previously described 2 While the keys are illuminated touch the key for approximately 2...

Page 30: ...wer LED is orange The power LED can be disabled in the OSD menus Please refer to Power status indicator light on page 34 for detailed instructions on how to do this In case of a power outage recovery...

Page 31: ...reviously described 2 Illuminate the keys as previously described 3 While the keys are illuminated touch the key As a result the OSD main menu comes up in the center of the screen However if no furthe...

Page 32: ...done by Use the and keys to move through the sub menus change values or make selections To go into a submenu or confirm adjustments and selections use the key Use the key to cancel adjustments or exi...

Page 33: ...Configuration User Interface Menu menu 3 Enter the Position submenu 4 Select one of the available OSD menu positions and confirm OSD menu language ABOUT THE OSD MENU LANGUAGE By default the OSD menu...

Page 34: ...led Disabled as desired and confirm Power status indicator light ABOUT THE POWER STATUS INDICATOR LIGHT By default when the display is switched on the power status indicator light is dimmed This behav...

Page 35: ...ration User Interface Indicator Lights menu 3 Enter the Keys submenu 4 Select Automatic Always On Always Off as desired and confirm Power lock function ABOUT THE POWER LOCK FUNCTION By enabling the po...

Page 36: ...his does not disable the USB hub and still allows to make use of the display s USB downstream connectors and any external devices connected to it keyboard mouse Please note that a connection from a PC...

Page 37: ...ossible This does not disable the USB hub and still allows to make use of the display s USB downstream connectors and any external devices connected to it keyboard mouse Please note that a connection...

Page 38: ...is go to the Power options properties window of your workstation TO ENABLE DISABLE DPMS MODE ON YOUR DISPLAY 1 Bring up the OSD main menu 2 Navigate to the Configuration Power Management menu 3 Enter...

Page 39: ...ATION ON YOUR DISPLAY 1 Bring up the OSD main menu 2 Navigate to the Configuration Power Management menu 3 Enter the Hibernate submenu 4 Select Enabled Disabled as desired and confirm TO SPECIFY THE H...

Page 40: ...ble over a predefined range When you change the luminance target the display will adjust its backlight to reach the target TO SET THE LUMINANCE TARGET 1 Bring up the OSD main menu 2 Navigate to the Co...

Page 41: ...s mode provides the full calibrated luminance and is intended for using the display for diagnostic purposes Text In this mode the luminance is reduced to approximately half of the luminance This is in...

Page 42: ...shifted to take into account the non zero luminance of an LCD panel when driven with a black signal They are especially useful in CT applications to improve the perception of low Haunsfield values DI...

Page 43: ...mined by the selected reading room Therefore it is also important to select a realistic reading room when enabling ALC This can be done by following the instructions in Reading rooms on page 44 TO ENA...

Page 44: ...ght Compensation ALC on page 43 to enable ALC The available reading rooms for your BARCO CORONIS Display are Reading rooms can only be selected when the DICOM display function is selected Therefore pl...

Page 45: ...into account TO SELECT CONTINUOUS ALC 1 Bring up the OSD main menu 2 Navigate to the Configuration Calibration Ambient Light menu 3 Enter the Continuous ALC submenu 4 Select Enabled Disabled as desir...

Page 46: ...ISPLAY ORIENTATION Your display automatically detects its physical orientation portrait or landscape and by default automatically adjusts the image orientation to this This means that when your displa...

Page 47: ...OUT INPUT SIGNALS The available input signals for your display are TO MANUALLY SELECT A VIDEO INPUT SIGNAL 1 Bring up the OSD main menu 2 Navigate to the Configuration Image Source menu 3 Enter the In...

Page 48: ...ted to your display might not always support all these video encoding modes Standard This mode uses the standard 8 bit encoding mechanism HDR1 This mode features 10 bit video encoding following the Hi...

Page 49: ...in your display The available grayscale conversion modes are Use Red Channel This mode is intended for grayscale displays where gray is sent over the red channel Use Green Channel This mode is intende...

Page 50: ...ate to the Configuration Image Source menu 3 Enter the Timings submenu 4 Select Refresh Rate Preferred Orientation or Color Depth 5 Select one of the available settings and confirm Refresh Rate Allows...

Page 51: ...isplay status ABOUT DISPLAY STATUS The Status submenu of the OSD menu provides info on the current status of your display runtimes temperatures etc the status of the connected image sources video enco...

Page 52: ...r Pril Ajax glass cleaner Sidolin glass cleaner In case none of the above cleaning products is available use plain water Take care not to damage or scratch the front glass Be careful with rings or oth...

Page 53: ...bove cleaning products is available use plain water 2 Repeat with water only 3 Wipe dry with a dry cloth Do not use following products Alcohol solvents at higher concentration 5 Strong alkalis lye str...

Page 54: ...ructions manual Follow all instructions for operation and use ELECTRICAL SHOCK TYPE OF PROTECTION ELECTRICAL Display with external power supply Class I equipment DEGREE OF SAFETY FLAMMABLE ANESTHETIC...

Page 55: ...lent 18 AWG min rated 300 V min provided with a hospital grade type plug 5 15P configuration for 120V application or 6 15P for 240V application Do not overload wall outlets and extension cords as this...

Page 56: ...EC CE 93 42 EEC A1 2007 47 EC class II b IEC 60950 1 2005 A1 2009 2ND EDITION IEC 60601 1 2ND ED 1988 A1 1991 A2 1995 UL 60601 1 1ST EDITION CAN CSA C22 2 NO 601 1 M90 2005 IEC 60601 1 2005 A1 2012 A...

Page 57: ...from uncontrolled waste disposal please separate these items from other types of waste and recycle them responsibly to promote the sustainable reuse of material resources For more information about r...

Page 58: ...oduct may contain The RoHS of Chinese Mainland is included in the MCV standard of the Ministry of Information Industry of China in the section Limit Requirements of toxic substances in Electronic Info...

Page 59: ...ased on the Standard of Electronic Information Products Environmental Friendly Use Period of Chinese Mainland Power supply unit X O O O O O Paper manuals O O O O O O CD manual O O O O O O O SJ T 11363...

Page 60: ...hese limits are designed to provide reasonable protection against harmful interference in a residential installation This equipment generates uses and can radiate radio frequency energy and if not ins...

Page 61: ...emissions to and interference from surrounding equipment Operation is subject to the following two conditions 1 this device may not cause harmful interference and 2 this device must Emissions test Co...

Page 62: ...ffer from harmful interference of surrounding equipment the user is encouraged to try to correct the interference by one or more of the following measures Reorient or relocate the receiving antenna or...

Page 63: ...ines 1kV for input output lines Mains power quality should be that of a typical commercial or hospital environment Surge IEC61000 4 5 1 kV line s to line s 2 kV line s to earth 1 kV line s to line s 2...

Page 64: ...cal commercial or hospital environment Conducted RF IEC 61000 4 6 Radiated RF IEC 61000 4 3 3 Vrms 150 kHz to 80 MHz 3 V m 80 MHz to 2 5 GHz 3 V 3 V m Portable and mobile RF communications equipment s...

Page 65: ...itional measures may be necessary such as re orienting or relocating the BARCO CORONIS Display b Over the frequency range 150 kHz to 80 MHz field strengths should be less than 3 V m At 80 MHz and 800...

Page 66: ...listed above the recommended separation distance d in meters m can be estimated using the equation applicable to the frequency of the transmitter Where P is the maximum output power rating of the tran...

Page 67: ...ed according to the UL regulations or Indicates the display is approved according to the c UL regulations Indicates the display is approved according to the DEMKO regulations Indicates the display is...

Page 68: ...Barco N V or Barco Inc and the licensee No other use duplication or disclosure of a Barco software product in any form is authorized The specifications of Barco products are subject to change without...

Page 69: ...stems without written permission of Barco 2013 Barco N V All rights reserved PATENT INFORMATION This product is covered under the following intellectual property rights US Patent RE43 707 US Patent 7...

Page 70: ...Yes Number of grayscales LUT in LUT out 1024 gray levels 10 12 Viewing angle H V 170 Uniform Luminance Tech nology ULT Yes Per Zone Uniformity PZU Yes Ambient Light Compensa tion ALC Yes Backlight Ou...

Page 71: ...ions with stand W x H x D Portrait w x hmax x d 392 x 658 2 x 110 2mm w x hmin x d 392 x 558 2 x 110 2mm Landscape w x hmax x d 484 7 x 565 5 x 110 2mm w x hmin x d 484 7 x 465 5 x 110 2mm Dimensions...

Page 72: ...1 2006 EN 60601 1 2 2007 CCC GB9254 2008 GB4943 2001 GB17625 1 2003 KC VCC FCC class B ICES 001 Level B FDA 510K RoHS Supplied accessories User Guide Quick Installation Sheet Video cables 1 x DVI Dual...

Page 73: ...e protect your rights with two steps 1 copyright the software and 2 offer you this license which gives you legal permission to copy distribute and or modify the software Also for each author s protect...

Page 74: ...tribution a complete machine readable copy of the corresponding source code to be distributed under the terms of Sections 1 and 2 above on a medium customarily used for software interchange or c Accom...

Page 75: ...the present version but may differ in detail to address new problems or concerns Each version is given a distinguishing version number If the Program specifies a version number of this License which a...

Page 76: ...ange the software The systematic pattern of such abuse occurs in the area of products for individuals to use which is precisely where it is most unacceptable Therefore we have designed this version of...

Page 77: ...ered works to others for the sole purpose of having them make modifications exclusively for you or provide you with facilities for running those works provided that you comply with the terms of this L...

Page 78: ...ain obligated to ensure that it is available for as long as needed to satisfy these requirements e Convey the object code using peer to peer transmission provided you inform other peers where the obje...

Page 79: ...o those files or a notice indicating where to find the applicable terms Additional terms permissive or non permissive may be stated in the form of a separately written license or stated as exceptions...

Page 80: ...modify or convey a specific copy of the covered work then the patent license you grant is automatically extended to all recipients of the covered work and works based on it A patent license is discrim...

Page 81: ...opy and distribute verbatim copies of this license document but changing it is not allowed This is the first released version of the Lesser GPL It also counts as the successor of the GNU Library Publi...

Page 82: ...a work that uses the library The former contains code derived from the library whereasthelattermustbecombinedwiththelibraryinordertorun GNU LESSER GENERAL PUBLIC LICENSE TERMS AND CONDITIONS FOR COPYI...

Page 83: ...hine readable source code which must be distributed under the terms of Sections 1 and 2 above on a medium customarily used for software interchange If distribution of object code is made by offering a...

Page 84: ...work 8 You may not copy modify sublicense link with or distribute the Library except as expressly provided under this License Any attempt otherwise to copy modify sublicense link with or distribute th...

Page 85: ...ED ABOVE BE LIABLE TO YOU FOR DAMAGES INCLUDING ANY GENERAL SPECIAL INCIDENTAL OR CONSEQUENTIAL DAMAGES ARISING OUT OF THE USE OR INABILITY TO USE THE LIBRARY INCLUDING BUT NOT LIMITED TO LOSS OF DATA...

Page 86: ...ill operate properly with a modified version of the Library that is interface compatible with the Linked Version e Provide Installation Information but only if you would otherwise be required to provi...

Page 87: ...Coronis 5MP 87...

Page 88: ...0120 Barco n v President Kennedypark 35 8500 Kortrijk Belgium www barco com B4100592 02 January 2013...

Reviews: