


3 Getting Started
Power up the sensor, and verify that the power LED is ON green.
3.1 Connect to the Sensor
1. Connect the sensor to the Pro Converter Cable.
2. Connect the Pro Converter Cable to the PC.
3. Open the Banner Radar Configuration Software.
4. Go to Sensor > Connect on the Navigation toolbar.
The Connection screen displays.
5. Select the correct Sensor Model and Com Port for the sensor.
6. Click Connect.
A message displays confirming the connection to the sensor.
7. Click OK.
The Connection screen closes and the sensor data displays.
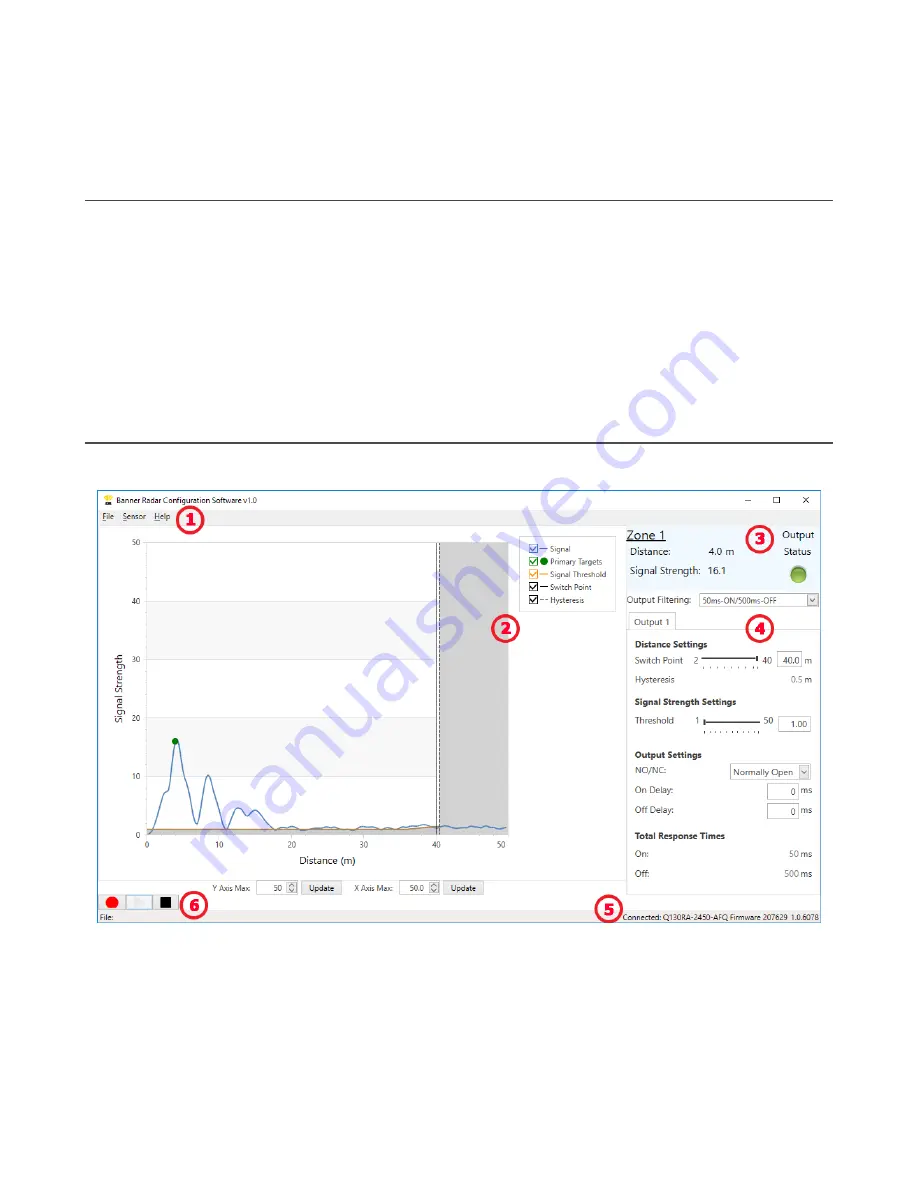
3.2 Software Overview
Easy setup and configuration of range, sensitivity, and output using the Banner Radar Configuration and Pro Converter
Cable.
Figure 4. Banner Radar Configuration Software
1. Navigation toolbar—Use this toolbar to connect to the sensor, to save or load a configuration, or to reset to factory
defaults
2. Live Sensor Data and Legend—Shows the signal strength versus distance for the connected sensor, as well as
options to select which data displays on the graph
3. Summary pane—Displays the distance to the target, the signal strength, and the output status
4. Sensor Settings pane—Set the sensor parameters in this pane
5. Status bar—Shows whether the sensor is connected, if a software update is available, and if the sensor data is
being recorded to a file
6. Live Sensor Data controls—Use these controls to record, freeze, and play real-time sensor data
R-GAGE
®
Q130RA Sensor
8
www.bannerengineering.com - Tel: + 1 888 373 6767


