


BeoMedia 1 Installation Guide
Page 17
8. Setting up a network on BeoMedia 1
If a wired connection is used which is recommended by Bang & Olufsen, connect the network cable from router to
BeoMedia 1. As a control of the network physical connection, check that the green LED is on, on the network card. If
the customer wants a wireless network connection, BeoMedia 1 supports Amitech drivers. This PCMCIA-card must then
be inserted in the BeoMedia 1. Select SERVICE on BeoMedia 1 main menu to control the network settings.
Test the network connection by starting Internet Explorer, and then entering a website address, for example
www.bang-olufsen.com.
If it is possible to view the website the settings are right. Next step is to go to page 19 (Check for updates). If the
website does not appear please continue with the following.
BeoMedia 1 is default set to obtain network settings, such as IP address and gateway, automatically from a DHCP
server.
Different network setups, such as network via wireless or networks using a static IP address, may require additional
settings to be set on BeoMedia 1.
Below is a guide to where the different settings may be applied.
Network Settings
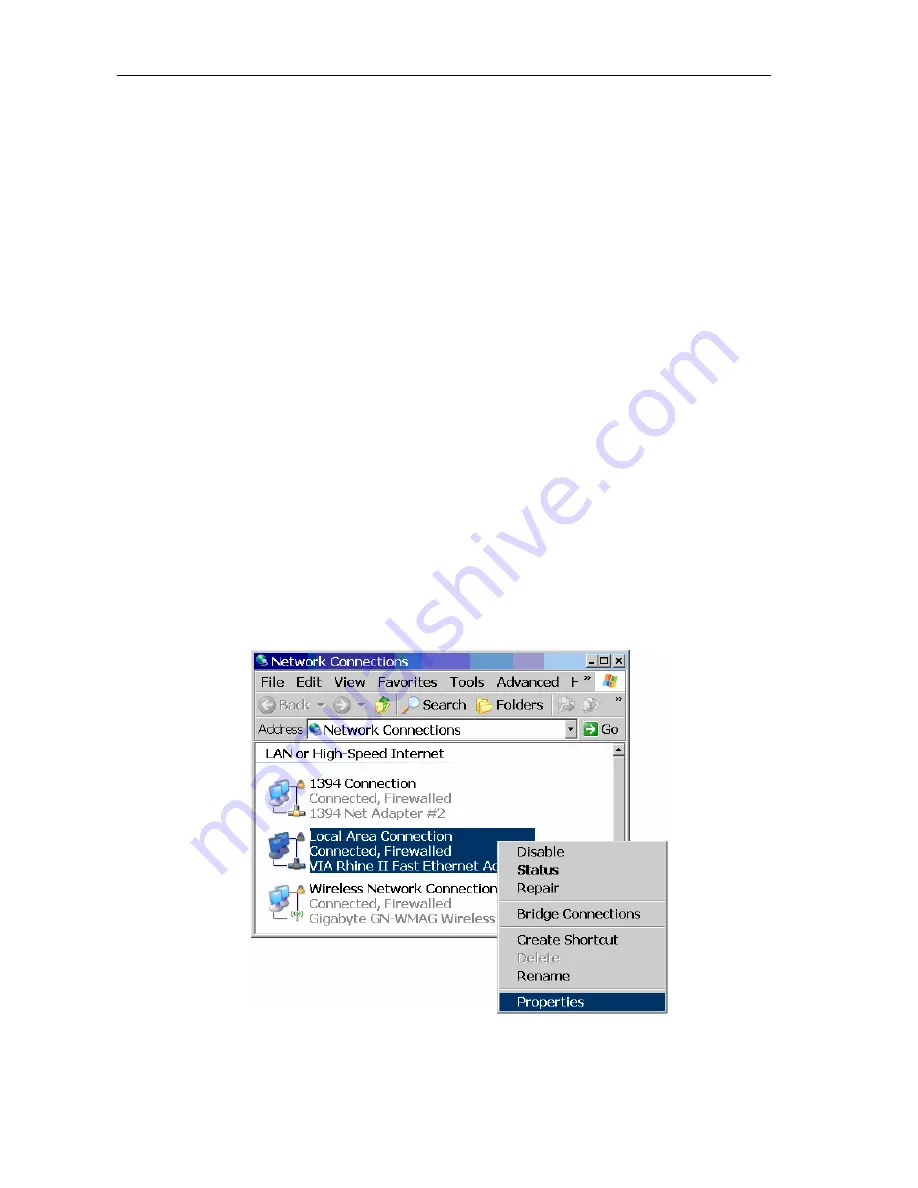
In the Control Panel select “Network Connections”. This will bring up the overview of different network connections.
Right-click on the appropriate network connection.
Local Area Connection – used if BeoMedia 1 is connected to a wired network
Wireless Network Connection – used if BeoMedia 1 is connected via Wireless network.
Select Properties as shown below.
Now select a network setup that matches the installation in question. If dynamic assignment of IP addresses (DHCP) is
being used, which is the typical setting, all you have to do is select “Obtain an IP address automatically” and you will
not have to enter addresses manually for IP and DNS.


