


13
USA
5.9.2
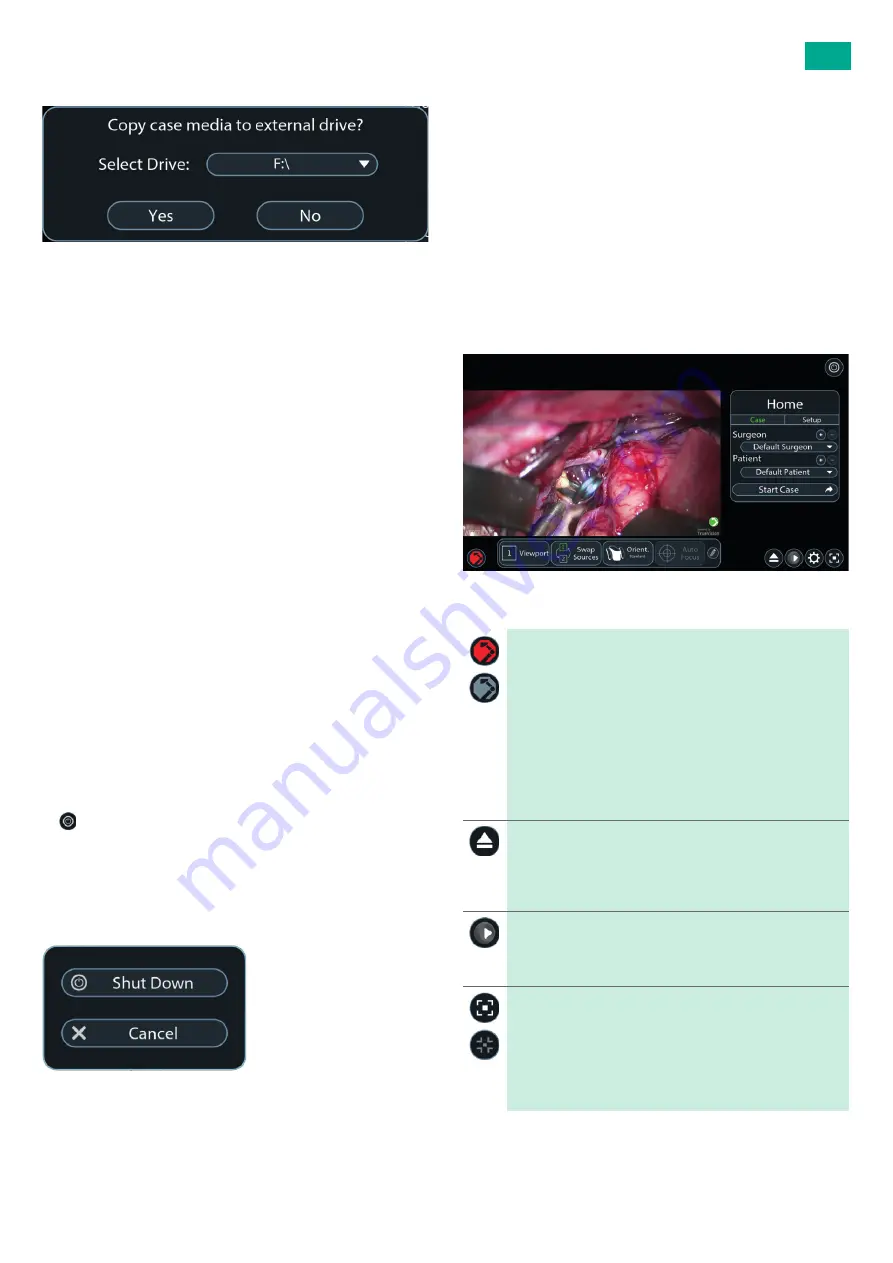
Copy media to drive
Fig. 19
►
To copy case media to an available local or externally connected drive,
select the drive letter from the drop-down list, then press “Yes”
– or –
►
Press “No” to save to the default location only.
The save media screens will close and the application returns to the
home screen.
There will be progress messages for the copy in progress, as well as con-
firmation once it completes.
Note
The location where case media will be saved is F:\TVS\TrueVision\Sur-
geons\<SurgeonName>. Selecting an additional drive to copy to will be in
addition to the default location.
5.10
Removing the drape
At the end of the case or when the robotic arm drape needs to be removed:
►
Ensure the area is clear of objects or people and move the robotic arm
into the “Drape” position, see Chapter 6.2.1.
►
Release the stripes on the drape bag.
►
Detach the adapter from the camera head.Invert and remove the drape
along the robotic arm.
►
Dispose the sterile drape in compliance with medical waste regulations.
5.11
Shutdown procedure
For safety, it is important to follow proper shutdown procedure when the
DSM system is not in use. The software will need to be shut down, the
robotic arm will need to be moved into storage position, and the system
power should be turned off with the main power button.
5.11.1 Software shutdown and robotic arm storage
►
After the drape has been removed from the robotic arm, press the Exit
button.
►
Once the 3D display is cleared from the robotic arm movement path,
move the robotic arm to “Storage” position, see Chapter 6.2.1 or press
“Cancel” button (return to the application).
Once the robotic arm is fully in “Storage” position, the software will
automatically provide further options to “Shut Down”, or press “Can-
cel” button (return to the application).
Fig. 20
5.12
Changing footswitch batteries
Battery type: 3 × IEC- LR14 (Type C – “Baby”)
►
Shut down DSM, see Chapter 5.11.
►
Open battery housing: Rotate both lockers near battery housing by 90°.
While doing so, lightly press down the battery cover.
►
Lift the empty batteries by the ejector belt and remove them.
►
Insert new batteries. Keep attention to the right polarity (see marking
on battery compartment bottom).
►
Close battery housing: rotate both lockers back to original position.
6.
Software
6.1
Home screen
The DSM software starts on the home screen on the touchscreen.
Fig. 21
Symbols
Protective stop
As a risk control, the software has a protective stop button in
the unlikely scenario that the robotic arm moves in an unpre-
dictable way. The protective stop button halts all robotic arm
movement when pressed. The button is available in both the
home and live screens.
The button will change color from red to gray when engaged
(On, movement disabled).
Press the button again to remove the protective stop and allow
the robotic arm to move again. The button will change back to
red.
Eject drive
When an external USB drive is connected to the system, select
the Eject button to properly eject the drive. The software will
confirm the drive has been ejected and can be physically
removed.
TrueMedia application
Select the TrueMedia application playback button to view or
edit surgical content. The DSM software will need to close in
order to open TrueMedia.
Fullscreen view
Select the fullscreen button to enter fullscreen mode, which
displays the surgery view and contains active status messages
and the buttons for emergency stop, settings, and exit
fullscreen mode. The fullscreen view button is available in both
the home and live screens.
Select the close fullscreen button to exit fullscreen mode.
Summary of Contents for Aesculap DSM
Page 2: ......
Page 3: ...1 3 4 5 6 2 ...


