GROOVE / HOUSING JOINTS
9
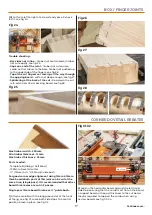
Fig 15-16
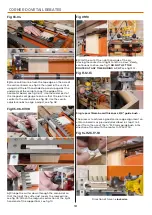
Fig 11-12-13-14
Fig 10
Fig 09
4)
The cutter size will generally match the board to be
slotted into the routed groove (eg 10mm board = 10mm
cutter). If a wider cut is required then comb or board
adjustments can be made & multiple cuts made to
achieve a wider groove slot. The cutter depth is optional
but for the best aesthetic & strength results set the
cutter depth to approx ⅔ the thickness of the material,
see fig 10.
5)
Attach the magnetic extraction at the right hand end
of the support bar, see fig 11 or on a larger width board
attach the right hand side stop to the right hand end of
the jig to support the work, see fig 12-13-14.
6)
Start the cut at the right hand side of the jig moving
the router from right to left, see fig 15-16. in a slow steady
continuous motion
DO NOT LIFT THE ROUTER AT ANY
TIME DURING A CUT
- NB if working in very hard wood a
half depth cut may be required.
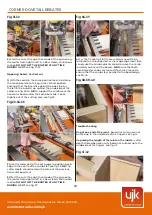
Trouble shooting -
• Groove deeper one end than the other -
see fig 17
comb not sat flat on the board, see fig 18.
• Joint too tight -
remove more material by slightly
adjusting comb position.
• Joint too loose -
cutter too large.
• Joint not square on board -
pencil line not marked
square, comb slot set gauge not used.
Side Stop
Magnetic
extraction
Fig 17-18


