Assembly
18
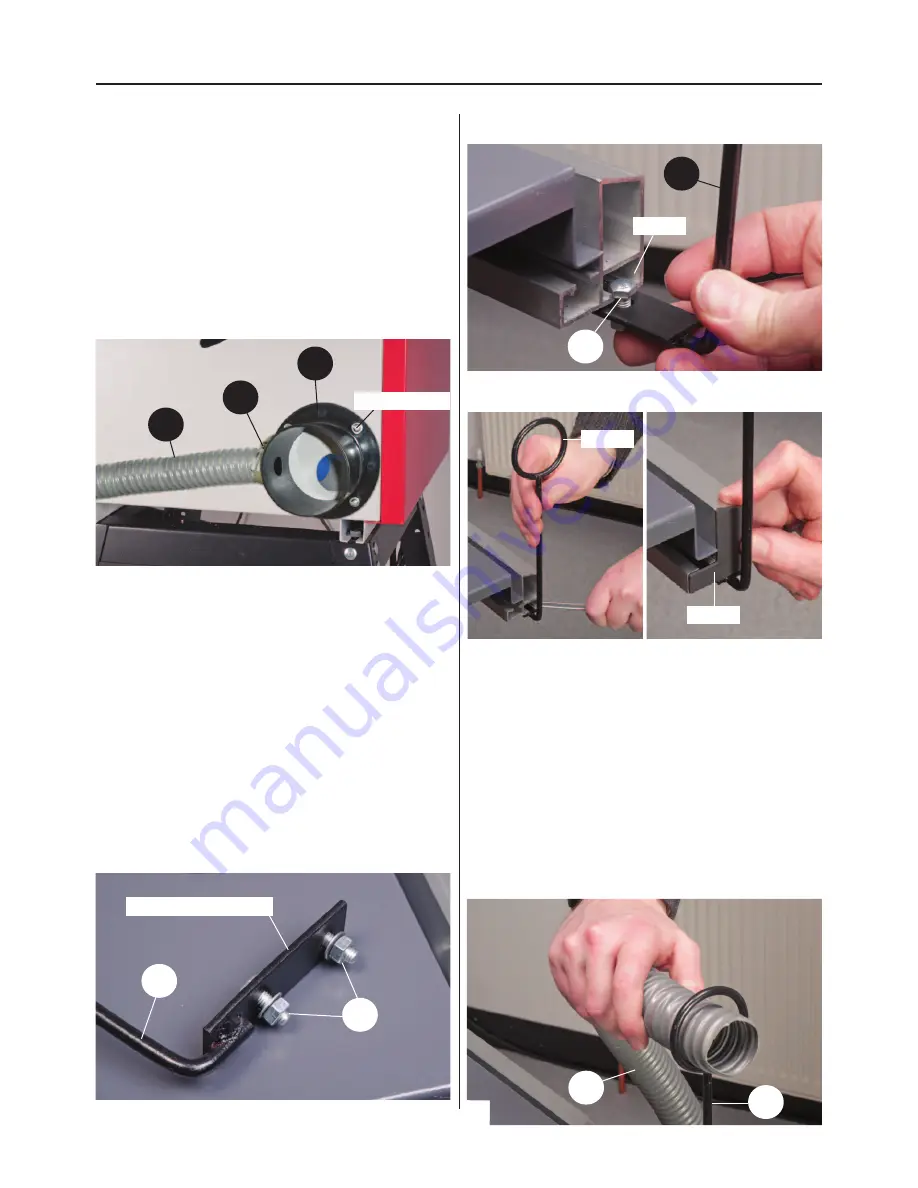
3). Line up the holes in the extraction moulding (C),
with the threaded holes to the rear of the saw table
(A) and secure in place with the Phillips screw and
washers, see fig 53.
4). Slide the remaining hose clip over one end of
the 30mm hose and fit the hose over the table saws
30mm dust extraction moulding outlet and nip tight,
see fig 53.
Fig 53
C
B
G2
Phillips screws
Code 508212 Only
5). Locate 30mm hose support bracket (P) and two
M6x16 Hex bolts, washers and nuts (O4). Remove the
plastic cover from the end of the rear extension table
support arm (N) and place safely aside. Remove the
nuts and washers from the Hex bolts, introduce the
bolts through the pre-drilled holes in the support
bracket plate (P) and replace the washers and nuts,
see fig 54.
NOTE: Leave a gap between the Hex bolt head
and support bracket plate for the next step.
Fig 55
Fig 54
Fig 56-57
O4
P
Support bracket plate
6). Turn the bracket support (P) so the ring is facing
upwards, line up the two Hex bolts (O4) with the
‘T’ slot and slide the support bracket assembly on.
Leave sufficant space to replace the plastic cover.
Tighten the Hex nuts to sercure the assembly,
see figs 55-56. Replace the cover to the end of the
support arm, see fig 57.
7). Slot the flexible hose (B) through support ring (P),
see fig 58 and secure it to the extraction moulding
(C) as described in step 3.
Fig 58
P
O4
‘T’ slot
Ring
Cover
B
P
Summary of Contents for Hobby series TS-250M
Page 28: ...Parts Breakdown List 28...
Page 30: ...Parts Breakdown List 30...


