


Adding Printers in Windows
24
AXIS OfficeBasic User’s Manual
Adding Printers in Windows NT using the Microsoft LPR Monitor
If you have not already done so, you should perform the TCP/IP basic
setup procedures prior to installing a printer for LPR printing.
Preparing for
LPR Printing
In the
Control Panel
, double-click the
Network
icon. Select the
Services
tab. If the TCP/IP Printing entry appears, then TCP/IP is already installed.
Close the
Network
folder and go on to
Installing an LPR printer
, below.
First, prepare for LPR printing:
1. Open the
Control Panel
and
double-
click the
Network
icon.
2. Select
Protocols
.
3. Add
TCP/IP Protocol
.
4. Select
Services
.
5. Add
Microsoft TCP/IP Printing
.
6. Add extension cable as optional accessory: (article #13522 Printer Extension
Cable).
Installing an LPR
Printer
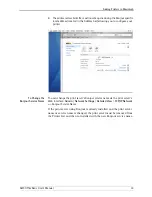
1. Go to
Start | Settings | Printers | Add Printer
. Select
My Computer
(for
peer-to-peer printing) and click
Next
.
2. From the
Available Ports
list, choose the appropriate printer port, which will
appear as the host name or IP address of the print server.
3. If the host name or IP address of the print server you wish to use does not
appear in the list
,
click
Add Port
.
4. Choose
LPR Port
from
Available Printer Ports
and click
New Port
.
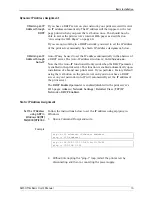
5. Type the print server’s name or IP address in the field
Name or address of
server providing lpr
(
Example: 10.13.6.198
).
Then enter which port to use in the field
Name of printer or print queue
on that server
:
•
USB1
•
LPT1
Click
OK
and then
Close
.
6. The added print server will now appear in the
Available Ports
list.
7. Click
Next
, choose an appropriate driver and finish the installation in the
normal manner.


